Maintain Order Overview
This article details everything that is on the Maintain Order screen of an order.
1.Open the Listing Manager and click on the Orders tab. 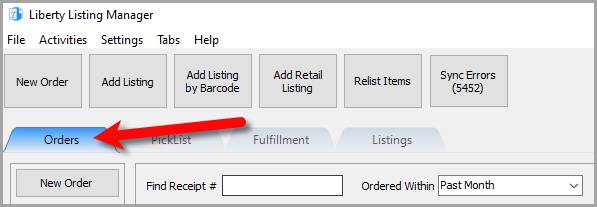
2.Add a new order or edit an existing order by double clicking on one from the Orders tab to see the Maintain Order screen for an order. 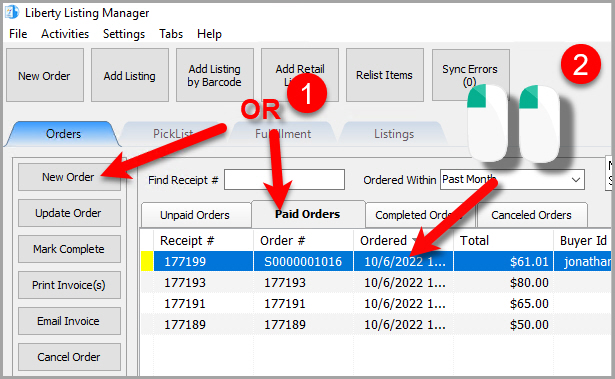
Maintain Order Layout
Changing the site of a manual order
For a manual order, you can change what Marketplace the order was from by dropping down the Site drop down menu and selecting the Marketplace. 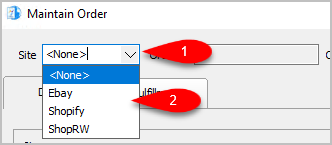
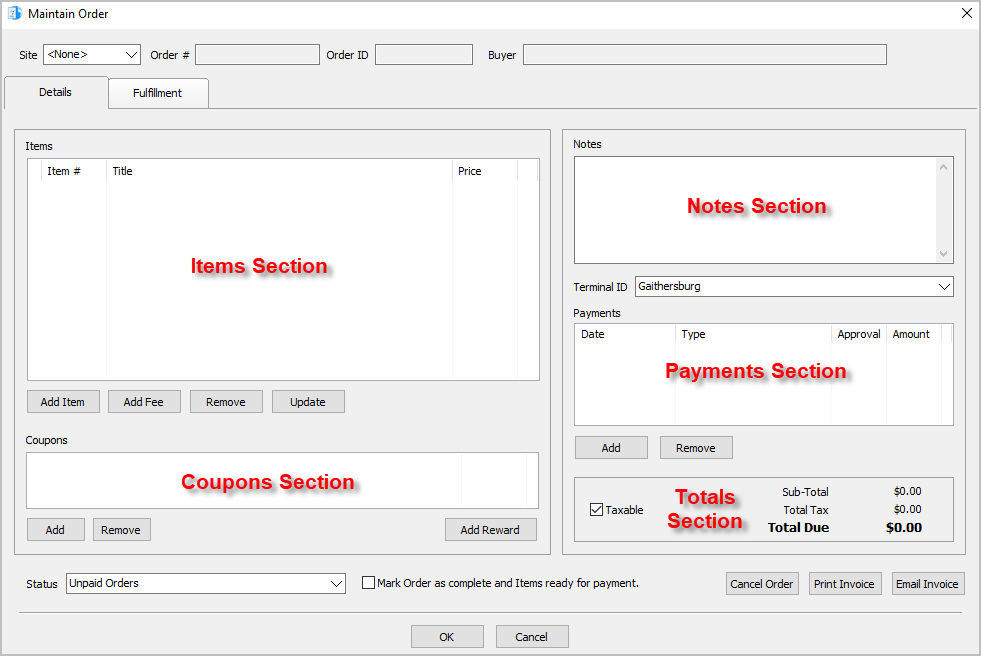
Items Section
●Add Item: Allows you to add an item to the order. When the order is completed, the item’s quantity will be reduced by 1 and will have a disposition of Sold Online.
1.Click the Add Item button.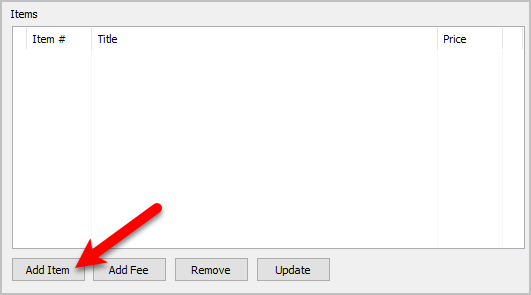
2.The Add Item dialog box will open.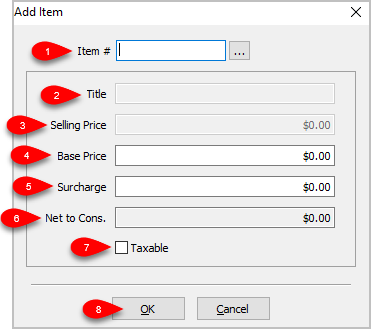
1.Item #: Input the account - item number of the item and press the Enter key or click the  button to search for the item.
2.Title: This is the title of the item you selected.
3.Selling Price: This is the Base Price plus the Surcharge.
4.Base Price: This is the price that is entered into the Price field during the item’s item entry process.
5.Surcharge: A charge that the consumer / customer pays when purchasing the item. This functions the same way that an Item Fee does in that it is profit for the store. It does not get included in the consignor split.
Note: Adding a Surcharge is a good way to pay for the overhead of marketing and maintaining your web presence.
6.Net to Cons.: This is the amount that the consignor is getting when the order is completed.
7.Taxable: Is this web item a Taxable item.
8.Press the OK button when finished.
●Add a Fee: This allows you to charge a fee that is not associated with inventory. Examples of fees include Delivery, Shipping, Gift Card, Gift Certificate and Misc. Fee. It is possible to create more Fee Types through the POS.
1.Click the Add Fee button. 
2.The Add Fee dialog box will appear. 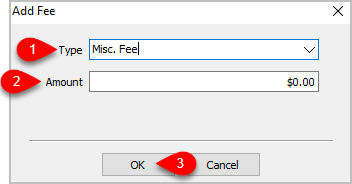
1.Type: This is the dropdown that allows you to select which fee you wish to charge.
2.Amount: This is the dollar value for the fee you wish to charge
3.Click the OK button when you are finished.
●Remove Item: Allows for the removal of items or fees added to the sale.
1.Click on the item or fee you wish to remove, then click the Remove button. 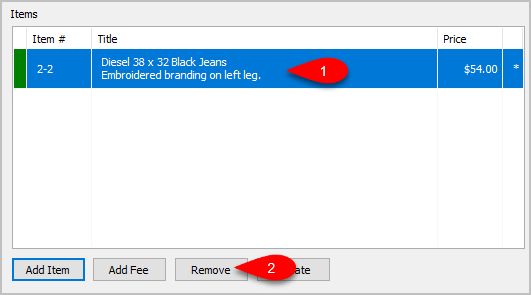
2.Click the Yes button, and the item or fee you selected will be removed. 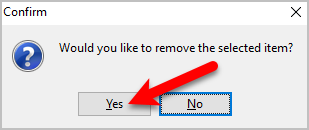
Updating unsellable items on orders that were pulled down from Shopify
This allows you to replace an item that was sold on Shopify with another item located within your inventory. This is very important if you happen to pull down an order that contains unsellable items either because they are out of stock or were created directly on Shopify instead of Liberty.
1.Items that have a Red indicator are unsellable items and are the only items in an order that can be Updated.
Click on an item that has a Red indicator and then click the Update button. 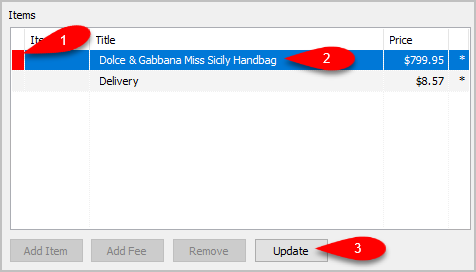
2.You may choose to replace the Unsellable item with a Fee or you can click the Browse … button to select another item to replace it. In this example we are going to select the Browse button. 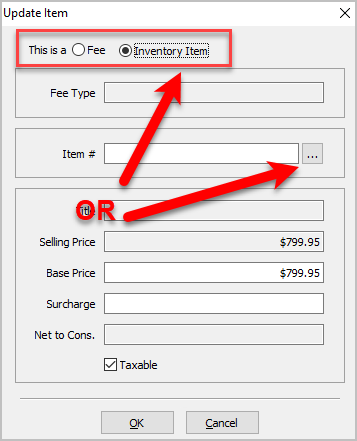
3.You can then set a Filter Date period if you need to. In the Quick Search field, type in what you are looking for, you can use things like Title, Description, and the account-item number. Click the Search button and then double-click on the Item to select it. 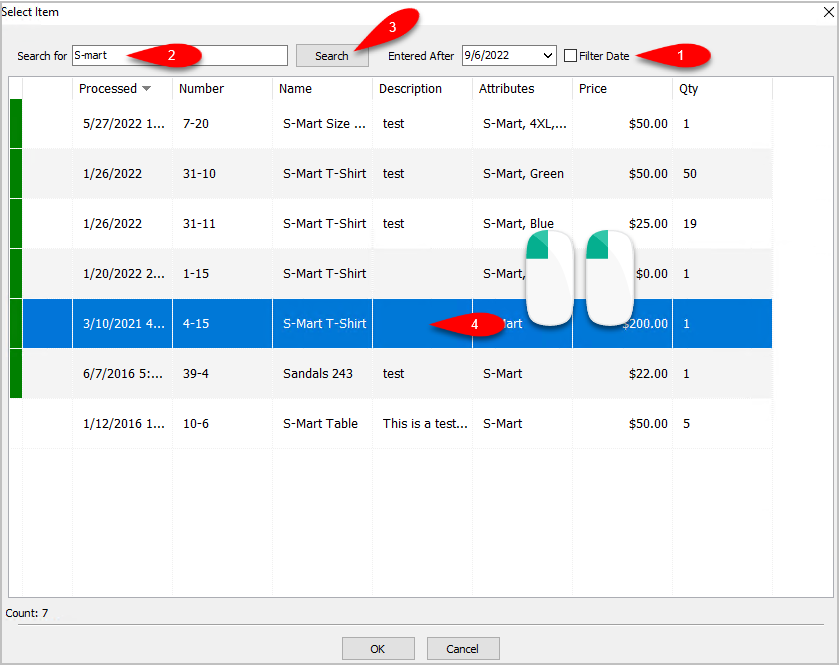
4.Confirm that the details are correct and then click the OK button. 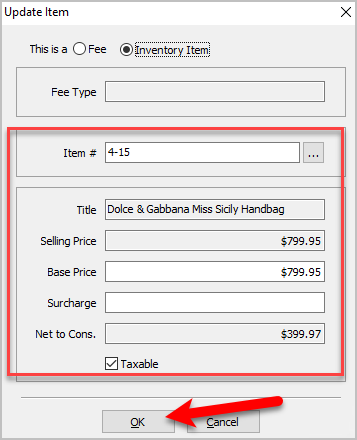
5.The indicator for the item will no longer be Red. It will instead show a Yellow indicator to show that the item has not been picked yet for fulfillment. 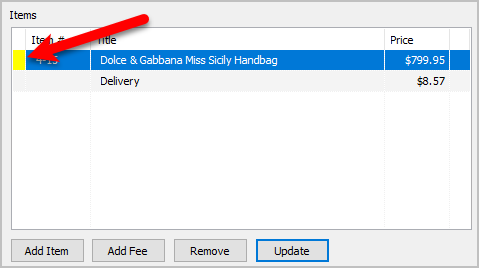
Coupons Section
●Add Coupon: Coupons are used to add a variable, flat rate or percentage rate discount. This will subtract the coupon value from the total.
1.Click the Add button. 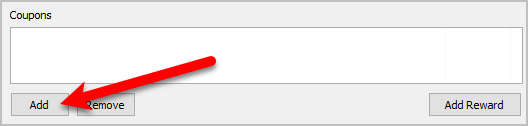
2.The Add Coupon dialog box will appear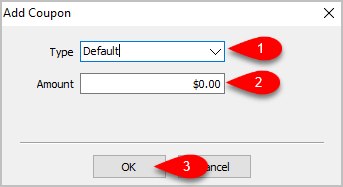
1.Dropdown the Type field and then select which coupon you want to apply.
2.If you selected a variable amount coupon, you can type in the value under the Amount field.
3.Click the OK button when finished.
●Remove Coupon: Allows for the removal of coupons added to the sale.
1.Select the coupon that was added, then click the Remove button. 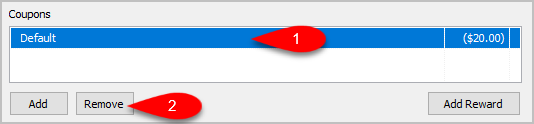
2.Click Yes, and the selected coupon will be removed. 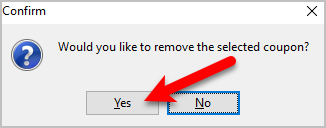
Payments Section
●Add a Payment:You can add a single payment or a combination of payments indicating how the customer paid for the order.
1.Click the Add button. 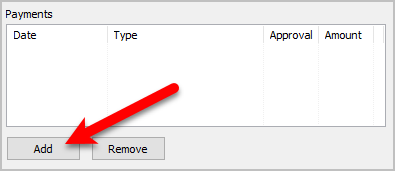
2.The Add Payment dialog box will appear. 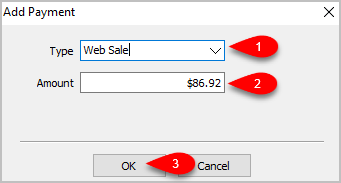
1.Dropdown the Type menu and select your first payment type you wish to add to the sale.
2.Type in the amount that you want to reflect as paid to the order.
3.Click the OK button.
Note: You can add as many payments as necessary to reflect how the order was actually paid for.
●Remove a Payment: This will allow you to remove payments from the order, depending on how it was entered in.
1.Select the payment you wish to remove from the order, then click the Remove button. 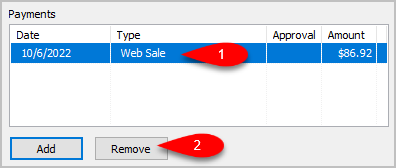
2.Click the Yes button to remove the payment from the order. 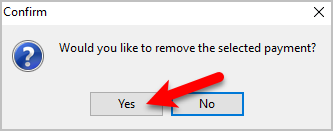
Totals Section
●The totals section reflects what makes up the dollar amounts in the order and shows what is still due. 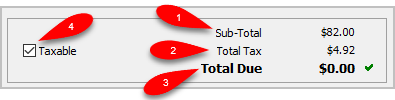
1.Sub-Total: This is the total for the order, before Tax.
2.Total Tax: This is the total tax due for the order.
3.Total Due: This is what is still due for the order before or after all the payments have been added. If all the payments have been added, the Total Due will read $0.00.
4.Taxable: This indicates whether the order is taxable or not.
Adding A Note To An Order
Additional notes for the order that help explain anything outside of what is normally referenced in the order.
●Type any additional information that is important to remember for the order in the Note field. 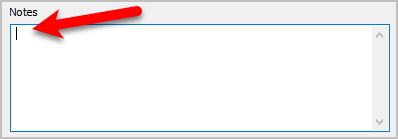
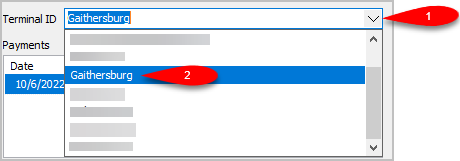
Changing the terminal ID of an order
You can change the terminal ID of an order to indicate what sales location the order is for.
Printing an invoice for an order
1.Click the Print Invoice button. 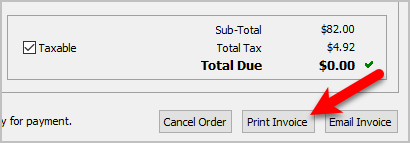
2.Select which printer you would like to print to if you do not want to use the default printer, then click the OK button. 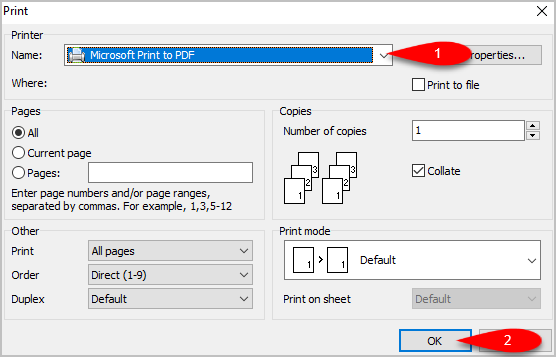
3.The invoice should print out. Here is what an example invoice looks like. 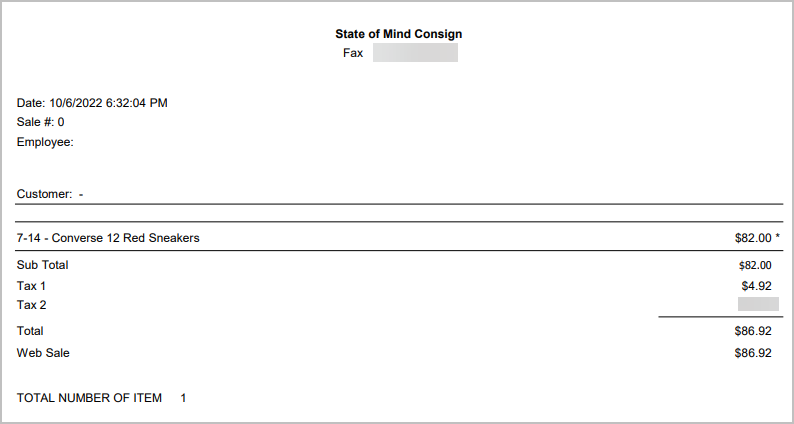
Emailing an invoice to a customer
1.Click the Email Invoice button. 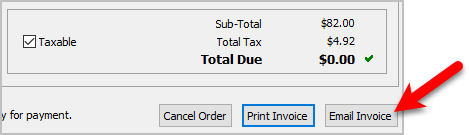
2.The Send To field should be filled in with the email address that came down with the order, but you can change it. You can also change the Subject field and the Message field. Click the OK button when you are finished. 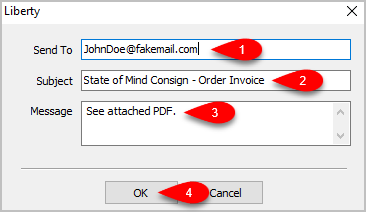
Related Topics
Changing The Marketplace/Site Of A Manual Order
Removing An Item Or Fee From An Order
Updating Unsellable Items On An Order
Removing A Coupon From An Order
Removing A Payment From An Order
Adding Or Changing The Shipping Information Of An Order
Marking An Order As Complete To make Items Ready For Payment
Changing The Terminal ID Of An Order
Printing An Invoice For An Order
Emailing An Invoice To A Customer