Setting Up Navigation On Shopify To Point To Created Collections
Here is the video that covers this content:
How To Create And Edit Your Menu Navigation
You are responsible for setting up the navigation to point to the appropriate collections. You can visit the following article for more information directly from Shopify on this process:
https://help.shopify.com/en/manual/sell-online/online-store/menus-and-links
This will need to be done before you can start selling any items. This is because without navigation links pointing to collections, your customers will not be able to see your product listings very easily:
Alternatively, you can contact the Shopify Gurus to get help doing this.
The following information can help you get started with creating your navigation so that collections can be linked to your main menu.
Note: This is something that a Resaleworld Support Technician cannot fully walk you through as this is a design choice. You can build out your navigation menu to say whatever you would like.
1.Go to https://myshopifystore.myshopify.com/admin on your computer and then log in.
Example: https://State-of-mind-consignment.myshopify.com/admin![]()
2.In the menu to the left, click on Online Store then Navigation.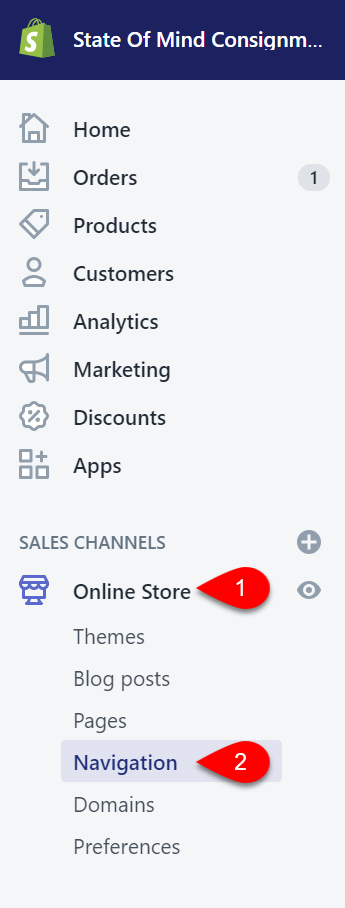
3.Click on the Main menu option. 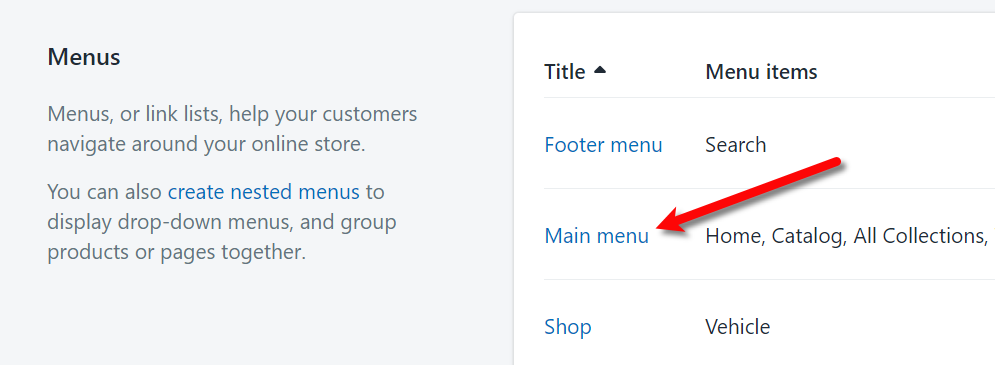
4.Click the Add menu item link at the bottom of the list of menus.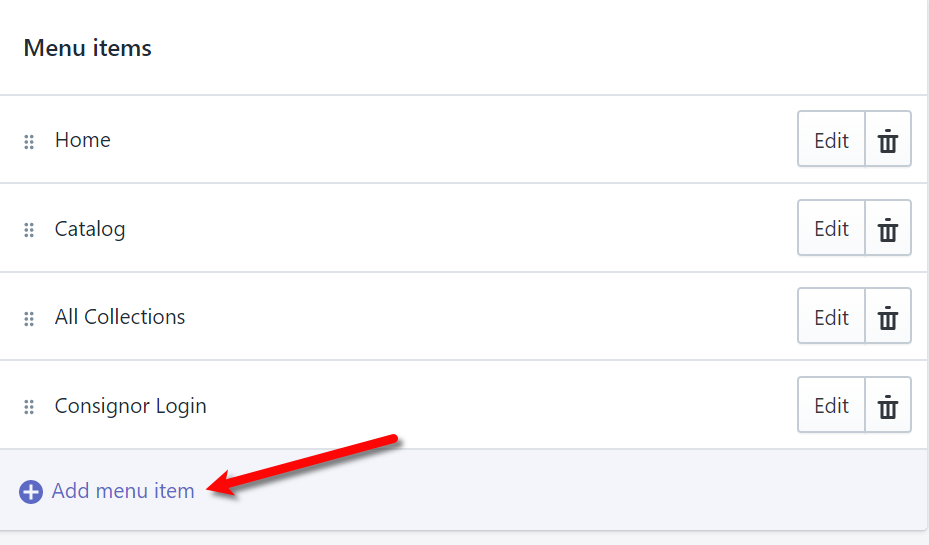
5.Next, we can create a Level 1 menu drop-down. If you have a 2 level or a 3 level category structure in Liberty, you can type the Name to match your level 1 department category. For this example, we used Woman’s Apparel.
For the Link, it is possible to push your level 1 category structure as a collection as well. This setting can be setup under Settings > Options > Shopify Options within the Listing Manager. For the below example, I just had the header going to the home page since I do not have a level 1 category of Woman’s Apparel being created as a collection on shopify.
Finally, click the Add button.
Note: You do not have to create dropdown menus if you do not want to. This example is showing how to create them just in case. It is possible to create a single link on your main menu that jumps straight to your individual collections. If you have a lot of collections, the bar may be too crowded for this method. 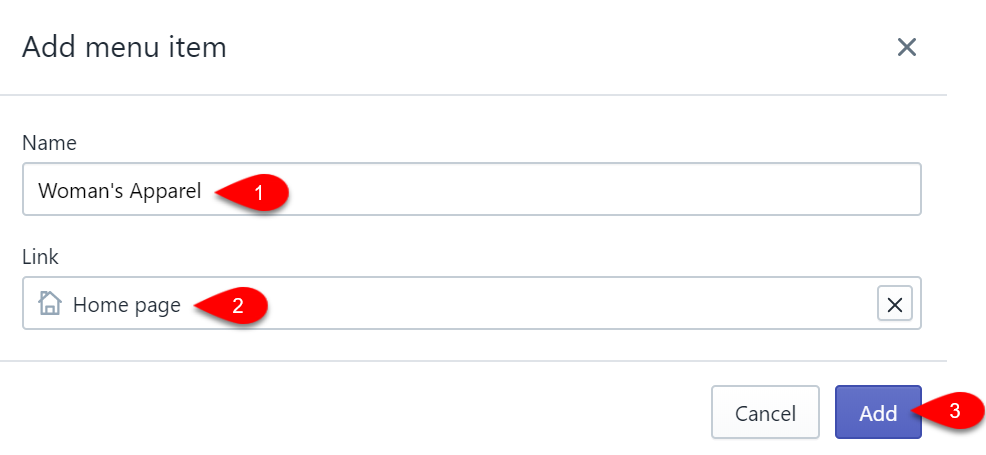
6.Next, we create a 2nd level menu item. In this example, we will use the Tops collection pushed up from Liberty when a listing under that category was created.
Click the Add menu item link again. 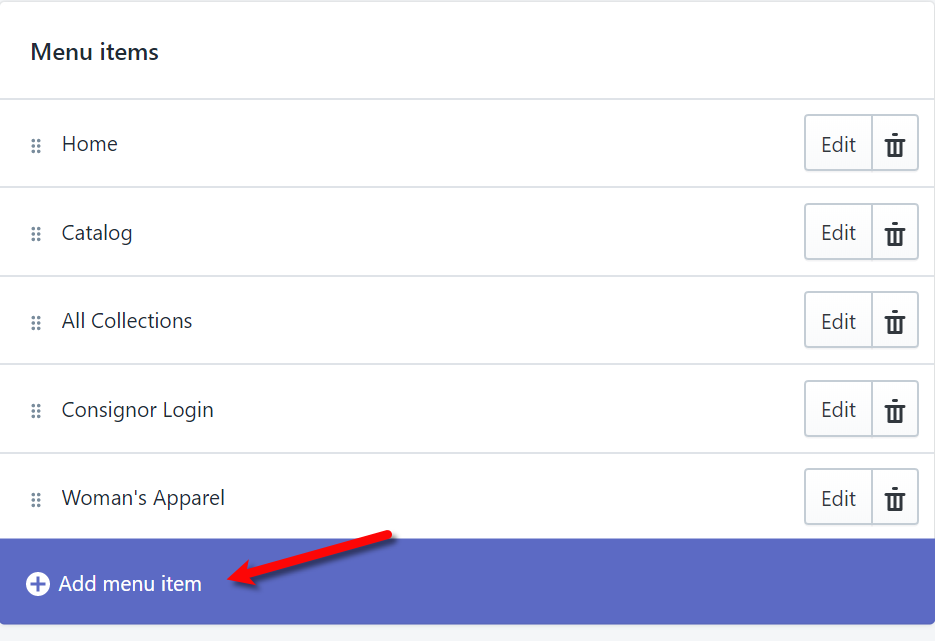
7.For the Name, you can type whatever you wish the navigation title to be set as.
In this example, we are naming the menu entry the same as the collection; Tops.
For the Link, you need to click on the appropriate Collection you wish the customer to be brought to, when they click on the drop-down menu option. In this example, we are using the Tops collection.
Click the Add button. 
8.We next need to move the Tops menu option underneath the Woman’s Apparel menu option. This is how we tell Shopify that we want to create a drop-down menu.
You do this by simply dragging the appropriate menu underneath another menu until you see a drop-down arrow.
Once you let go of the mouse button, the menu will now be underneath the menu you wanted.
In the example below, Tops is now a child menu of Woman’s Apparel. 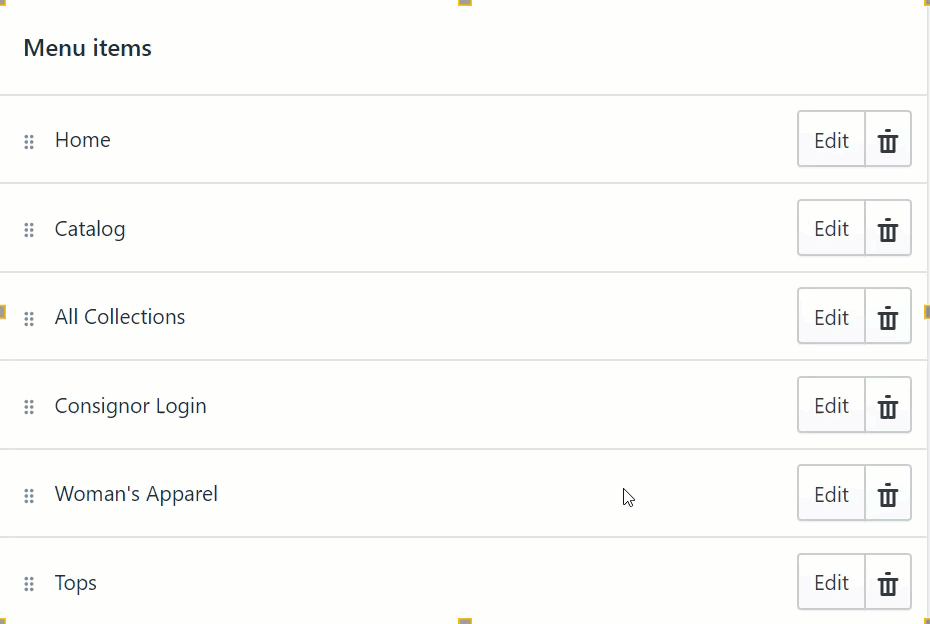
9.Now that a child menu has been created, you will now see that it is very easy to add another child menu if you would like. This child menu would be associated with another collection that falls under Woman’s Apparel like Pants/Shorts.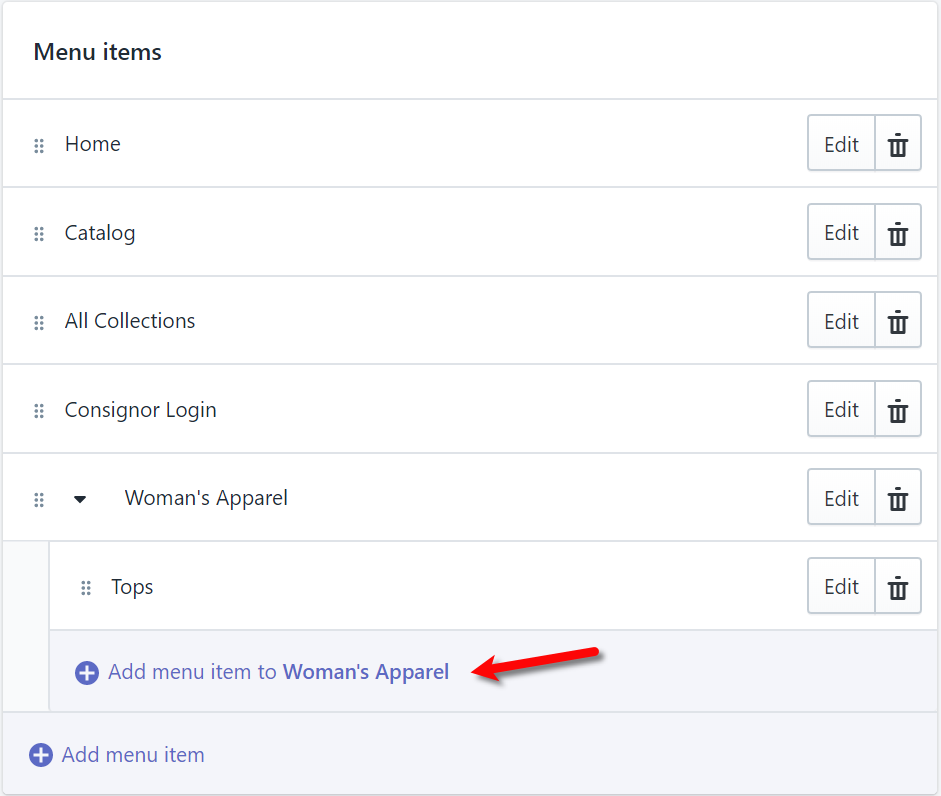
10.You must now continue until you have created the rest of your menu options. You can then drag and drop them in the order you want them to appear on your Shopify Page.
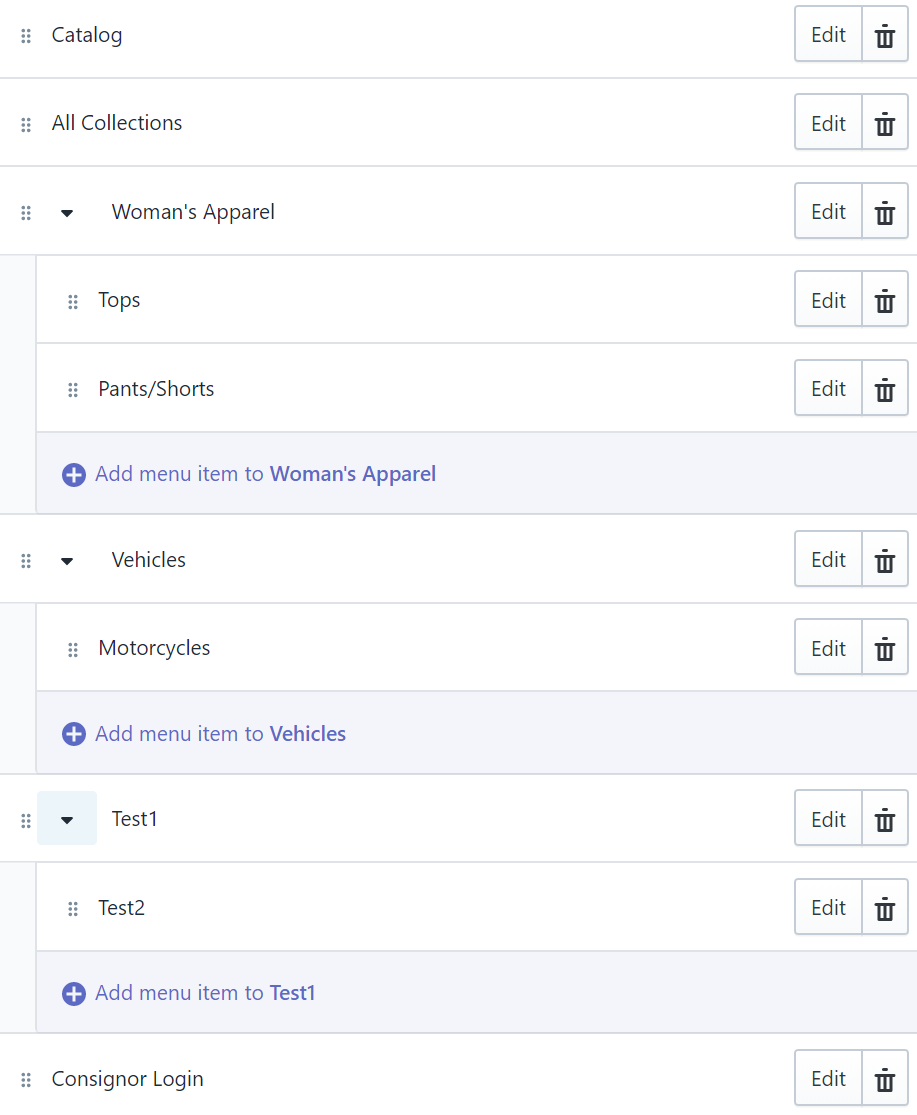
11.Here is an example of what the above menu structure looks like to help you visualize the end product. 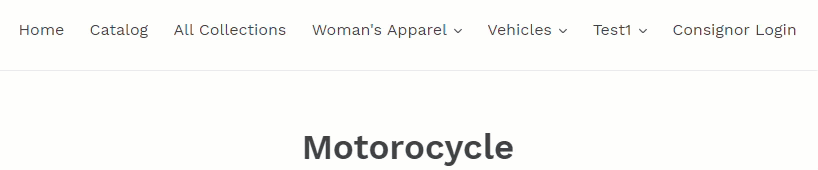
Related Topics
2nd Level Category To Shopify Collection Creation
Automatic Collections and Shopify Tags Advanced Method
Creating a ShopRW / Shopify Listing Overview
Editing A Web Description in HTML
Definitions of Web Description Processor Buttons
Previewing a ShopRW / Shopify Web Description
Deleting Images From A Web Listing
Setting a ShopRW / Shopify Item to Ready To List
Saving a ShopRW / Shopify Listing