Retail Item Entry Window
The Retail fields are described below.
Notes: The Save button must be selected to save information.
If a field described below does not appear on screen, it may be a Hidden field. To show a hidden field:
•Click on the Edit Layout button.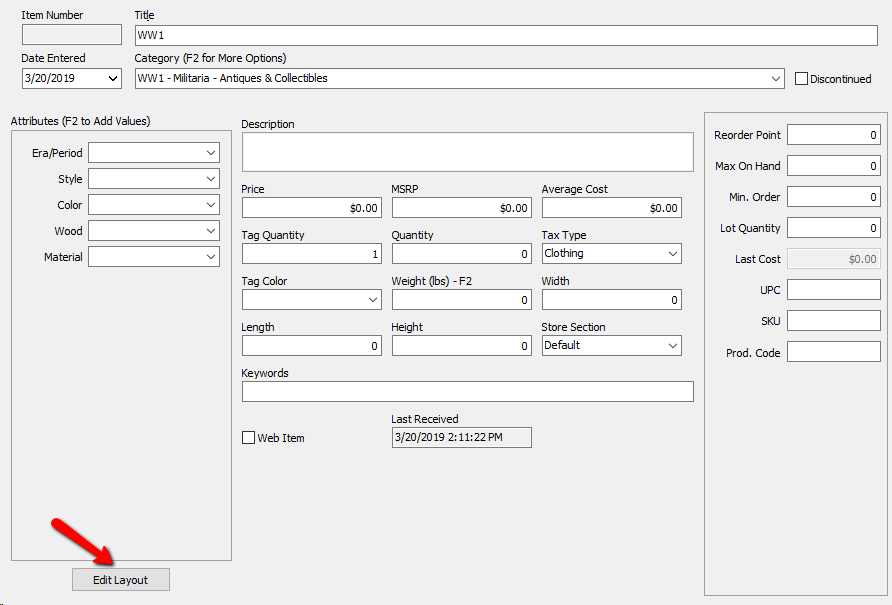
•Right click a blank area in the Item Entry field, and select Edit Layout. Anything hidden will say No in the visible column. To Show a field, highlight the field then click the Show Field button. For more information about Editing Layouts, see the section entitled Set Item Entry Field Preferences.

Retail Item Entry Window Fields
The following fields are the bare minimum requirements for entering retail items into liberty.
●Date Entered : Date the item is entered into inventory. Liberty defaults to the system date. Change the date if necessary by typing in a new date.
●Category : The category the item is to be kept in. If on a Category 3 structure, then select the Level 3 Category that best describes this item. Same if on a level 2 or level 1 structure.
To save time and keystrokes Liberty will auto fill the Category field as you type in the Category field.
Alternatively, press F2 and the Select Category dialog will appear, from which you may use the mouse or a combination of letters and arrow keys to choose a Category. In addition you can press the Add button to add a new category.
Please see Categories Overview and Add, Change, and Delete Categories for more information.
●Price : Enter the price you set to sell the item in your store at, and that you wish to appear on the price tag.
Note: When selling online items, this is your base price and does not include any fees.
The following fields are assigned by Liberty and cannot be changed by the user.
●Item Number : Assigned by the system. Each account starts at item number 1. The next item number can be changed by changing the number in the Next Item Number field Account Info screen.
●Title : A phrase reated by Liberty combining selected fields, most often the Attribute Types, Brand, and Level 3 Category fields. The default syntax is:
{Attribute(s) + Brand + Level 3 Category}
Examples:
Peach Size 10 Ann Taylor Blouse
Oak 60 inch Taylor Table
The purpose is to provide items listed online with an Item Title, and to create a consistent way to reference items within Liberty. In addition to appearing in the Auction Ads and HTML Templates, Titles are used in the Item Lookup, Wish List, and certain reports.
While Liberty automatically creates the Title, you may change it for any reason here in the Item Entry screen.
In addition, the Maintain Category Attributes dialog provides the ability to select which Attributes are, and which are not, included in the Title. Please see the sections entitled Overview of Attributes and Show Attributes in Item Titles for more information.
Note: When an item is edited after it has been saved, the Title must be manually changed. This is because the Title does not automatically update.
●Average Cost : This field shows the average cost of the currently displayed item. This field may be changed, however it is recommended that you do not change the value in this field.
●Last Cost : This field shows the cost paid for the item in the most recent order. This field is not editable.
The following fields are optional and not required when entering items.
●Discontinued (Check Box) : This will cause the image to no longer appear on the Inventory List view. To make the item appear on the list, simply check the Show Discontinued Items check box as shown on the Inventory tab.
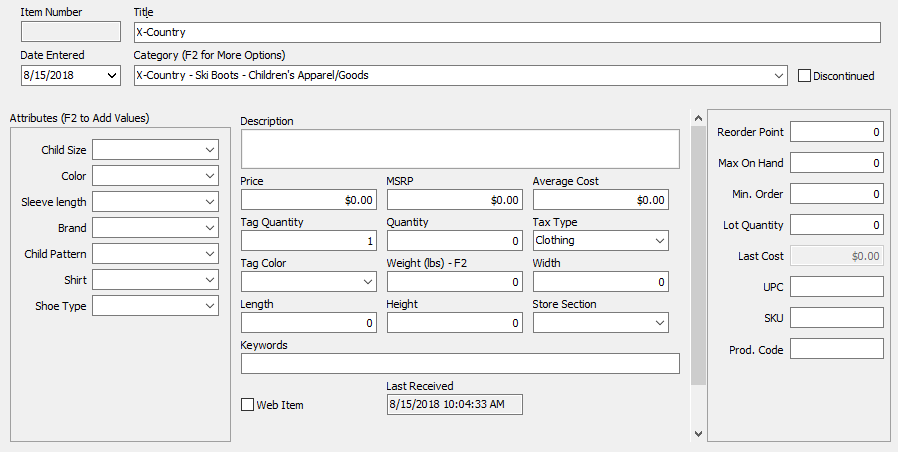
●Attributes & Attribute Panel : Select the appropriate attributes for this item. To help save time entering items, all Attributes make use of auto fill.
●Description : Describe the item as much or as little as you wish. The information entered into this field will appear on the price tag. The Description field supports live spell check which will underline a word in red to indicate when a word is misspelled. Right click the word and click Spelling Suggestions for a list of words to select from to replace the misspelled word.
Note: Some price tags have a limitation to the amount of text that can be printed on it. Liberty will attempt to put as much text on the tag as possible. If a Description takes up more room the what is available., the remaining will be omitted.
●Tag Quantity : Enter the number of tags you want printed for this item. The default is 1. You may want more than one tag if an item, such as a suit, has more than one piece.
●Store Section : Use this optional field to identify where the item is located on the store floor. Store Sections must be set up ahead of time.
●Quantity (on Hand) : This field displays how many of this particular item are in stock. By default the value is 1. If you have more then one of the same item, you can add a value greater than 1.
●Tax Code : The Tax Code defaults to the Tax Code assigned for each item's Category through Product Lines. See Categories Overview, Set up Tax Codes, and Set Up Product Lines, for more information.
An item's Tax Code may be changed by selecting a Tax Code from the drop-down list.
●Tag Color : Tag colors may be used for any reason. Two common reasons are:
○Performing Automatic Markdowns based on tag color (see Set Up Automatic Markdowns by Tag Color for more information).
○Grouping inventory by tag color.
●UPC (Universal Product Code) : Enter the item's UPC (Universal Product Code) in this field. Do this by either:
○Scanning the UPC with the bar code reader (while the cursor is in the UPC field).
○Typing the UPC into the field.
UPCs are 13 characters in length. If the UPC entered is 13 characters in length then UPCs scanned at Point of Sale will add the item to the sale. If the UPC is not 13 characters then Point of Sale will not recognize the entry.
Enter the item's UPC (Universal Product Code) in this field. Do this by either:
Scanning the UPC with the bar code reader (while the cursor is in the UPC field).
Typing the UPC into the field.
UPCs are 13 characters in length. If the UPC entered is 13 characters in length then UPCs scanned at Point of Sale will add the item to the sale. If the UPC is not 13 characters then Point of Sale will not recognize the entry.
Note: Every item has a unique UPC number, and UPCs are controlled and assigned by a national organization.
●Prod. Code : Enter the item's Product Code in this field. Product Codes are generally assigned by the manufacturer of the item.
●SKU : Enter the item's SKU (stock keeping unit) number in this field. Stores usually generate and assign their own SKU's.
●Re-oder Point : Specify the minimum number of the item you wish to have on hand at any one point in time before a reorder is required. This field is used for reference and reporting purposes.
●Min. Order : Specify the minimum order required by the manufacturer/distributor for this item. This field is used for reference and reporting purposes.
●Max On Hand : Specify the maximum number of the item you wish to have on hand at any one point in time. This field is used for reference and reporting purposes.
●Lot Quantity : Lot Quantity impacts whether or not this item is displayed on the Retail Reorder report, as well as how the report calculates the quantity to order.
●Tag Color : Tag colors may be used for any reason. Two common reasons are:
○Performing Automatic Markdowns based on tag color (see Set Up Automatic Markdowns by Tag Color for more information).
○Grouping inventory by tag color.
●Weight : The Weight of the item
●Width : The Width of the item
●Length : The Length of the item
●Height : The Height of the item
●Key Words : Key Words work like Meta Tags. When an item is pushed to reCommerce, they are the words and phrases that searchers enter into search engines, also called "search queries" to find the items.
●Image Column : The image column is where you can add images to an item.
The following field is required to be able to sell items online.
●Web Item Check Box : This will mark the item as a Web item to be sold online. See Liberty Listing Manager for details.
●Last Received Date : This is the last date this item had its quantity replenished.
The Lower Section Of The Retail item Entry Screen
●Variants : If you are adding items with variations of one and another, these Variants will be displayed here.
●Sales : When an item is going to be on sale, you can set this up in the Sale field.
Note: The Sale Field is for when and item is to be sold at a discount for a period of time. Do not confuse this with the item’s sales history.
●Location Summary : Displays an inventory count for the specified item for each location.
●Locations History : Displays when and item was moved from one location to another or when inventory was received for a location.