PickList Tab Overview
The PickList Tab allows you to easily see all items that need to be pulled off the floor to fulfill existing orders.
This tool also allows you to flag the items as unsellable so that the orders don’t accidentally get completed without figuring out what to do with any unsellable items.
Printing the PickList From The PickList Tab
You can print a copy of the PickList to take with you to the floor to help you find the items that you need to pull.
1.Open the Listing Manager and navigate to the PickList tab.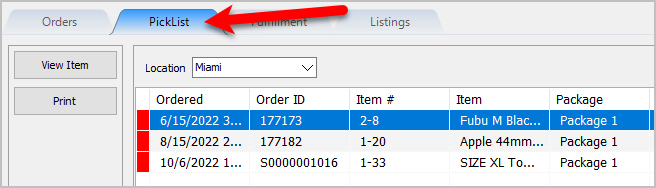
2.Select the Location of the orders you want to work with from the Location drop-down 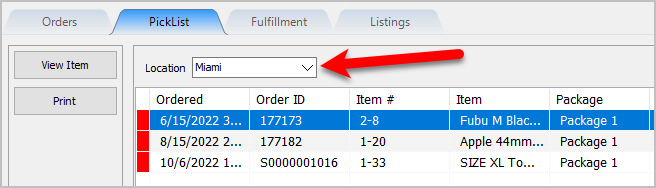
3.Click the Print button. 
4.If you do not want to use the Default Windows Printer, select the printer you want to Print from and then click the OK button. 
5.Here is a sample of what the PickList will look like. 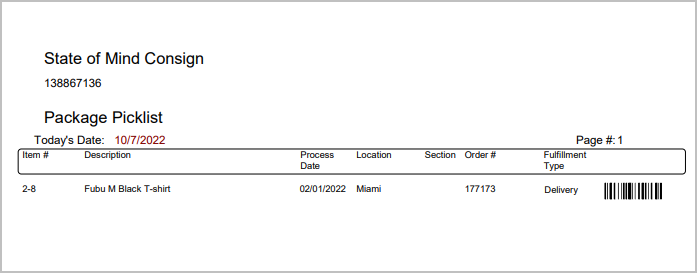
Picking Items In The PickList Tab
1.You can view items that need to be picked from the PickList Tab. When you have grabbed the item off the floor, you can right-click on the item and then click Pick Selected.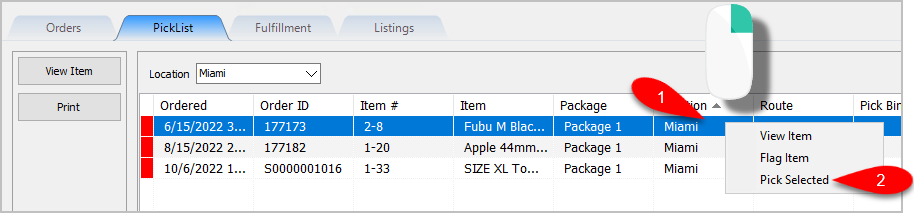
2.You can also multi-select items to be picked by using either CTRL + Left Click or if the items are close together Shift + Left Click, then right-click on the last item you selected and click Pick Selected. 
3.You can also scan the Item Barcode off of the items you pull to quickly confirm you have the right item and to mark the item as Picked. 
4.Back on the Orders tab, you will notice the item color indicator is no longer yellow. This indicates that the order has been picked. 
Note: Items do not have to be picked to be able complete their corresponding order. The only order you cannot complete is an order that has unsellable items. These orders have a red indicator next to them on the Orders Tab.
Viewing Item Details Within The PickList Tab
1.Right-Click on the Item you want to view the item details on and then click View Item. 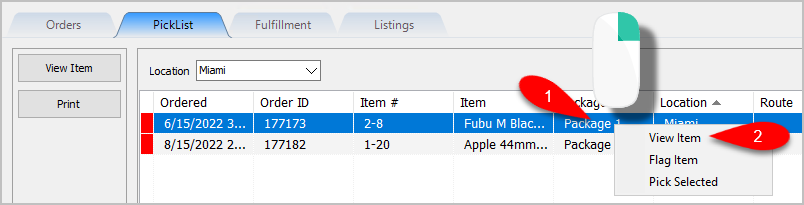
2.You can view the details of the item like Process Date, Price, Item Name, Description, Order Information and Client Transactions. This can help you make sure you are picking the right item. 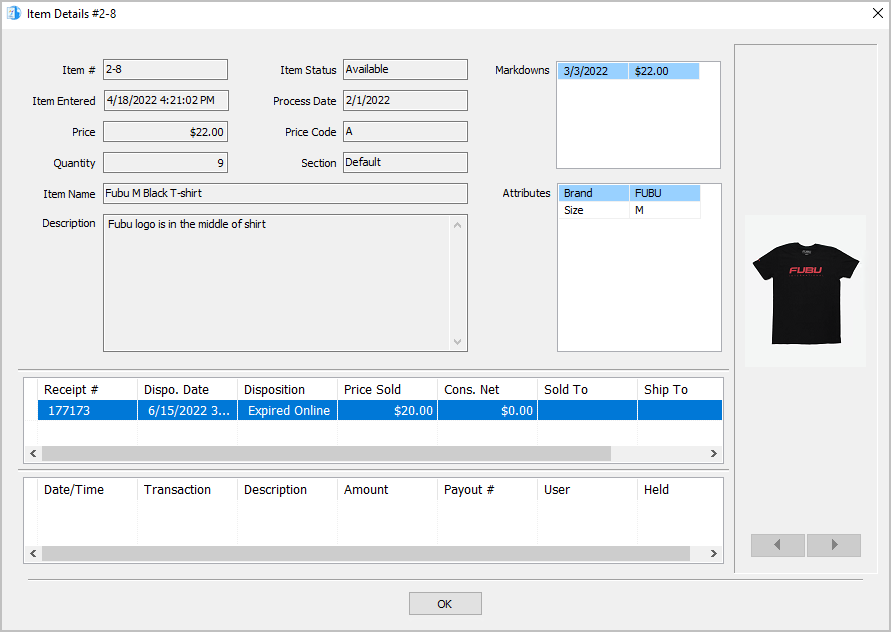
Flagging Items From The PickList Tab
There may be a situation where you either cannot find an item on the floor due to it being missing or sold in-store by accident before it could have been taken on the floor. In these situations, you will want to flag the item so that the Order does not get accidentally completed before the Unsellable Item situation is handled.
1.Right-Click on the Item you could not find or confirm it is missing and then click Flag Item. 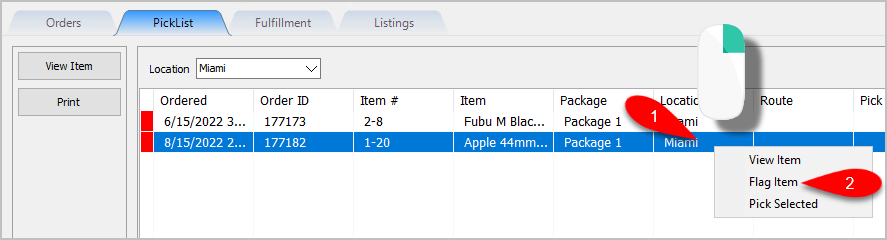
2.You will get a prompt asking you Are you sure that you want to mark the selected items as Flagged? Click the Yes button. 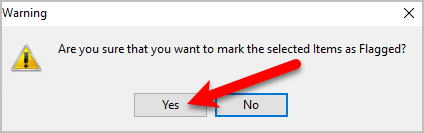
3.You can now go back to the Orders Tab and select the Order to see a Red Item Indicator. If you look at the Items area at the bottom, you can see the item or items that were Flagged as Unsellable. 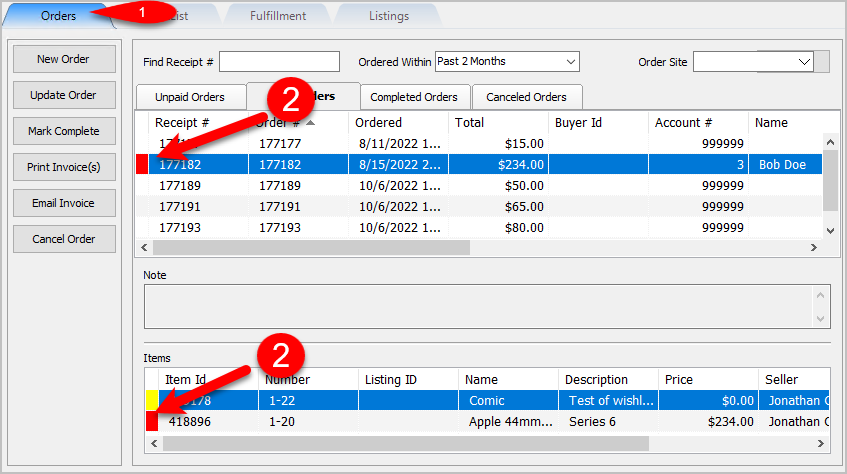
Creating Pick Bins For Sorting Picked Items
Pick Bins can help sort out the inventory you pick to ensure that all items that are part of a package/order can be fulfilled easily and properly.
1.Click on the Settings menu option at the top and then click on Maintain Pick Bins. 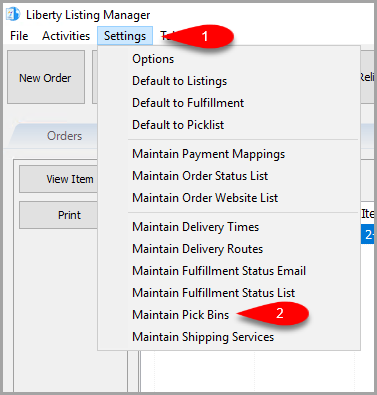
2.Click the Add button.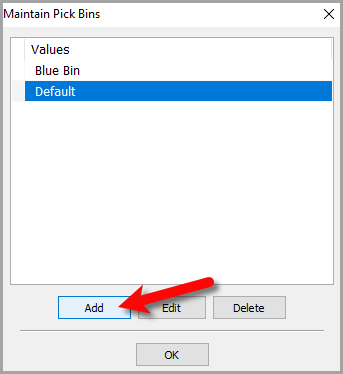
3.For the Description, type what you would like to name the Bin. If you have multiple stores, you can set the Location to the actual location of your store. Otherwise, you can just leave Location blank. 
4.Click the OK button. 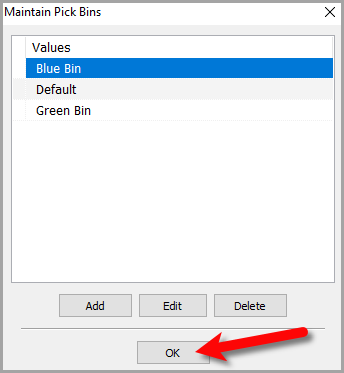
Picking Items Into A Pick Bin
1.You can Left-Click to select an item or multiple items using the Multi-Select method from the Picklist tab. 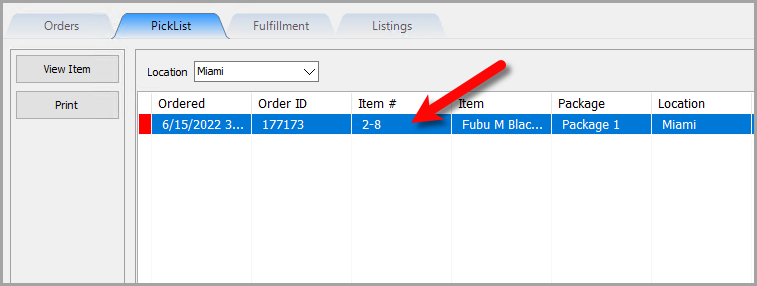
2.Under the Pick Bin drop-down, select which Pick Bin you would like to use. 
Note: The Pick Bins that are visible to you in this list are the ones that have been set to your terminal’s current location. If you do not have multiple locations, then you will be able to see all Pick Bins.
3.Click the Pick Selected button to Pick the items into the Selected Pick Bin.
Alternatively, you can scan the item barcode into the Item Barcode field to pick the item into the Pick Bin. 
Related Topics
Printing the PickList From The PickList Tab
Picking Items In The PickList Tab
Viewing Item Details Within The PickList Tab
Flagging Items From The PickList Tab
Creating Pick bins For Sorting Picked Items