Troubleshooting The TSC TDP-247/TDP-245 Plus Tag Printer
If your tags are printing in between two tags, please click on the following link to skip to the appropriate section that addresses this issue:
How Your Tag Printer Driver Settings Should Look
Most printing issues encountered with the TSC TDP-247/TDP-245 Plus tag printer can be resolved by doing the following:
1.Turn the printer off.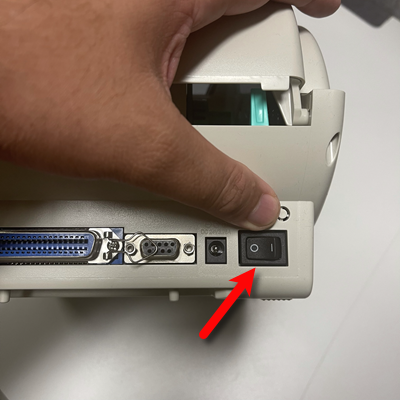
2.Open the tag printer lid by pulling up on the green tabs on the left and right of the printer. 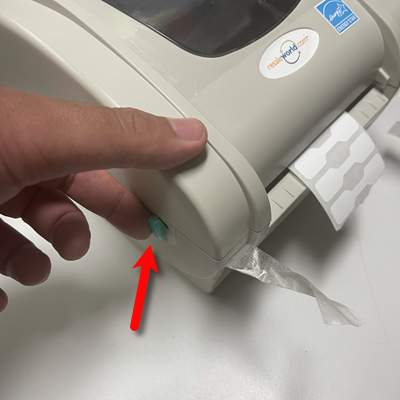
3.Remove the tag roll completely from the printer, disassemble the spindle and set it aside. 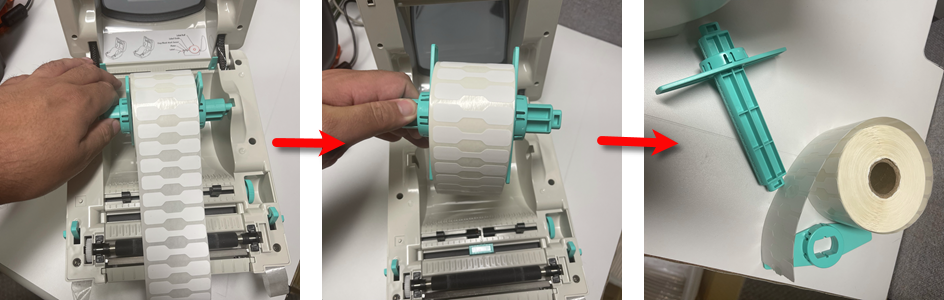
4.Adjust the green Gap Sensor so that the plastic arrows are between the Black Rectangle and the Circle sensor. 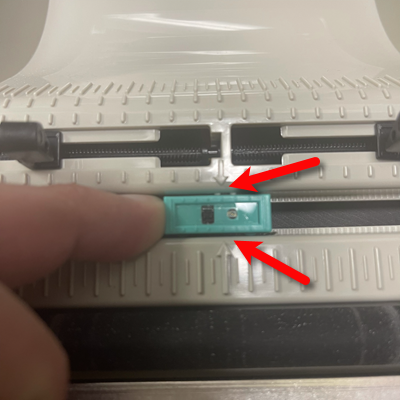
5.Next, you will need to remove the Black Rubber Roller from it’s housing.
Pinch the two clips on both sides of the roller gently, and then lift the roller up. 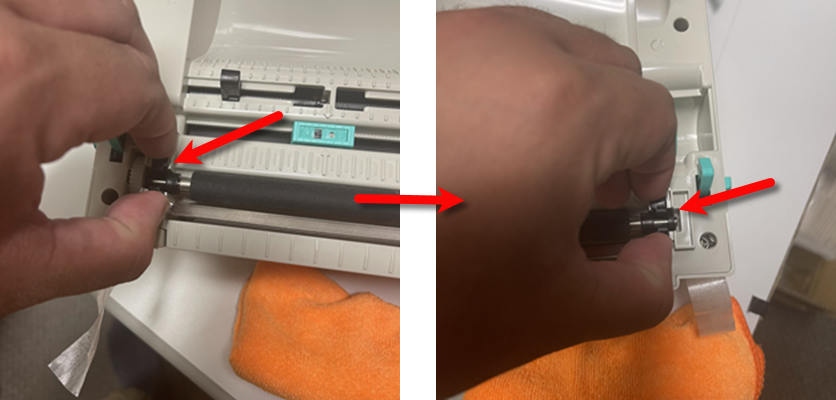
6.Take a Microfiber Rag with some Water and clean off the Black Rubber Roller. 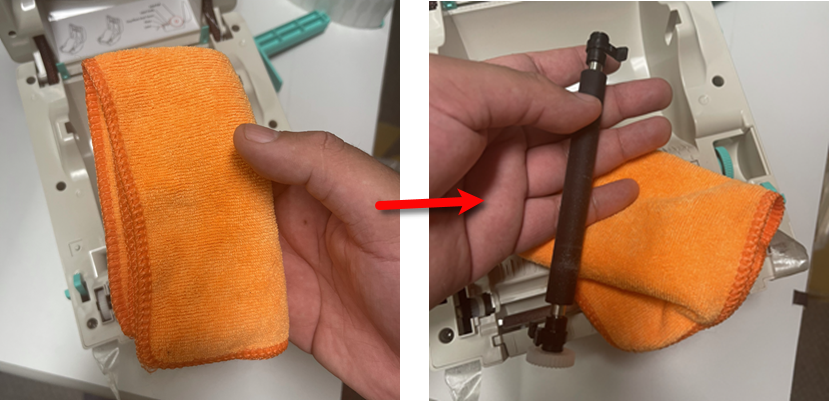
7.Place the Black Rubber Roller back into position on the tag printer and gently press down on both sides to snap the clips back into position.
Note: Please make sure that Black Rubber Roller is dry before using the printer again. 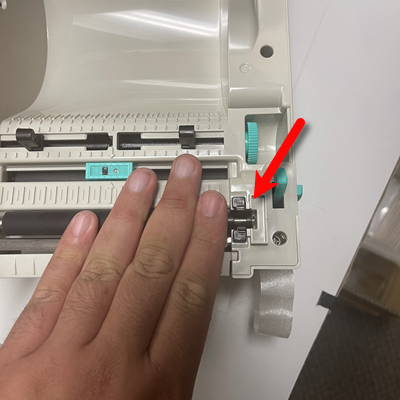
8.Using a clean and dry Microfiber Rag and 91% to 99% Isopropyl Alcohol, clean the TSC tag printer’s Thermal Head.
Do not pour or spray alcohol directly on to any of the printer parts, only pour or spray on the microfiber rag.
Note: The higher the percentage of alcohol, the better it will be for cleaning your printer head. Do not use 70% alcohol as the additives could damage your tag printer’s thermal head over time.
Note: Please make sure that the Thermal Head is dry before using the printer again. Alcohol normally dries very quickly. 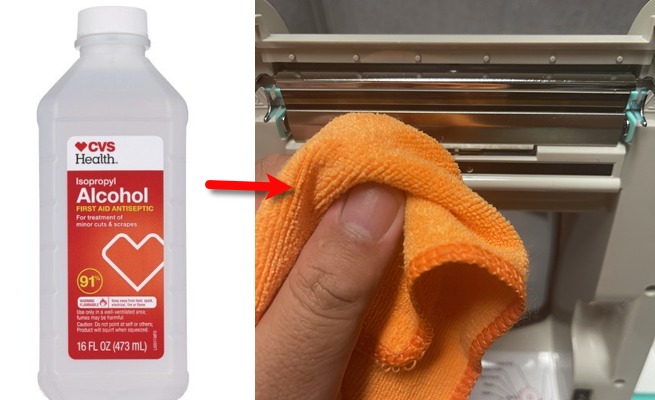
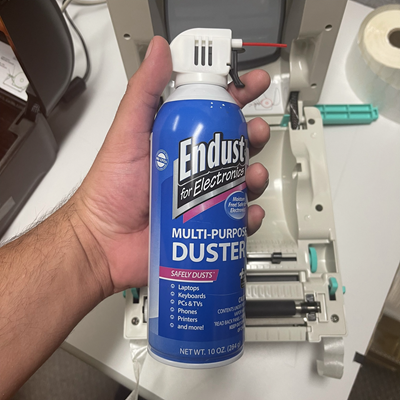
9.Get a can of Compressed Air.
10.Point the red straw and blow out the center cavity first, then blow out the plastic gear on the left and finally blow out the center crevices near the sensor.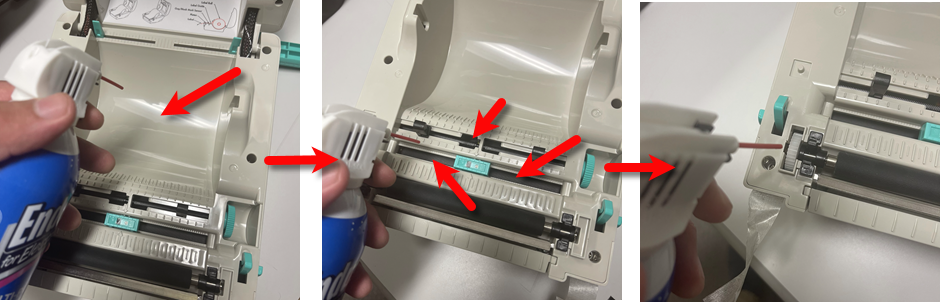
11.Reassemble the spindle with the roll placed as close to the center as possible. Then place the spindle with the roll back into the printer. Use the green turn dial on the right to adjust the black guide arms so that they are snug up against the tags. 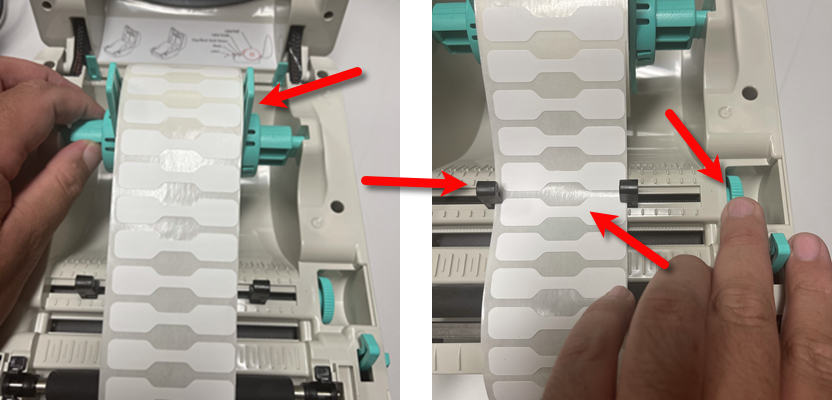
12.Make sure that at least half a tag is sticking out of the printer.
In the case of jewelry tags, make sure that at least one whole tag is sticking outside of the printer. 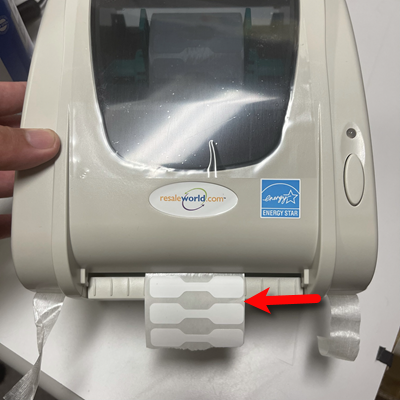
13.Turn the printer on. The printer will now automatically Calibrate your tags and read the proper gap size and height.
Note: Do not roll the tags back up into the printer. This procedure is required in order for the tag printer to align your tags. Rolling up the tags will break this alignment. If for any reason you ever need to roll the tags up, make sure that you hit the feed button twice, if you do not turn the printer off. 
How your Tag Printer driver settings should look
1.Click your Start Menu and then type Control Panel. Click on the applet when you see it or press your Enter key. 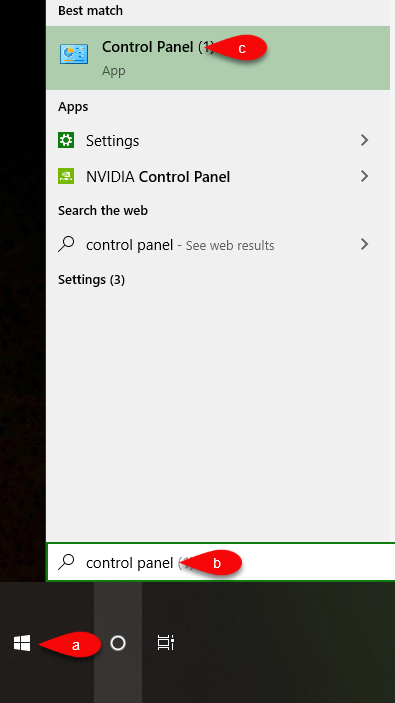
2.If your Category view looks like this, click the View By dropdown and select Small Icons.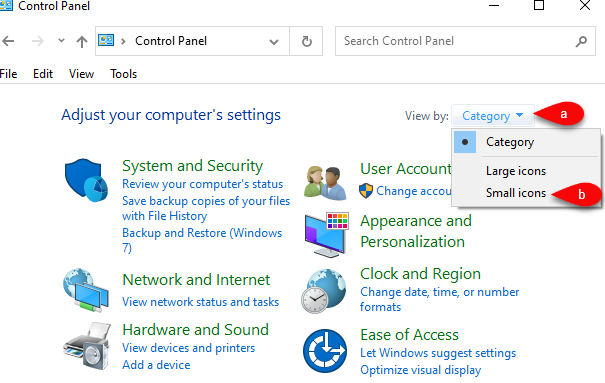
3.Click on the Devices and Printers applet. 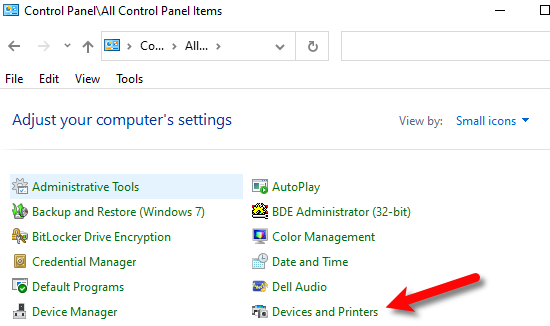
4.Right-Click on your tag printer driver instance and then click Printer Properties.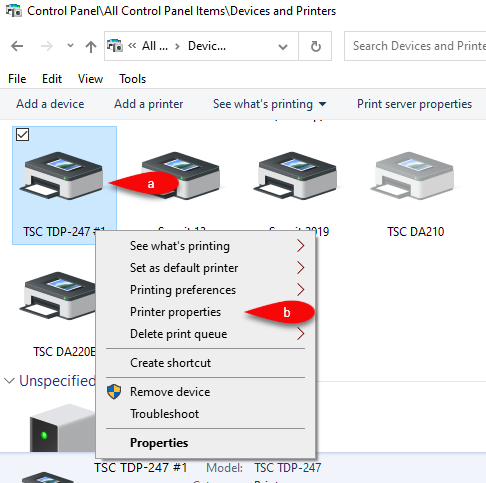
5.Click the Preferences… button. 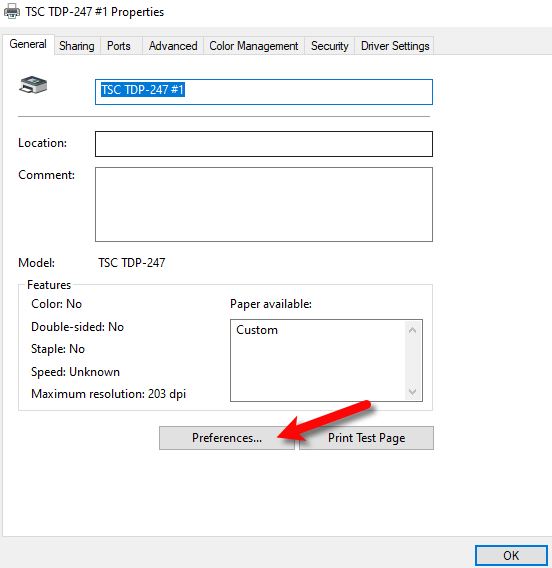
6.The following settings are for the recommended NiceLabel driver.
Make sure that Width reads 4 and Height reads 6, then make sure the rotation is set to Portrait.
Click the Apply button, then OK.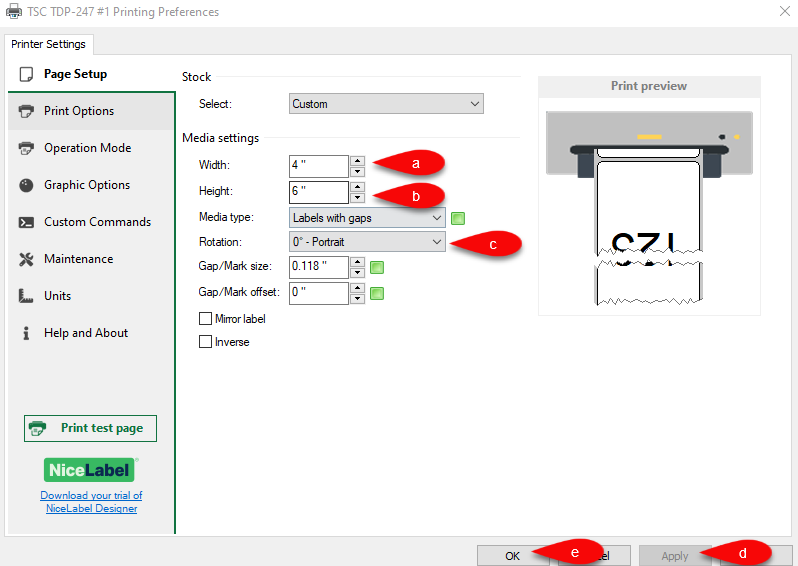
7.The following settings are for the Seagull driver, which is not the recommended driver for TSC printers but will still work.
Make sure that you are on the Page Setup tab, for Stock name, this should be set to 4 x 6.
For the Orientation, this needs to be set to Portrait 180.
Click the Apply and then the OK button when finished. 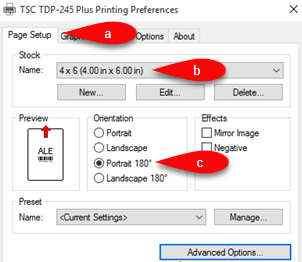
You should now be ready to print your tags.
Related Topics
Installing the TSC TDP-247 USB Tag Printer on Windows 10
Troubleshooting the TSC TDP-247/TDP-245 Plus Tag Printer
How To Recalibrate a TSC Tag Printer