How To Send Existing Items To Shopify Through The Liberty Item Entry App
This article will help walk you through editing an existing item in Liberty 5 for the purpose of sending it to Shopify. through the Liberty Item Entry app.
Note: These steps will also work for stores that are on ShopRW
Here is the video that covers this content:
How To Send Existing Items To Shopify Through The Liberty Item Entry App
1.Find and then tap on the Item Entry app
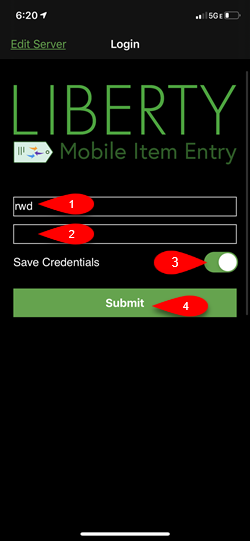
2.If you are not currently using Face ID or Touch ID, you can type in your username and password.
Then tap Save Credentials if you want and tap the Submit button.
Note: It is normal to not see what your password is when you are done typing it in.
3.If you have never sent an existing item to Shopify before, tap the folder icon at the top right. 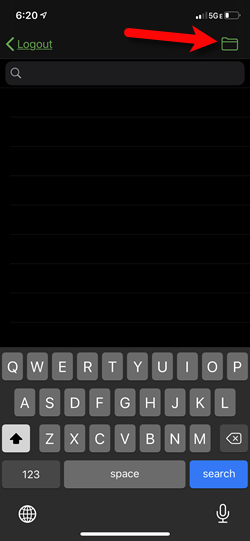
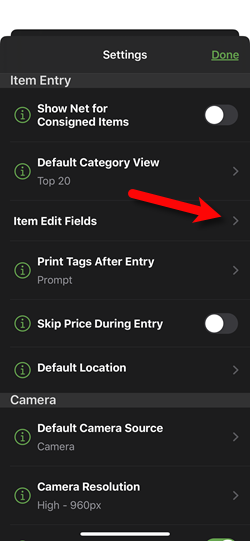
4.Tap the Edit Settings option. 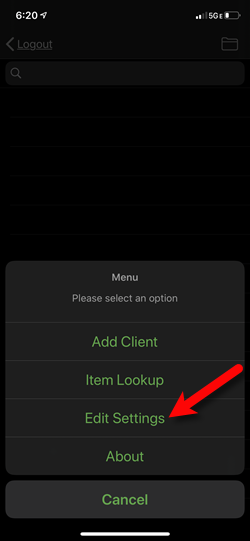
5.Tap the Item Edit Fields option.
Note: If you have multiple stores, it is definitely a good idea to set a Default Location. This will ensure that all items entered from this iDevice show up with a proper location. This option is located on this screen, simply tap on it to edit the Default Location.
6.If you have set the Liberty Listing Manager to require a Weight, make sure to checkmark this field so you can edit the weight of an item. You can also tap Location so that you can edit the location of an item on a case by case basis, if you have multiple stores. 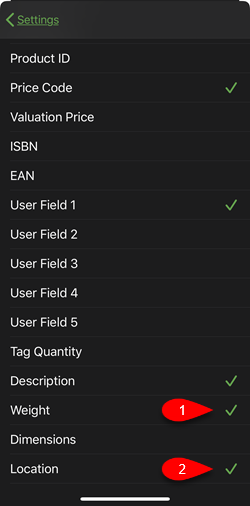
7.Tap on Web Item to checkmark it and make it available when you edit an item.
Next, tap the Settings back button at the top right corner of the screen to go back. 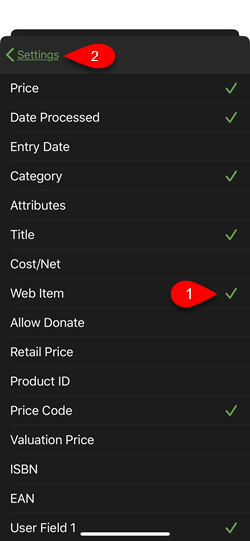
8.Tap the Done button. 
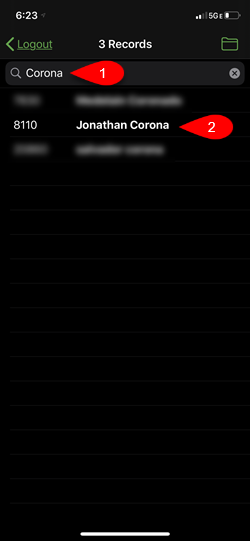
9.Search for an account by First Name, Last Name or Account Number and then tap on it to open the account.
Note: Alternatively, you can tap the folder at the top right corner and then tap on Item Lookup to edit your item. This will allow you to enter in the account-number or scan the tag using your iDevice’s camera.
10.Tap on the View Inventory option.
11.Tap on an item you would like to send to Shopify or ShopRW.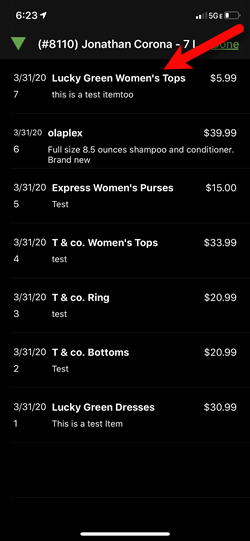
12.Tap the Menu button at the top right corner. 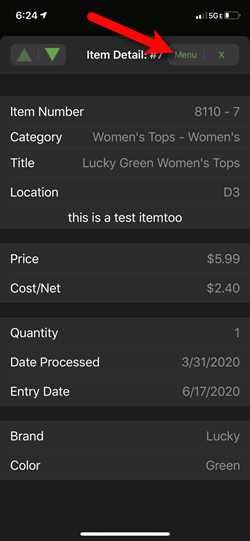
13.You can tap Add Image With Camera if you would like to take a quick picture of the item. 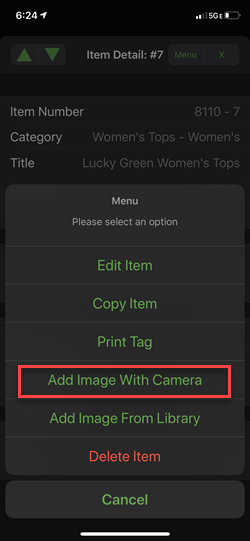
14.When you have the item centered the way you would like, tap the Circle button to take the picture. 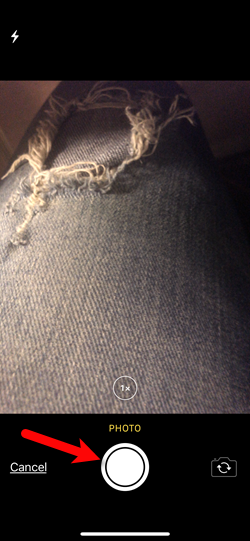
15.Now tap Use Photo.
You can repeat this process if you want to take another picture. 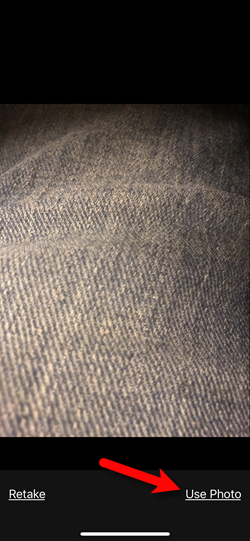
16.You can also tap Add Image From Library if you took all of the pictures you wanted earlier and want to be able to add them all using multi select. 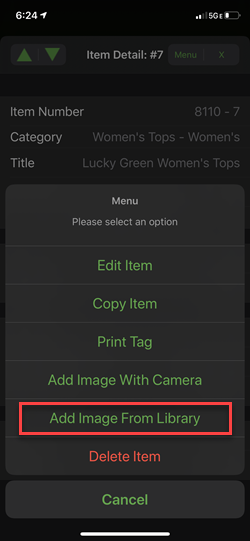
17.Tap the Circle icon located in the top right of the images on all the ones you would like to add to the item. Then tap the Done button. 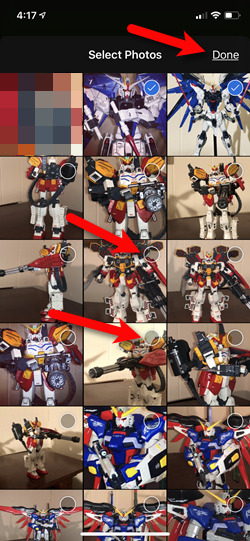
18.Based on the options on the pop-up, selecting Yes will add the images to the item.
Selecting Cancel will take you back to the item without saving images and selecting Reselect Images will allow you to change what images you want to attach to the item. 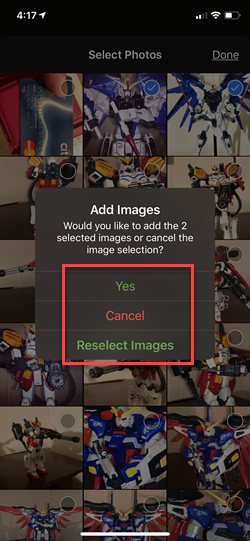
19.When you are done adding your images, tap the Edit Item button. 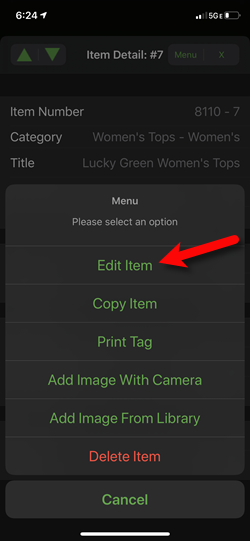
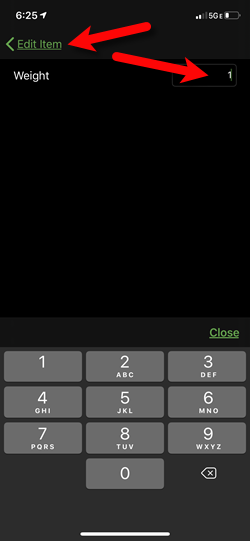
20.If you want to change the item Location or enter in the Weight for the item, you can do so from this screen. 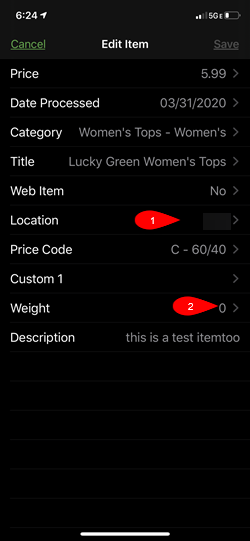
1.The Location option will allow you to select from a list of all of your store Locations. This will tell Liberty 5 where the item is located. 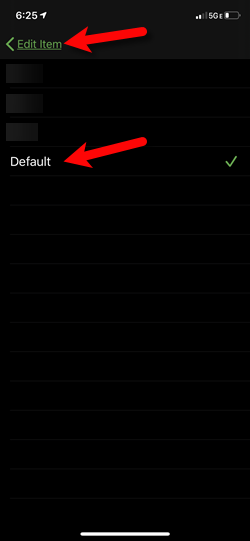
2.The Weight option allows you to type in the Weight of the item.
Note: There is an option on Shopify and ShopRW that will specify whether this number is in Pounds (lbs) or Ounces (oz). This number is in Pounds by default.
21.When back on the Edit Item screen or if you are not putting in a Weight or changing the Location of the item, tap the Web Item option. 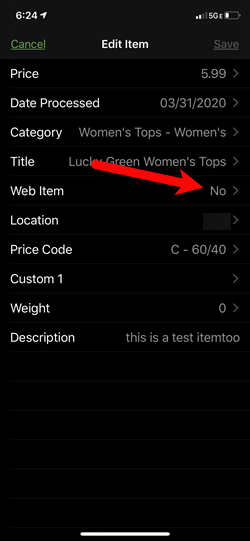
22.Flip the Web Item switch to On.
If your Listing Manager is set to create listings on Shopify for new web items, then when you save the item, it will go straight to Shopify. This is assuming that you filled in a weight and have attached a picture to the item, if these are set to be required.
Please visit the following article for more information on the Create Listings for New Web Items:
Storefront Settings
If your Listing Manager is not set to auto-create listings on Shopify, there will be some additional steps your web item entry person will need to do before the item can be listed on Shopify.
They will need to go to the Listing Manager and then click on Add A Listing.
Please visit the following article if you are using this method:
Adding A Regular Listing
23.Tap the Save button. 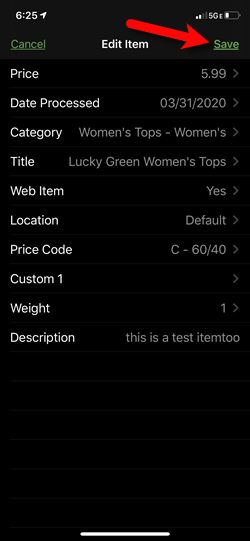
Related Topics
Liberty Item Entry Application Setup Overview
Downloading the Liberty Item Entry Application From The Apple App Store
Creating a Device Key for your iDevice
Getting the IP Address Of Your Server
Connecting The Item Entry App To Your Server Computer
Adding Items To Shopify Through The Item Entry App