Item Lookup
Here is the video that covers this content:
How To Use The Item Lookup Feature
Use the item lookup feature to find items in the system. This is great tool if an item has lost it’s tags, been moved to another account, or entered on the wrong account.
How To Use The Item Lookup
1.From within the Inventory Module select the Item Lookup button at the top.
The Item Lookup screen will be displayed.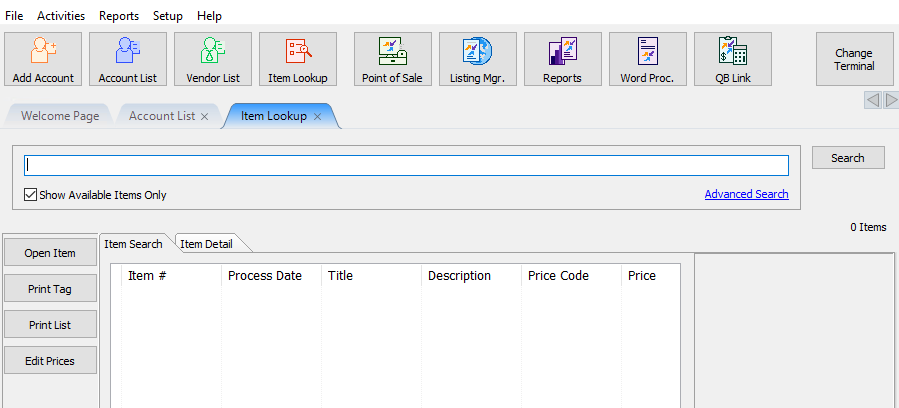
The Search Area
The Search Area : This area has two modes. Basic and Advanced
●Basic Search Mode : Contains a search field and a checkbox toggle to show only available items or not.
Press the Search button once you have entered all information.
●Advanced Search Mode : Selecting advanced Search will provide more options to work with.
Searching for items in the advanced Item Look search field is a little bit more powerful.
Search For : In the Search For Section you can tell Liberty to search for specific items based on the criteria defined. The
drop down box to the right of the Search For field displays a list of qualities you can use to search for an item.
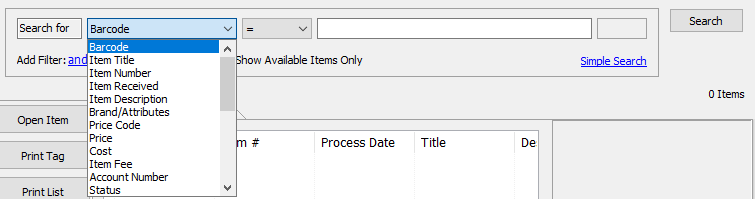
Simply choose the option and it populates in the field.

The next drop down field contains a list of Modifiers. Select a modifier to further refine your search.
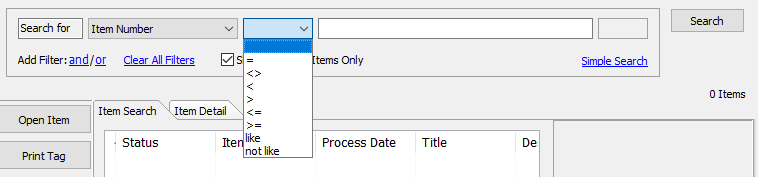
The Modifiers work in the following ways.
○Equals ( = ) : Yielded results will equal what is typed in the search box.
○Does Not Equal ( <> ) : Yielded results will not equal what is typed in the search box.
○Less Than ( < ) : Yielded results will be less than what is typed in the search box.
○Greater Than ( > ) : Yielded results will be greater than what is typed in the search box.
○Less Than or equal to ( < = ) : Yielded results will be less than or equal to what is typed in the search box.
○Greater Than or equal to ( > = ) : Yielded results will be greater than or equal to what is typed in the search box.
○Like : Using Like will search for, and yield results for items that are similar to the search.
Example: Searching for the term Shade will find “Shady”. Searching for Blue will find “Blueish”
○Not Like : Using Not Like will search for, and prevent results for items that are similar to the search.
Example: Setting it to search for items Not Like Cap will also not yield “Cape”.
In the blank field, type in your value and press the Search button.
Your results will be displayed.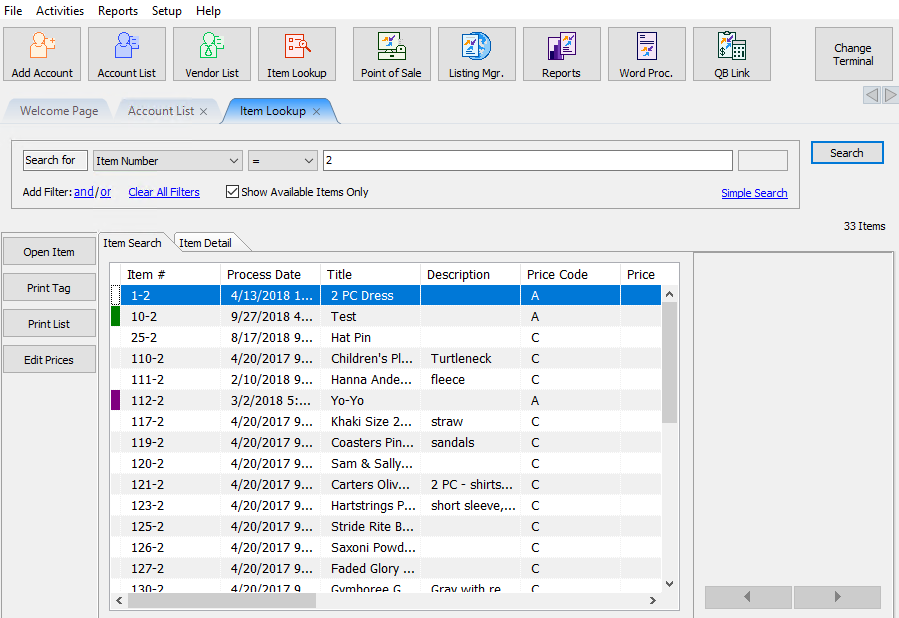
Using the Advanced Search is like forming a sentence. The above example simply reads “Search for all items that have the Item Number that equals to 2”.
You can further restrict your results using the Add Filter.

Selecting And, will add another Search line and will require both search fields to be true to yield results.

This Statement reads “Search for all items that have an item number equal to 2 And have only been sold”.
Selecting Or, will add another Search line and will only require one line to be true to yield results.

This Statement reads “Search for all items that have an item number equal to 2 Or have a price of $10.00”.
You can mix and match the And and Or options to get more specific.

This Statement reads “Search for all items that have an item number equal to 2, And a price equal to $5.00 Or a price equal to $10.00”.
Use the Clear All Filters option to remove all search options.

The Results Section
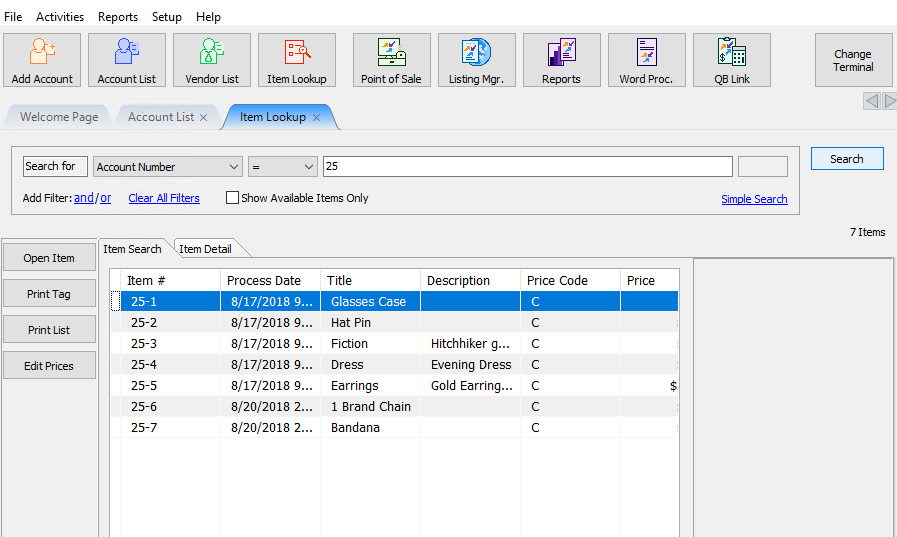
Once you have all your search criteria entered and your results listed, you should see something like this.
This Statement is asking to look for all items on account number 25. Noticed “Show Available Items Only” is unchecked.
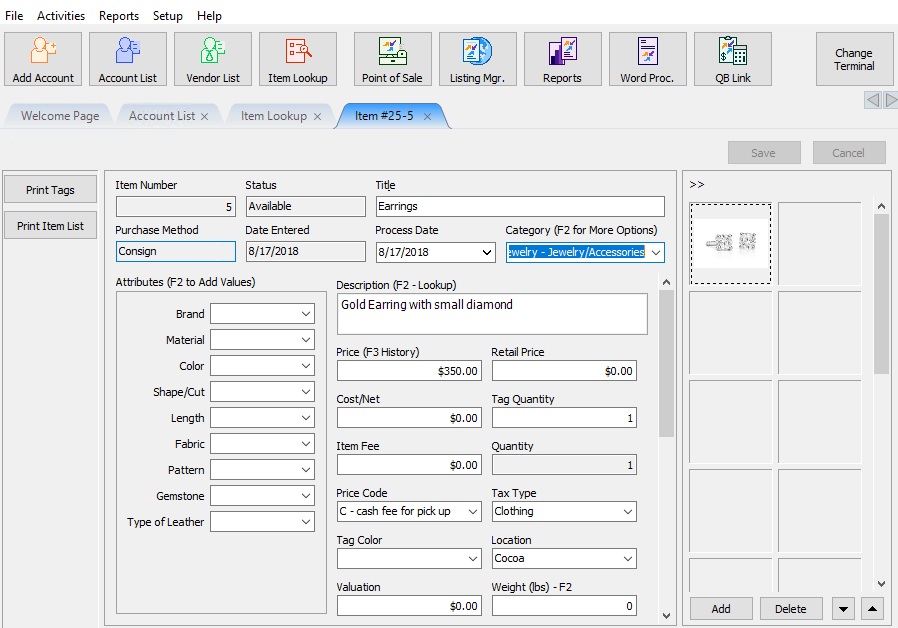
●Open Item : Highlighting the item and selecting the Open Item button will display the Details of the item. This will allow you to make changes to the details of the item. For more information on Item Details see Viewing Inventory.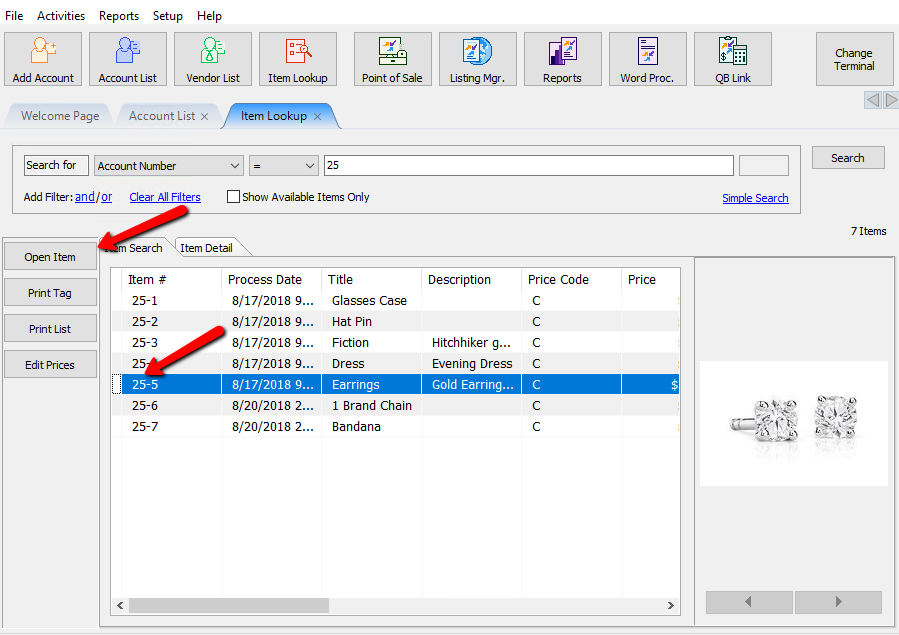
If you just need a quick glance if the item details, simply highlighting the item and selecting the Item Detail Tab will also show details of the item, however you can not modify the details from this screen.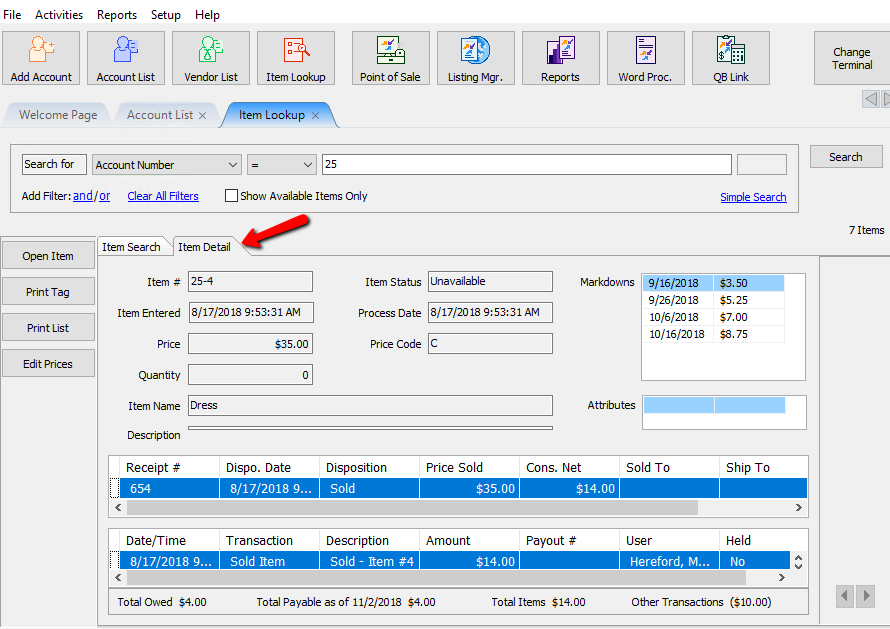
●Print Tag : Highlight the item and select the Print Tag button will initiate the Print Tag dialog. For more information on Printing Tags see Printing Price Tags.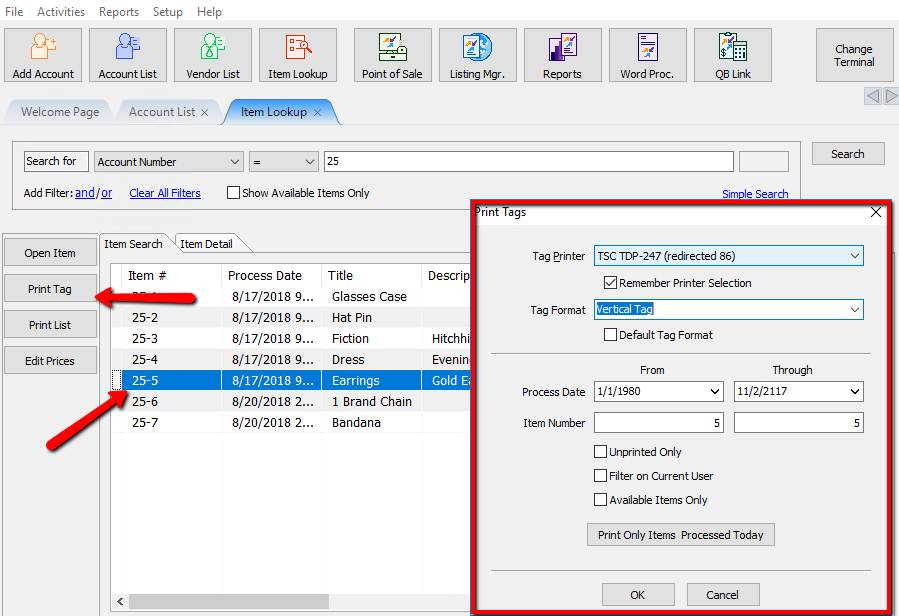
●Print List : Selecting the Print List button will generate a printable list of the results you searched for.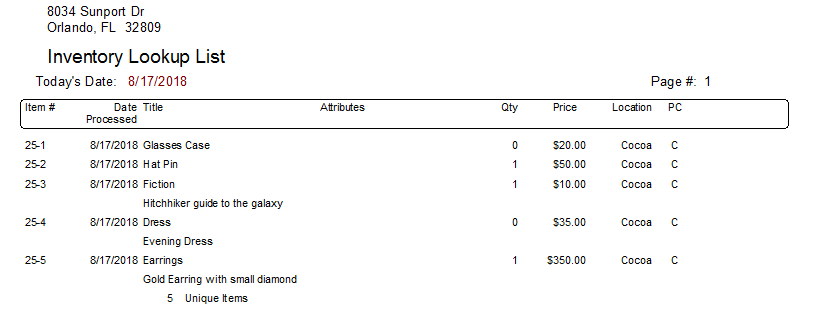
●Edit Prices : Selecting the Edit Prices button will pull up a dialog box that will allow you to edit all the prices of the items in the list.
Highlighting an item will also reveal the first image of the item to the right. Using the left and right arrows under the image will allow you to scroll through the subsequent images.
Color Coding
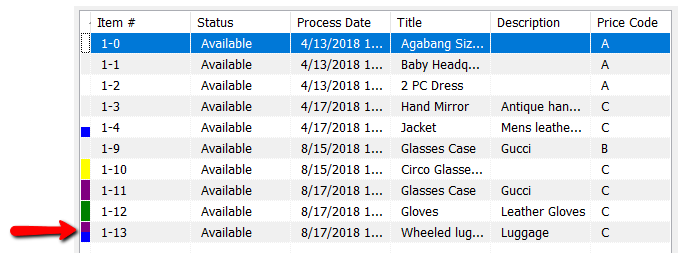
Some items in the Item Lookup field will have color codes at the beginning of them. Here is a list of Color Codes you might see.
●White/Light Gray (No color) : This is a consigned item.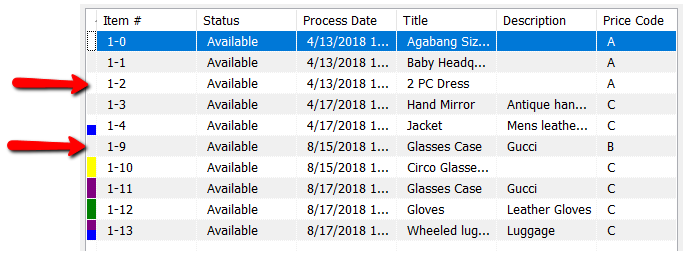
●Half Blue (With any other color) : Blue indicates the item is a Web Item. Blue can be combined with another color.
Example: This is a Consigned Web Item.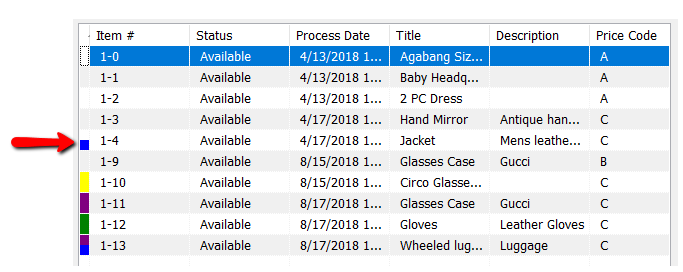
Example: This is a Purchased outright Web Item.
●Yellow : Yellow indicates a pending Buy/Trade item.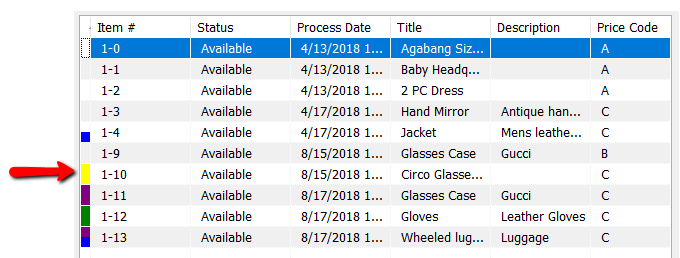
●Purple : Purple indicates a Purchased outright item.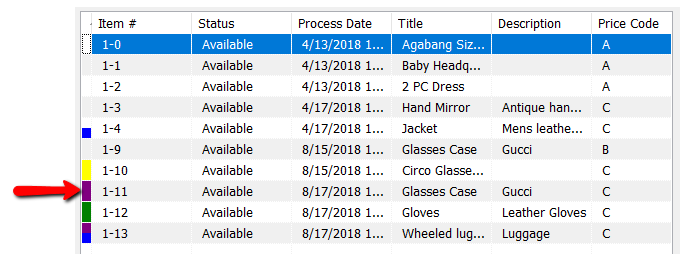
●Green : Green Indicates a Store Owned Item.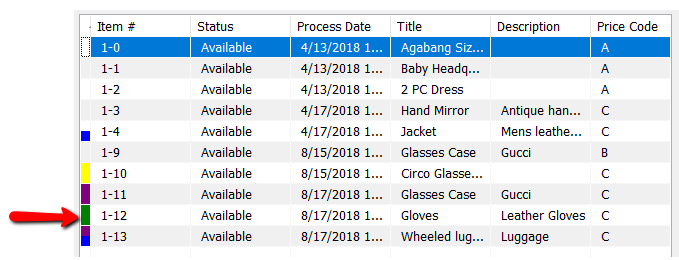
●Gray : Gray indicates Retail Items.
Related Topics
Viewing Inventory
Find an Item From within an Account
Finding Items with a Status of Needs Info