Web Feature
The following video chapter contains setup information on this topic:
https://www.youtube.com/watch?v=bm9YPwazle0&t=225s
Note: You can have multiple web pages displayed in their own separate panels within the Liberty Kiosk App.
1.Open Liberty and then click Setup and then Liberty Mobile Admin. 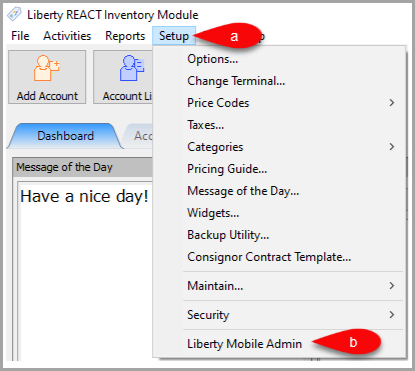
2.Click Maintain and then Kiosk Configurations. 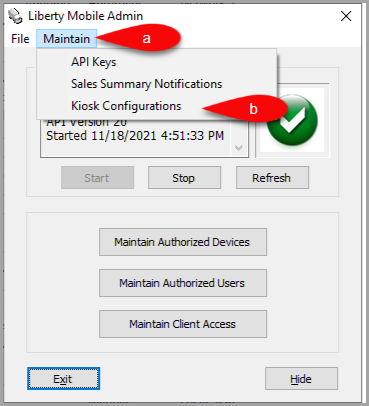
3.Select the Configuration you want to edit and then click the Edit button. 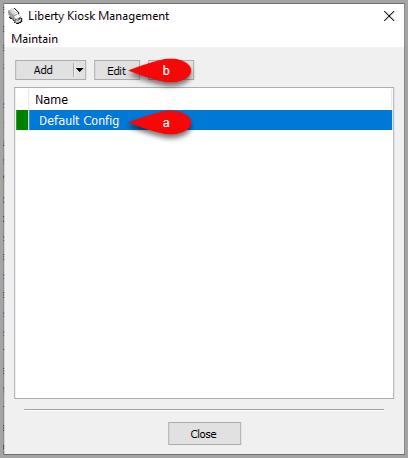
4.Click the dropdown for New Custom Page, then select the Web option. 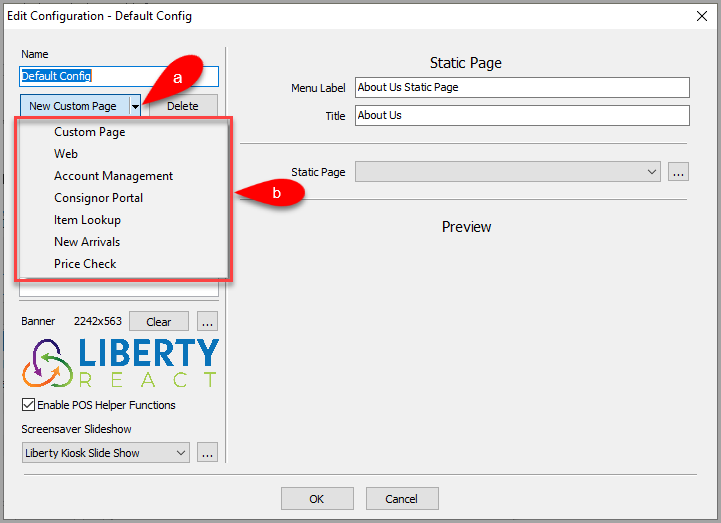
5.You can now configure the Web feature which will add a panel within the Liberty Kiosk App.
Note: You can have more than one Web panel showcasing different web sites you would like your consignors to view from the Liberty Kiosk App.
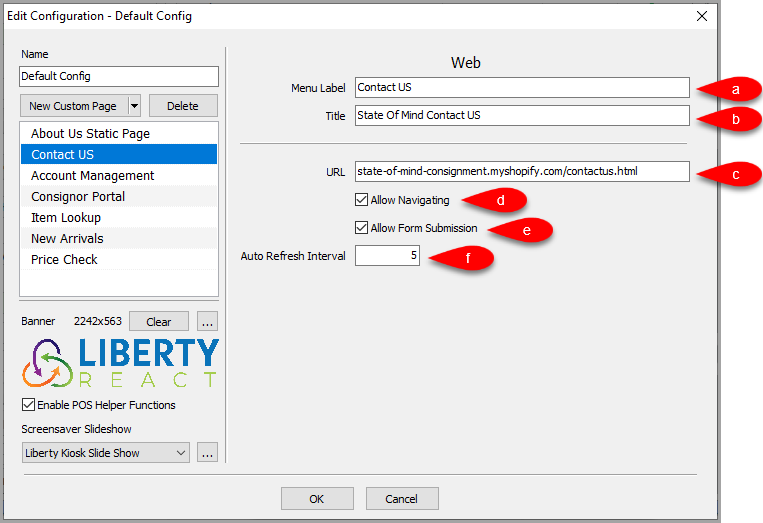
a.Menu Label: This is the feature menu label that appears in the Liberty Kiosk App 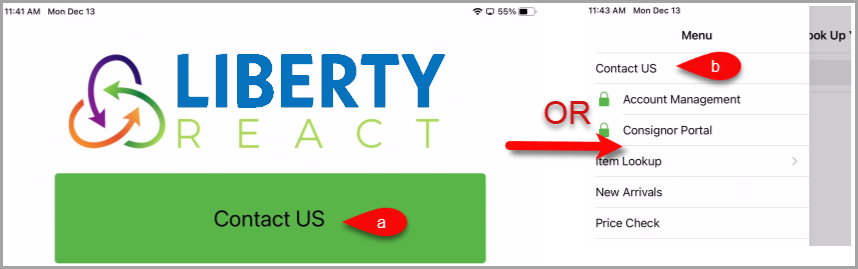
b.Title: Title of the page when shown in the Liberty Kiosk App.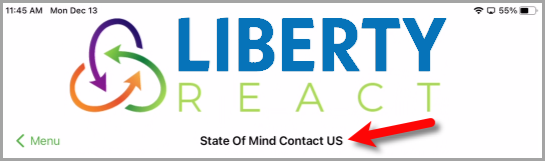
c.URL: The web address of the web page you wish to display in the Liberty Kiosk App for this panel.
d.Allow Navigating: Controls whether you want the user to be able to tap on navigation items like Web Links or if you want the page to remain static for this panel.
e.Allow Form Submission: Allows a user to interact with a web form submission button, if this is a form that allows the user to submit information. An example would be like a Contact Us submission form.
f.Auto Refresh Interval: The time in minutes to refresh a web page. This is useful if you are using a page that has new content often.
Next Article:
Next, you can add the Account Management feature to the Liberty Kiosk app.
Please click on the following link to continue:
Account Management Feature
Related Topics
Custom Page / Static Page Feature
POS Resale Rewards Kiosk Connect