Consignor Portal Feature
The following video chapter contains setup information on this topic:
https://www.youtube.com/watch?v=bm9YPwazle0&t=410s
1.Open Liberty and then click Setup and then Liberty Mobile Admin. 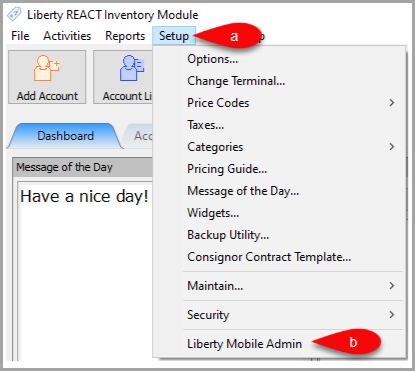
2.Click Maintain and then Kiosk Configurations. 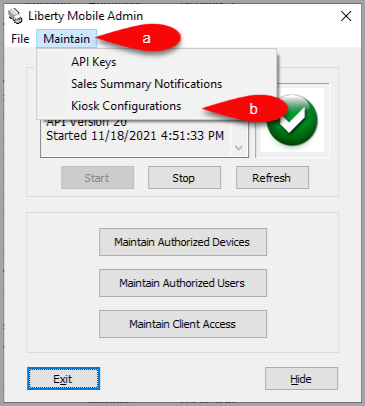
3.Select the Configuration you want to edit and then click the Edit button. 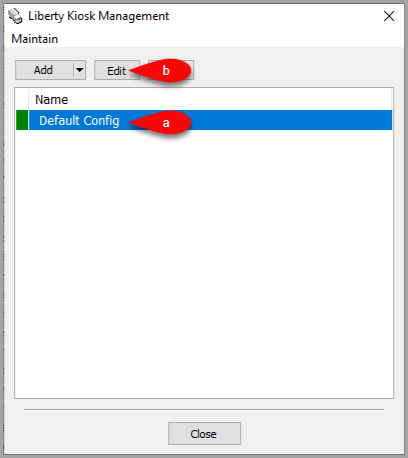
4.Click the dropdown for New Custom Page, then select the Consignor Portal option. 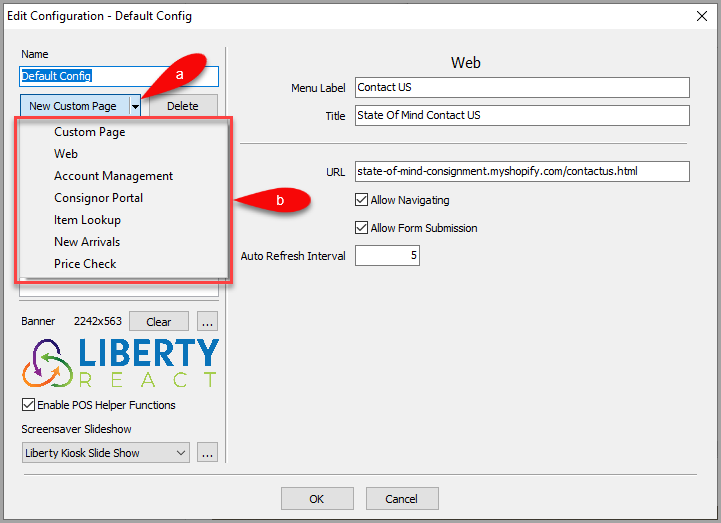
5.You can now configure the Consignor Portal feature which will add a panel within the Liberty Kiosk App.
You can check or uncheck the section header boxes to set whether you want the section to appear in the Panel. 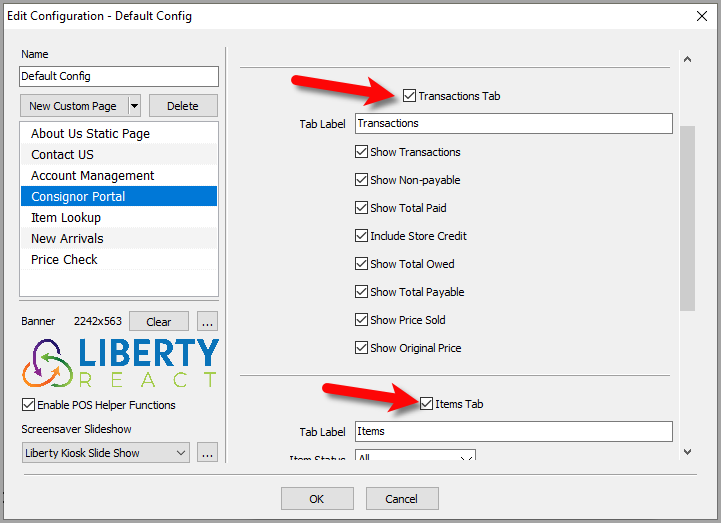
6.Here is part 1 of the options you can change for the Consignor Portal feature. 
a.Menu Label: This is the feature menu label that appears in the Liberty Kiosk App 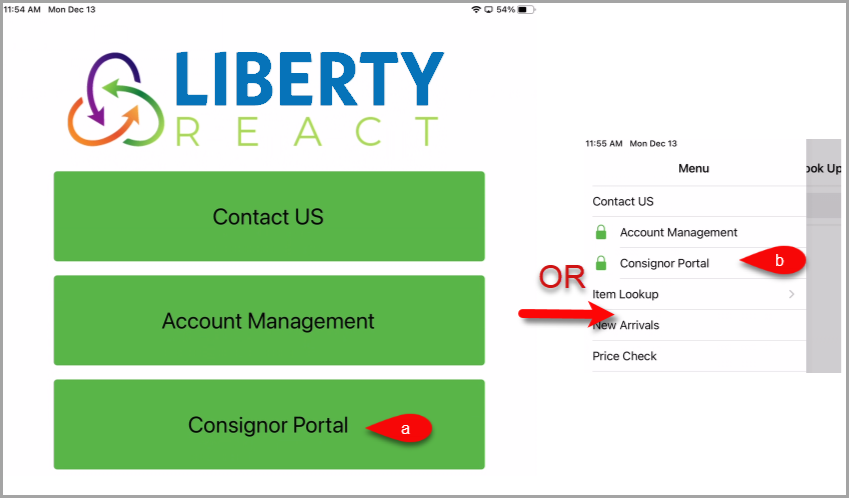
b.Title: Title of the page when shown in the Liberty Kiosk App.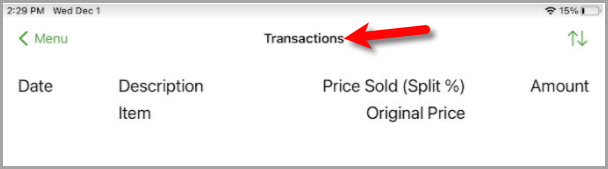
c.Use Web Configuration: Enabling this option will allow the Liberty Kiosk app to use the same configurations as the stand alone Consignor Login and Shopify Consignor Login web features. The options for these web features can be accessed and edited by visiting the https://my.resaleworld.com website.
d.Transactions Tab: Controls whether you want to see the Transactions section.
e.Tab Label: Allows you to customize the Label for the Transactions section.
f.Show Transaction: Controls whether to show individual transactions as opposed to just a summary with totals.
g.Show Non-Payable: Controls whether to display non-payable transactions as well as transactions that are not-yet payable.
h.Show Total Paid: Controls whether to show total paid to date.
i.Include Store Credit: Controls whether to include used store credit in the total payable amount.
j.Show Total Owed: Controls whether to display a summary of total owed, which included all non-payable or not-yet-payable transactions.
k.Show Total Payable: Controls whether to display a summary for total payable, which excludes all non-payable transactions as well as yet-to-be paid transactions.
l.Show Price Sold: Controls whether to display the price sold on the transactions list.
7.Here is part 2 of the options you can change for the Consignor Portal feature. 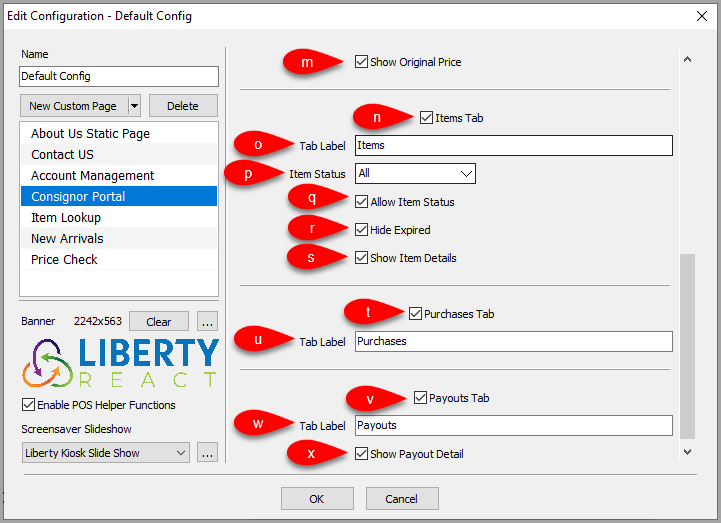
m.Show Original Price: Shows the original (non-markdown) price on the transactions list.
n.Items Tab: Controls whether the Item Tab appears in the Liberty Kiosk app under consignor portal.
o.Tab Label: Allows you to customize the Label for the Items section.
p.Item Status: Specifies whether to show All items, Available items only or Unavailable items only.
q.Allow Item Status: Allows the Consignor/Customer to change the status filter.
r.Hide Expired: Hides available items that are past their expiration date.
s.Show Item Details: Allow clicking on the product to view details.
t.Purchases Tab: Controls whether the Purchases Tab appears in the Liberty Kiosk app under consignor portal.
u.Tab Label: Allows you to customize the Label for the Purchases section.
v.Payouts Tab: Controls whether the Payouts Tab appears in the Liberty Kiosk app under consignor portal.
w.Tab Label: Allows you to customize the Label for the Payouts section.
x.Show Payout Detail: Allow customers to view the Payout Details.
8.Here are some examples of what the consignor’s can see for Account Management on the Liberty Kiosk App:
a.If the consignor has not signed in before, they will be prompted to sign in. 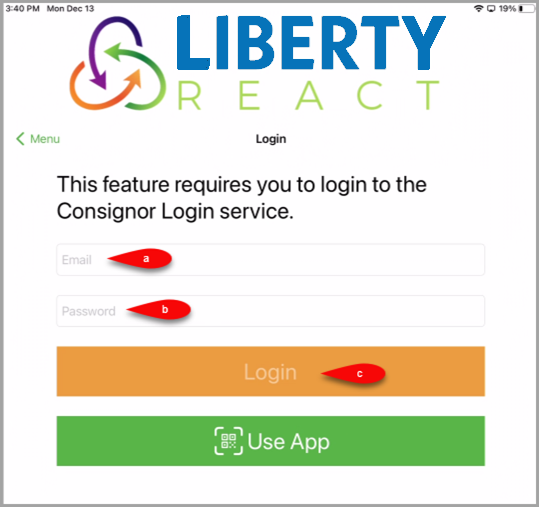
b.If the customer has the Consignor Login app pulled up on their phone, they can select Use App to sign into their account.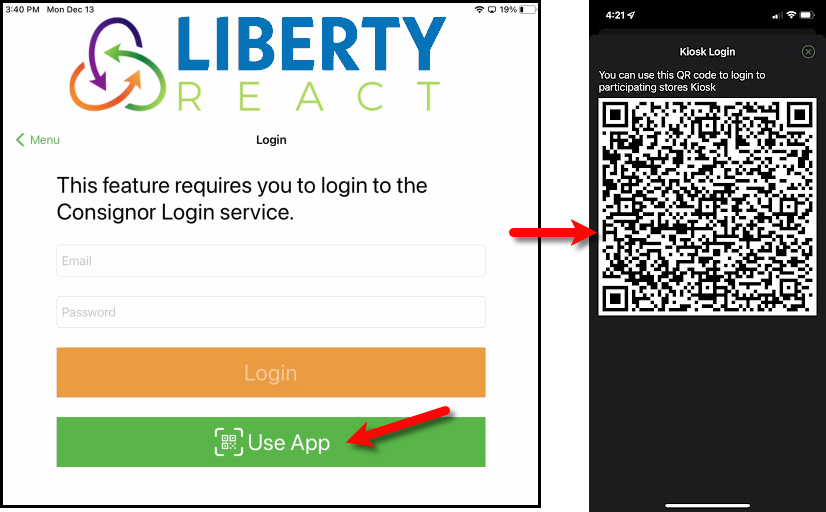
c.Once signed in, they can see everything similar to what they would see on the consignor login page. 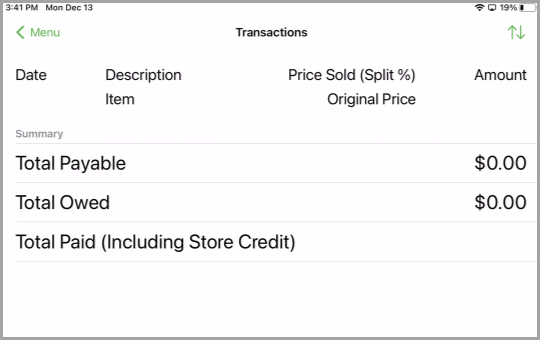
Next Article:
We are now ready to add the Item Lookup feature to the Liberty Kiosk app.
Click the following link to continue:
Item Lookup Feature
Related Topics
Custom Page / Static Page Feature
POS Resale Rewards Kiosk Connect