Liberty Point of Sale Overview
Items sold to customers who are present in your place of business are posted using Point of Sale (POS). See the sections covering the Listing Manager Manager for information on handling online sales.
The term posting refers to marking an item as sold, recording the date of the sale, price of the sale, net amount to be paid to the consignor, etc. If an item is not posted, the consignor will not be paid.
Before using Point of Sale it is helpful to set up and customize Liberty Point of Sale for maximum efficiency. Please see the section entitled Set Up Checklists for more details.
The most efficient way to post a sale is to use a barcode reader to scan the barcode printed on the price tag. We recommend using a barcode reader for posting sales for two reasons. First, it's much faster and easier than entering the information by hand. Second, a barcode reader eliminates the opportunity to make errors when posting. barcode readers are rated to one error per 100,000 scans or better.
If you choose not to use a barcode reader, or need to post an item and the barcode reader is unable to successfully scan the barcode, you may type in the account number and item number listed on the price tag.
Example: Account number 245 has consigned this item and the number of the item to be sold is 10 so type in the item as 245-10.
Note: Liberty REACT Comes Configured to work with and without touchscreen capability.
General Functionalities Of The Point Of Sale (POS)
Using PoS it is Possible (Though Not Required) To Do Many Things, Including But Not Limited To:
●Scan barcodes printed on price tags and price labels by Liberty.
●Scan UPC barcodes for retail items.
●Post sales at full or reduced price.
●Accept and track payments of any type (Cash, Check, Visa, Master Card, Coupons, etc.).
●Refund sales.
●Post items and/or entire sales as tax exempt.
●Choose a customer for purchases.
●Print receipts.
●Operate an electronic cash drawer and manage the money it contains.
Some Additional Important Information About PoS
●There are special reports for analyzing information developed using POS. Particularly useful are the End of Day Sales Detail and End of Day Payment Detail reports. Please see Liberty Reports Overview for more information.
●Point of Sale can be run on multiple workstations simultaneously.
●While recommended, using POS does not require printing a receipt.
●While recommended, using POS does not require operating a cash drawer, nor managing cash drawer balances.
●While recommended, using POS does not require tracking customer purchases.
●Items may be posted as Returned (to the consignor), Donated, etc., however, the Post Sales routine is used to accomplish this task, not POS. See the section entitled Post a Return or Donation for more information.
Point Of Sale Layout
The top section of the POS screen deals with adding an account to a sale. The Customer button allows you to open a search box to select the customer you need to add to the sale. The Edit button allows you to edit the details of the customers account. The Notes button allows you to view the notes of the account. The Redeem button allows you to redeem rewards points for the account. See Rewards Plans for more details.
The upper left box displays the details of the items added for purchase.
The middle left section shows the breakdown of the amount due for the sale.
The lower left box shows the details of the payments
The bottom section shows the amount still due and the amount being paid.
The very bottom of the POS shows the Cashier that will ring up the sale, the Terminal Id, and the person the sales is credited to if you do commission.
The Entry Field is where you will either scan the barcodes of the items, or enter them via Account-Item number. The field also indicates the Posting Mode you are in.
Selecting the Clear button will clear out any data entered into the Entry Field.
Selecting the Item button will allow you to search for an item.
Selecting the Fee button will open a sub-menu of fees to charge to a customer.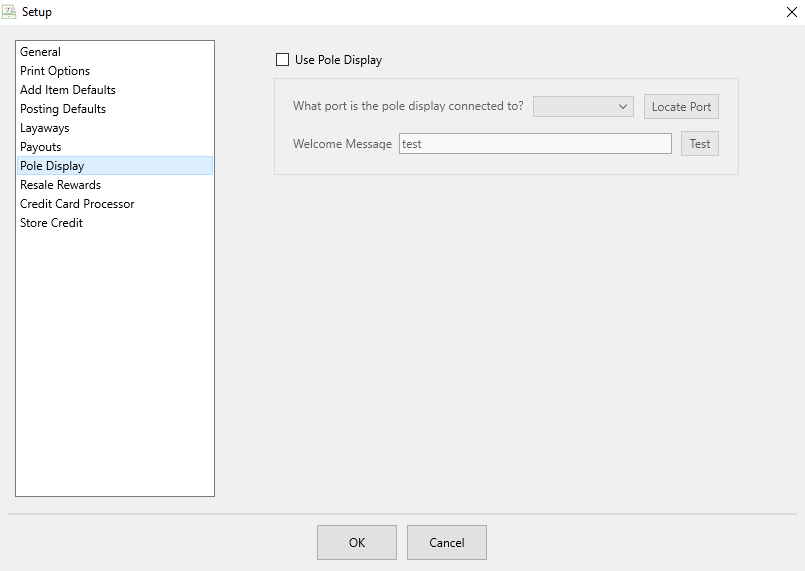
Selecting the Refund button allows you to start the refund process.
Selecting the Coupon button will provide a sub-menu of different coupons you can apply to the sale.
Selecting the PLU button will give you a list of commonly sold items that can be accessed quickly for selling.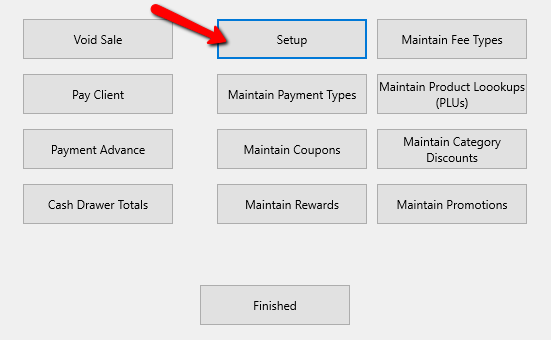
The Number Pad buttons are there for Touch Screen Users.
Payment Type buttons can be found in the middle section under the Number Pad. The POS can display up to 9 payment type buttons by default. If you have more than 8 payment types, the rest can be found by pressing the More… button.
The Notes box can be used to add a special not to the sale.
The Posting Mode buttons can be used to change between different posting modes for the sales.
Select the Add Item button to quickly add an item to the POS.
Use the Check Gift Card button to check the remaining balance on a Gift Card.
Select the Deliver: Pickup button to enter in the delivery information if items in this sale are to be delivered or picked up by the customer.
Select the Tax Exempt button to make a sale Tax Exempt.
Select the What Promotion button for tracking promotion purposes
Select the Change Salesperson button for tracking the sales to a sales person for commission purposes. 
Select the More button to access a Sub-menu of other POS Options such as Set Posting Date, Setup, Remote Assistance and Rewards Summary.