Changing The Picked Status Of An Item Within Fulfillment Sub-Tab
1.Open the Listing Manager and navigate to the Orders tab. Most of the orders you will be working with will be under the Paid Orders sub tab but you can access fulfillment from any sub tab. Change the date range under the Ordered Within drop down to select the period of time you wish to work with. Then Double-Click on the order you want to Fulfill.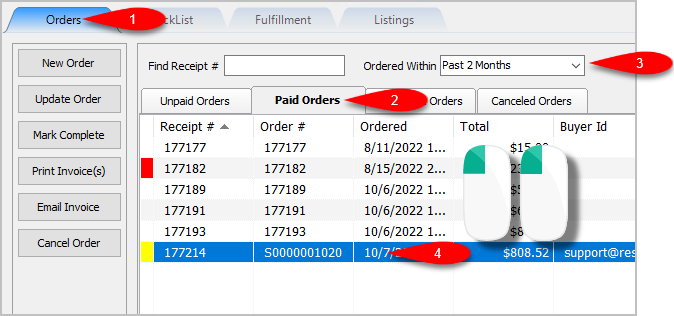
2.You will now have access to the Fulfillment sub-tab of an order. 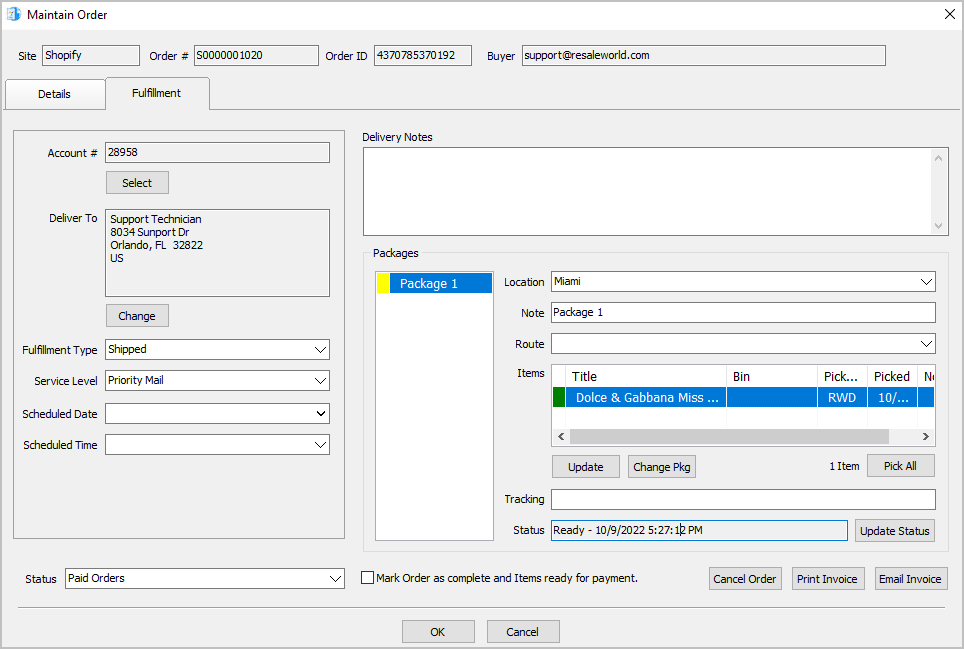
3.If the items have not been picked yet (indicated by a Red box), you can Update the item by first selecting the item you want to pick in this list and then clicking the Update button. 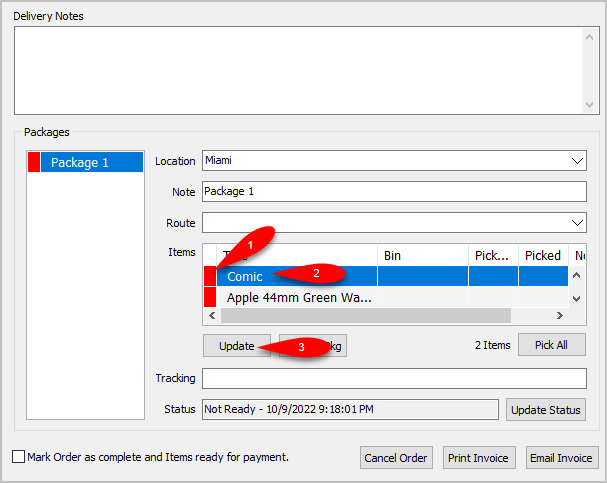
4.You will see an Update Package Detail box. You can update which Bin you want the item assigned to, as well as add a Note to the item before clicking the Pick Now button. Then click the OK button. 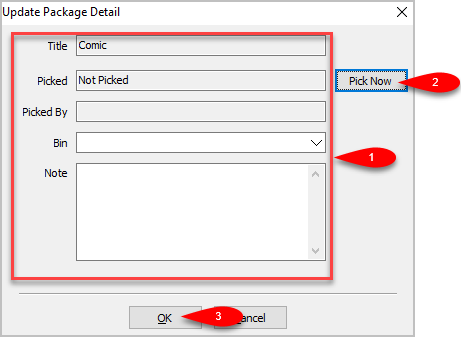
5.The single item will have a Green indicator to show that it has been successfully Picked. 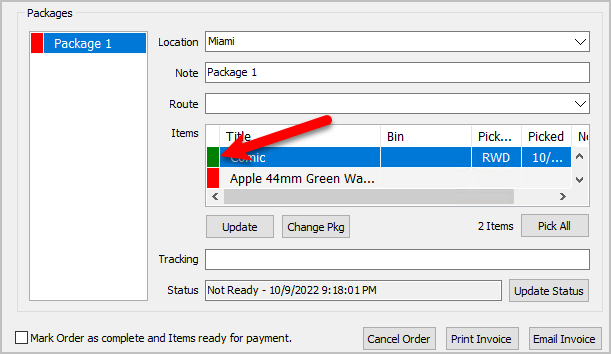
6.Alternatively, if there is more than one item that has not been Picked, you can click the Pick All button if you have found and sorted all the items that were part of the Web Order. 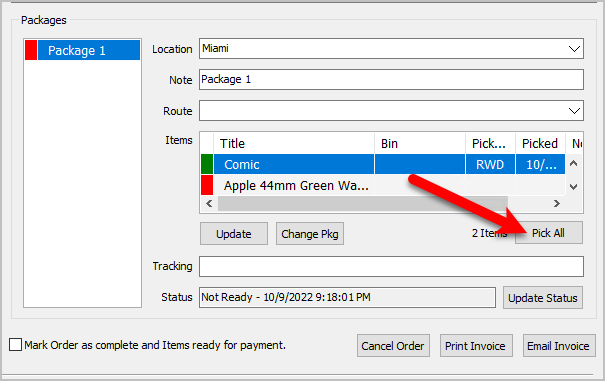
7.You will see a Pick All dialog box come up. You can select which Bin you want to sort the Picked items to and then click the OK button. 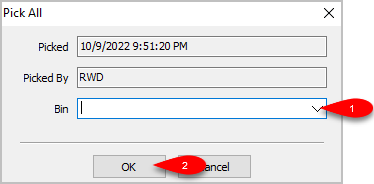
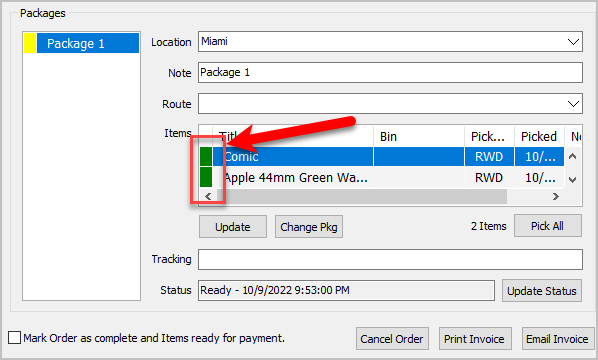
8.All items that originally had a Red indicator and were Not Picked, will now have a Green indicator and will show as Picked.
Related Topics
Fulfillment From The Order Tab Overview
Getting To The Fulfillment Sub-Tab From An Order
Changing The Account Used For the Fulfillment Of An Item
Changing the Shipping Address Of An Order To Be Fulfilled
Changing the Fulfillment Type and Schedule Details Of An Order
Adding Delivery Notes To An Order
Changing The Fulfillment Location Of An Order
Dealing With More Than One Package For The Fulfillment Of An Order
Changing The Delivery Route Of An Order
Adding The Tracking Number to Packages Within The Fulfillment Sub-Tab