Changing the Fulfillment Type and Schedule Details Of An Order
1.Open the Listing Manager and navigate to the Orders tab. Most of the orders you will be working with will be under the Paid Orders sub tab but you can access fulfillment from any sub tab. Change the date range under the Ordered Within drop down to select the period of time you wish to work with. Then Double-Click on the order you want to Fulfill.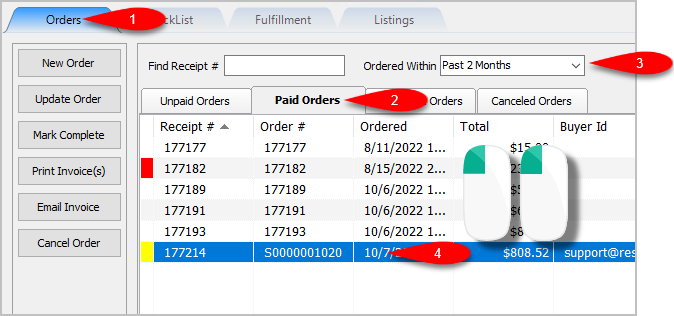
2.You will now have access to the Fulfillment sub-tab of an order. 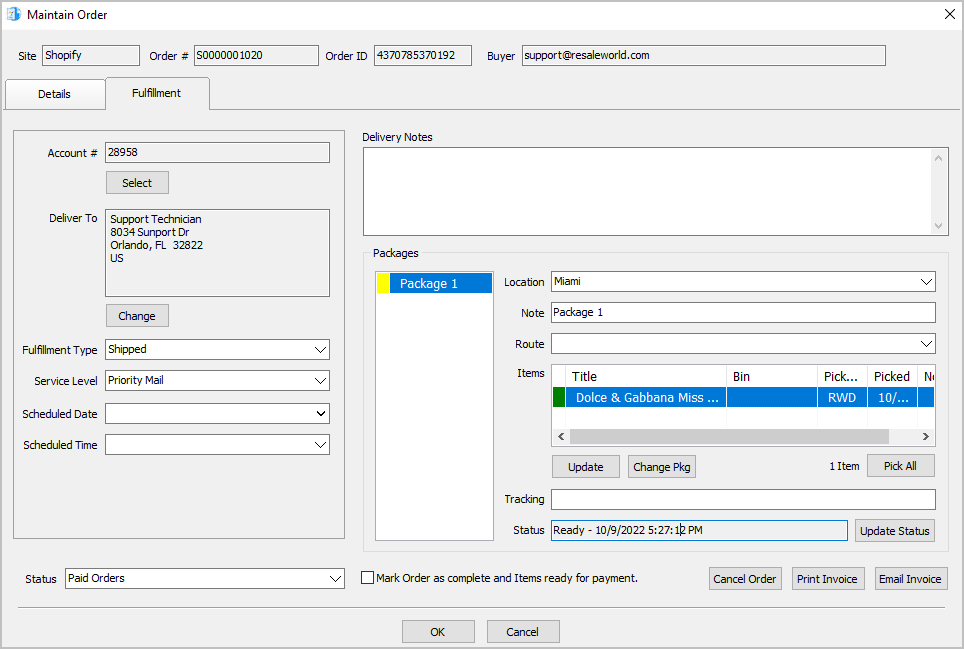
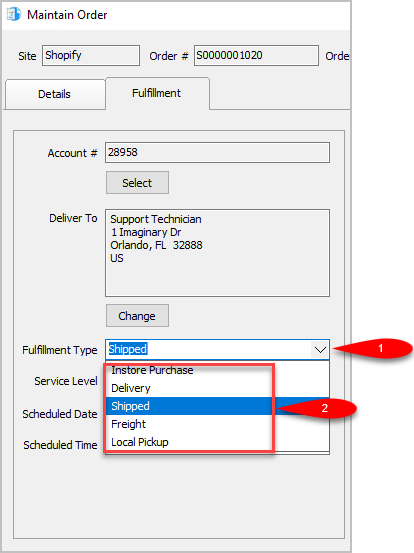
3.Set the Fulfillment Type to the status that matches how the item is going to be Fulfilled. For this example, we will select Shipped.
Note: You can use the types that are already built into Liberty Listing Manager or you can make your own by going to Settings > Maintain Fulfillment Status List.
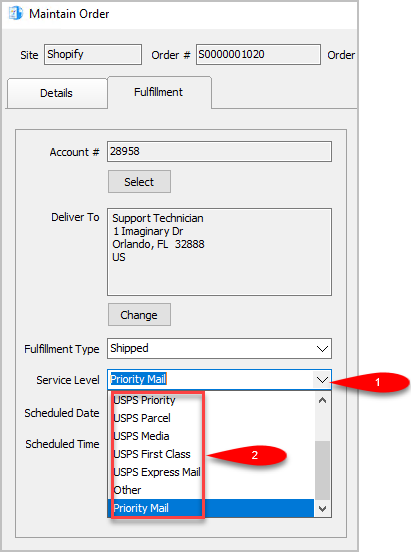
4.We can now change the Service Level as to what shipping service will be used for the order. The service level is not available if the Fulfillment Type is set to anything other than Shipped.
For this example, since we are setting the status to shipped we will select USPS Priority
Note: You can add your own Service Levels by going to Settings > Maintain Shipping Services
5.Scheduled Date can be used to set the date something will be Delivered, Purchased In Store or Shipped.
Simply click the drop-down and select the date. 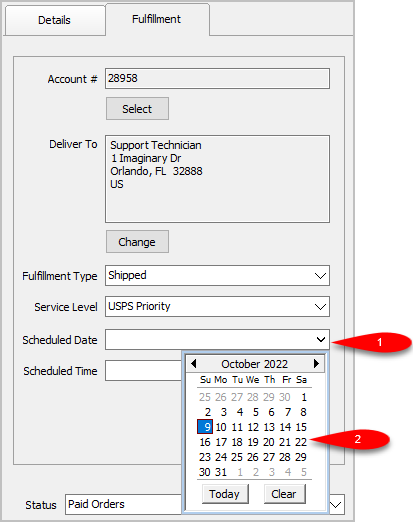
6.You can set the Scheduled Time. This drop-down will be empty until you create some entries by going to Settings > Maintain Delivery Times.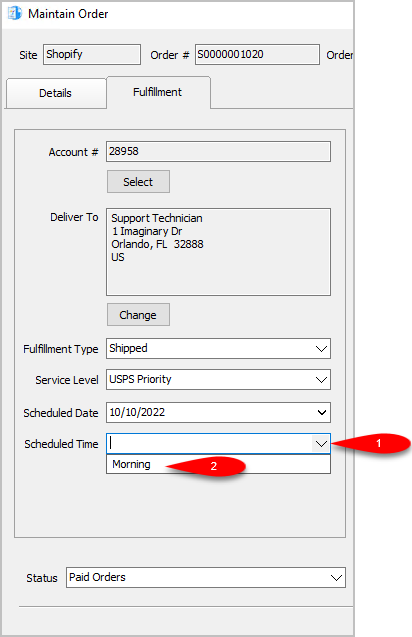
Related Topics
Fulfillment From The Order Tab Overview
Getting To The Fulfillment Sub-Tab From An Order
Changing The Account Used For the Fulfillment Of An Item
Changing the Shipping Address Of An Order To Be Fulfilled
Adding Delivery Notes To An Order
Changing The Fulfillment Location Of An Order
Dealing With More Than One Package For The Fulfillment Of An Order
Changing The Delivery Route Of An Order
Changing The Picked Status Of An Item Within Fulfillment Sub-Tab
Adding The Tracking Number to Packages Within The Fulfillment Sub-Tab
