Alternate Method: How To Scan Your Inventory Using The Opticon Scanner
This method of scanning inventory is for advanced users only. There is a larger room for error when utilizing this method because the software will not delete the barcodes off the scanner for you automatically.
This is really only if you would prefer the scanner software not automatically delete the barcodes off the scanner and want to have manual control over this process.
Resaleworld recommends the following article if you want to minimize any potential problems with accidental overage scans and prevent lost time trying to fix such issues:
How To Scan Your Inventory Using The Auto Mode and the Opticon Scanner
1.)Right click on any blank space on the desktop, click New and then click Folder. 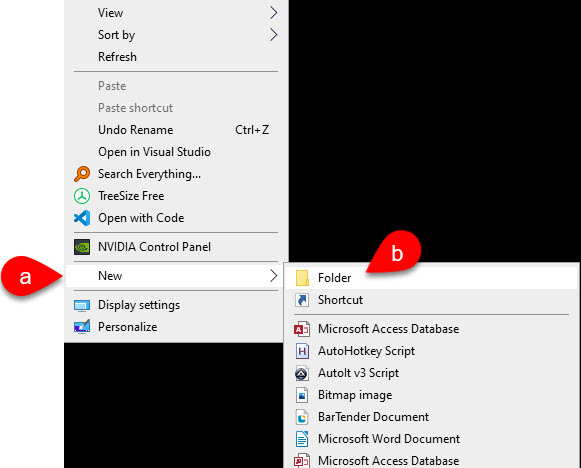
2.)For the name of the Folder, type Inventory Count Files.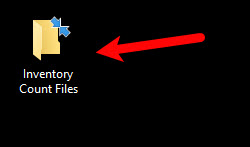
3.)Open the OPN utility that is now located on your desktop.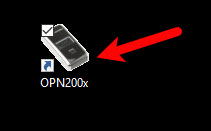
4.) There are a few things that you need to do to setup the utility so that you can do your first inventory scan.
a.)Checkmark the Save to file checkmark box.
b.)Uncheck everything under the Display area.
c.)Click on CSV bubble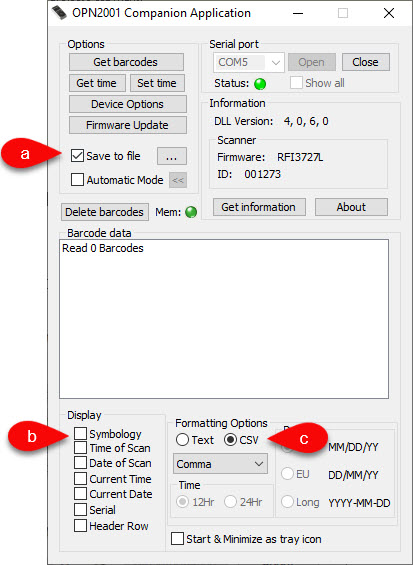
5.)For the actual scan process, you want to scan the store in quadrants. Do not try to scan the entire store with one scanner, in one run.
Simply press the main button on the Opticon when it is hovering over an item barcode. You will hear an audible confirmation that the item has been scanned. 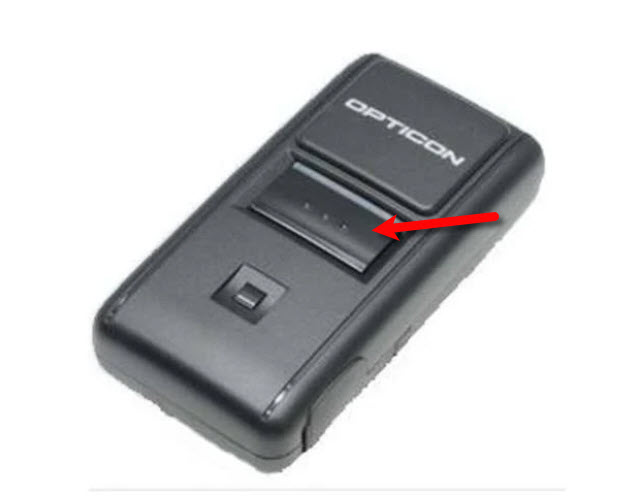
If you here more than one beep, then you have scanned an item too many times and you will need to use the smaller square button to re-scan the item. This will reduce the count by one for each scan. 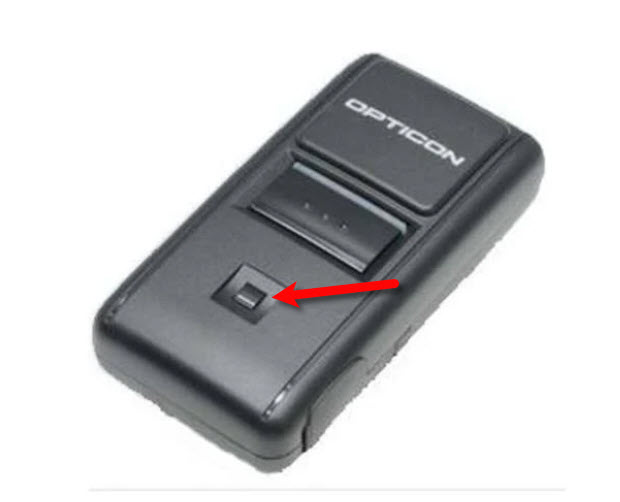
We recommend that if you have a large quantity of an item, that you scan each individual item, rather than the same item multiple times. This will prevent accidental over scans and under scans.
Once a scanner has been loaded with the barcodes, you may connect the scanner to the PC via the USB cable and reopen the OPN utility.
6.)Click the three dots to the right of save to file.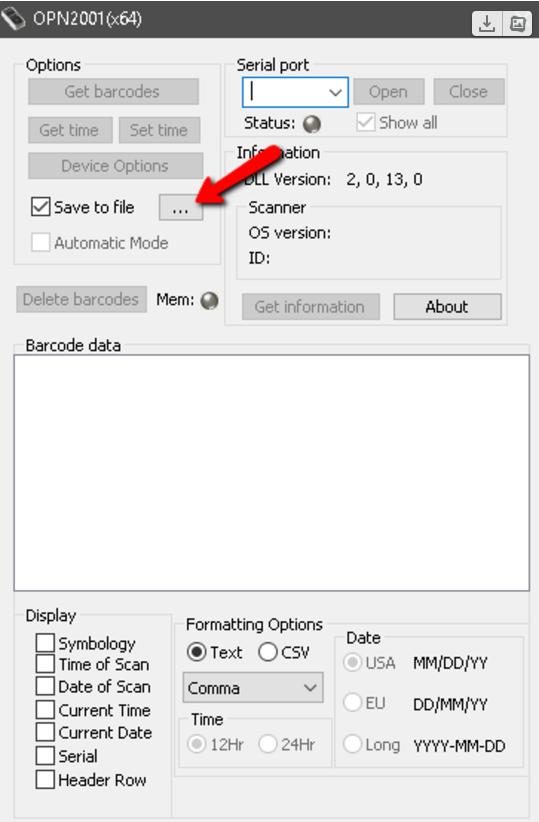
7.)Browse to the "Inventory Counts" file located on the desktop and double click on the file. This should lock in the folder to which the opticon scanner will create the .CSV files containing the barcodes.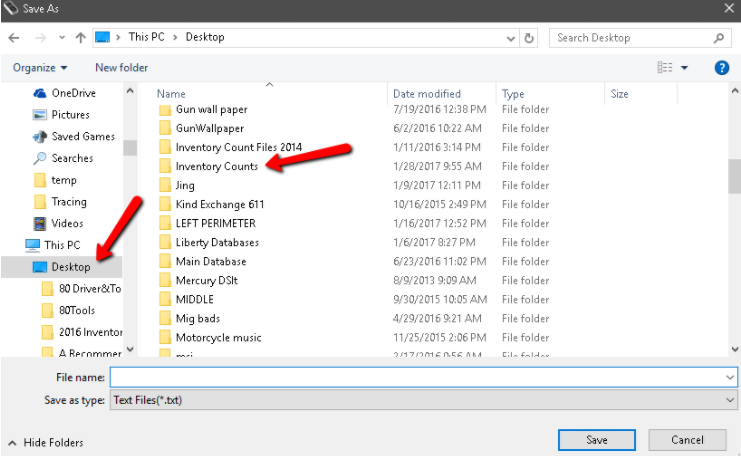
8.)Type the name of the section you have already scanned in the file name box below and click “Save”. The section will need to change each time you bring the scanner back after you are done scanning a particular area or quadrant.
Example "Shoes Section 1.csv"
9.)Keep in mind that clicking the “Save” button does not generate the actual barcode file, but indicates what you want the file to be named, when it is generated.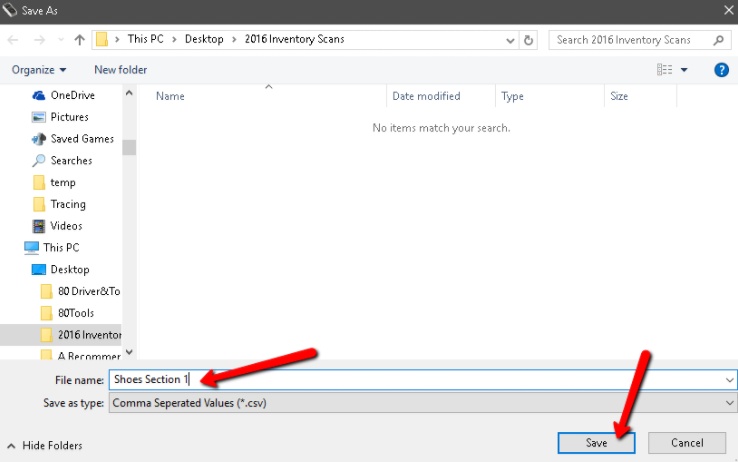
10.)Now click "Get Barcodes"
11.)This will generate the CSV file that you will need within the inventory counts file.
VERY IMPORTANT: You must now delete the barcodes so that the scanner doesn’t accidentally add the existing barcodes to the new scans you create for the next quadrant.
Note that the barcodes in the display box will not disappear when you delete the barcodes off of the scanner, this is normal as this is only a display.
You can then repeat this entire process of scanning the next area, hooking up the scanner to the PC when you are done, saving the next file name, scanning the barcodes and clicking get barcodes. 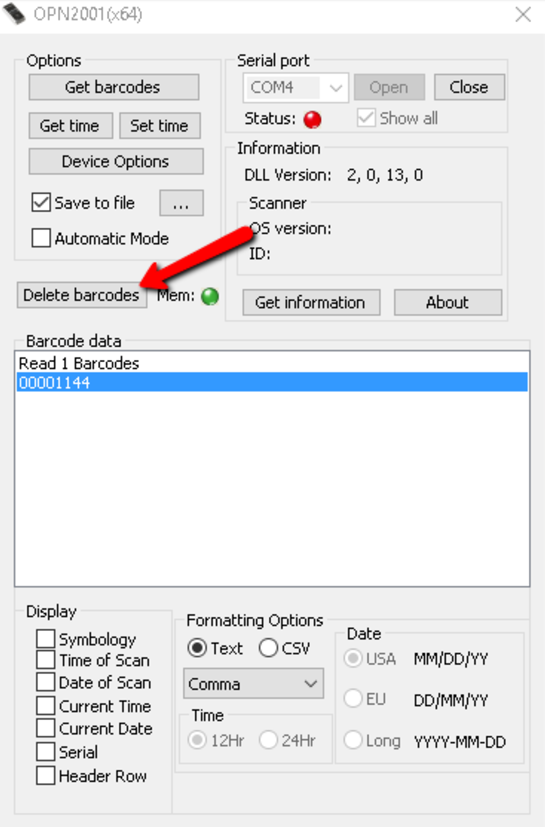
12.)Once you are done scanning the entire store, you are ready to view the Physical Inventory Getting Started Guide