How to Install a Zebra Tag Printer
1When installing the Printer Driver Utility, the correct drivers are placed in your RWD folder. We must now run this driver installer.
Click on the File Explorer icon located on your Taskbar.

2Open your C:\ drive by double-clicking on it.
3Open the RWD folder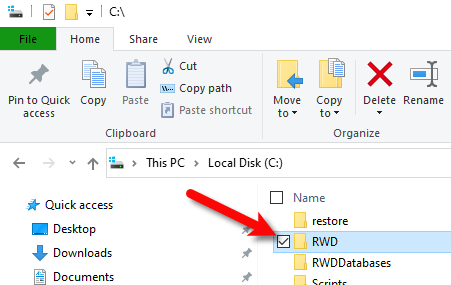
4Open the PrinterDrivers folder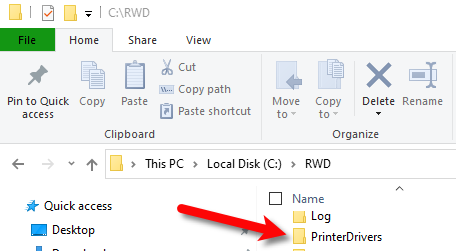
5Open the Drivers Folder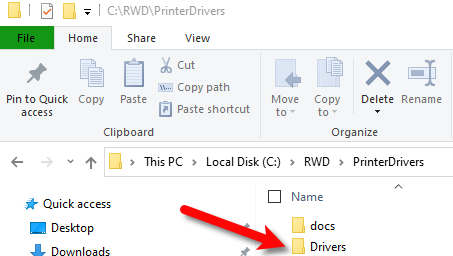
6Open the Zebra folder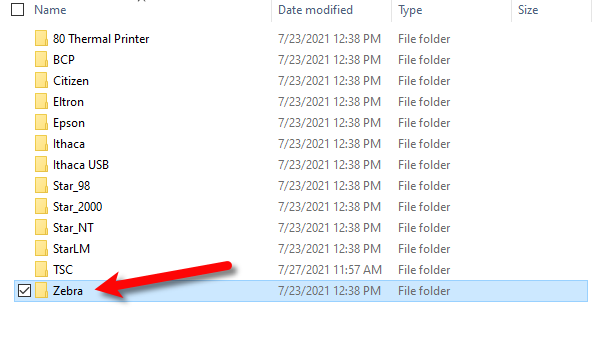
7Open the DriverWizard.exe by double-clicking on the program. 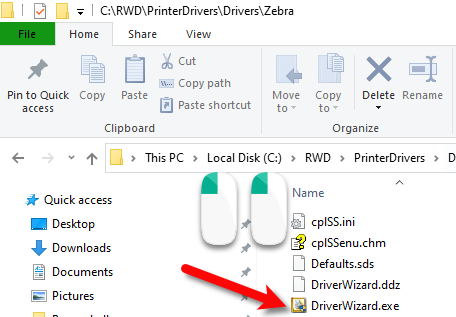
Alternatively, you can download and run the driver installer using the following link:
http://downloads.seagullscientific.com/drivers/archive/7.4/7.4.3/Zebra_7.4.3.exe
8Select I accept the terms in the license agreement and then click Next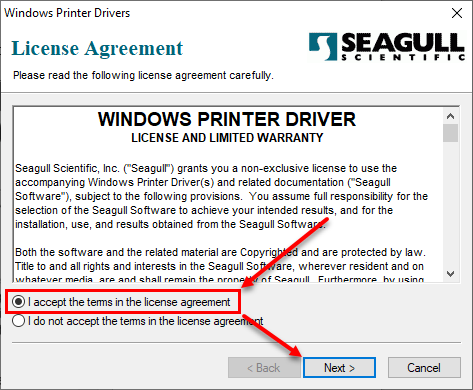
9Click on the Next button when the next dialog screen comes up.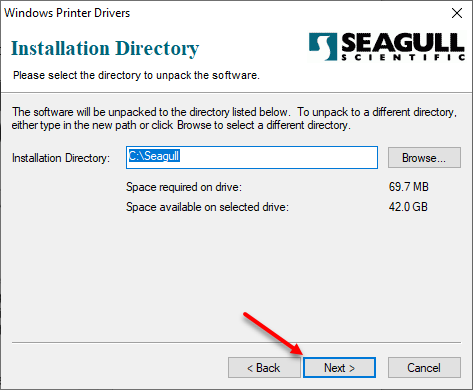
10Uncheck both Run Driver Wizard after unpacking drivers and Read installation instructions (contained in 'Installation_Instructions.html), then click the Finish button.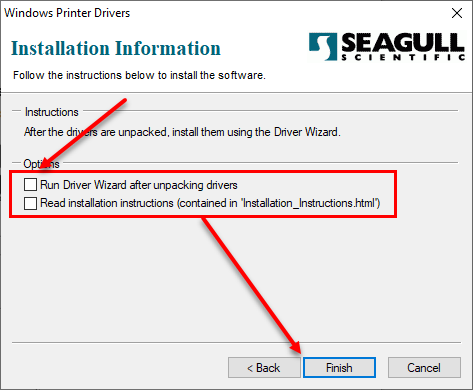
11Click the Windows search bar, then type “control panel”. Click on the Control Panel search result. 
12In Control Panel, click on Devices and Printers.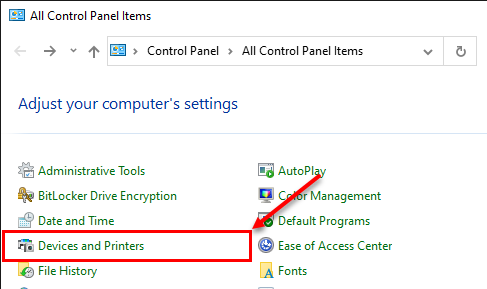
13Click the Add a printer option at the top left corner of the Devices and Printers window.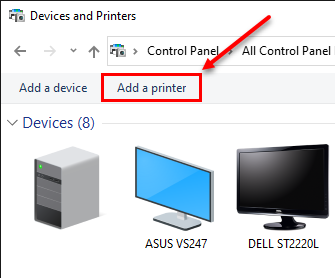
14Click “The printer that I want isn't listed” link at the bottom.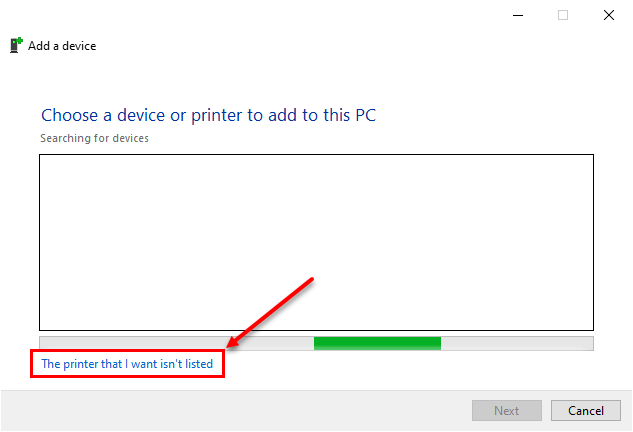
15Select the Add a local printer or network printer with manual settings option, then click Next.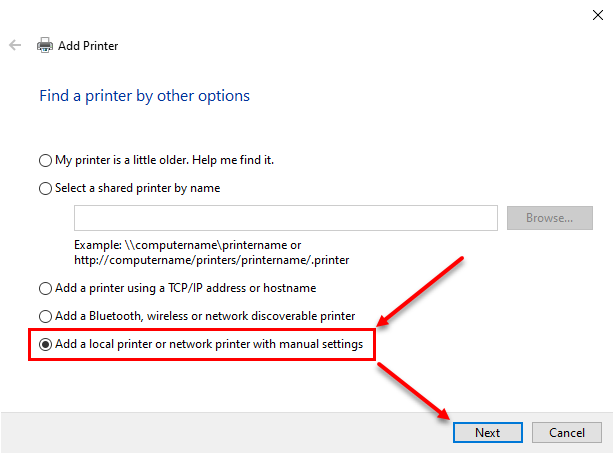
16Select Use an existing port, then click the drop down menu and select the VUSB port that is associated with the printer. Usually it is the last numbered port if you just plugged the printer in before any other printer.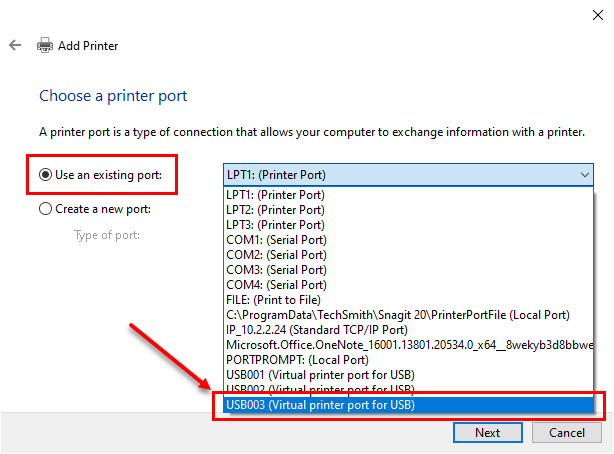
17Click the Next button.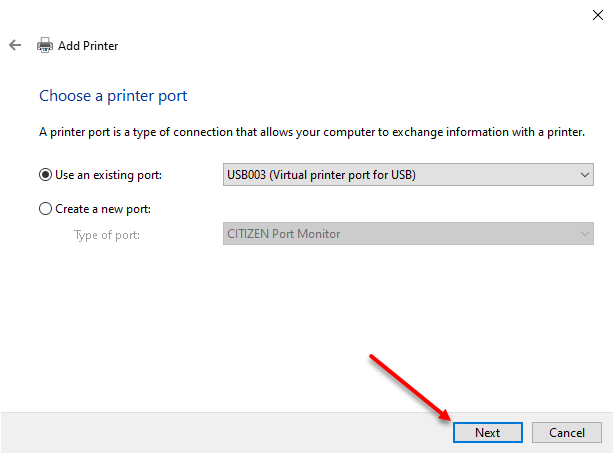
18Click the Have Disk button.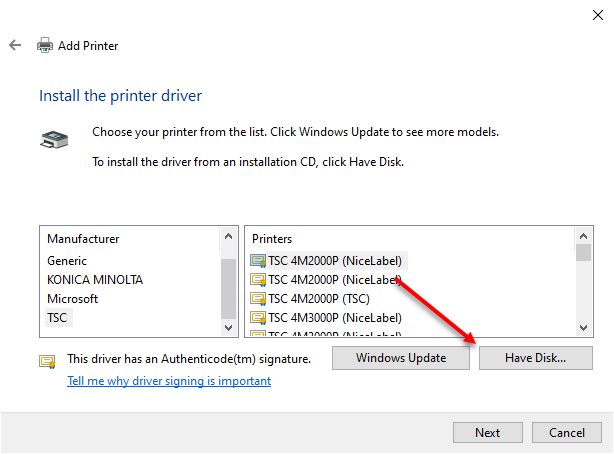
19Click the Browse button.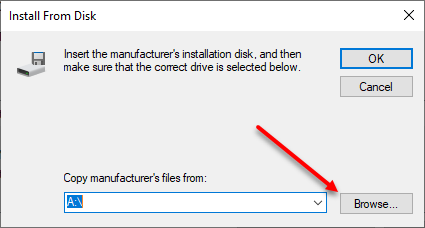
20Navigate to the C:\Seagull directory and then click and select the Zebra.inf file.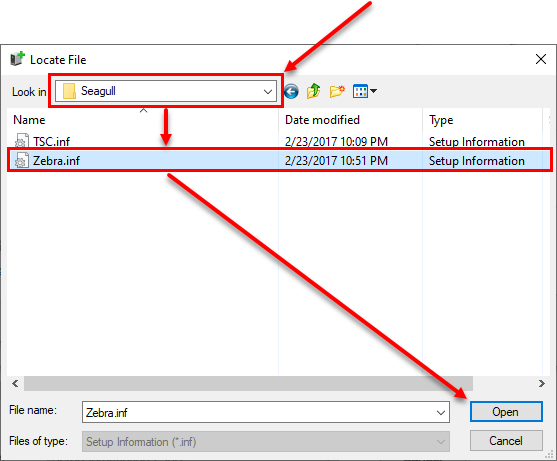
21Click the OK button.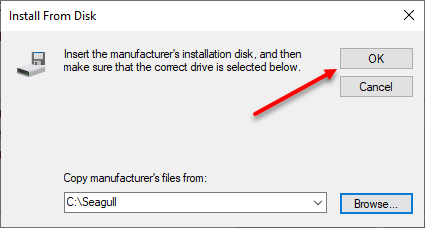
22Select the appropriate Zebra LP2844 model in the list. Then, click the Next button.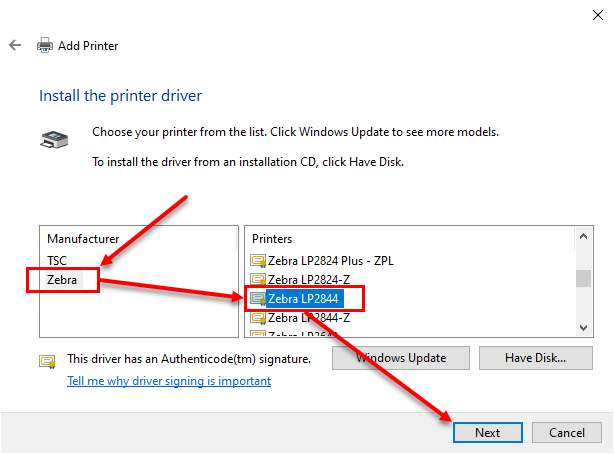
23If prompted, select Replace the current driver and then click the Next button. Otherwise skip this step as it is not applicable.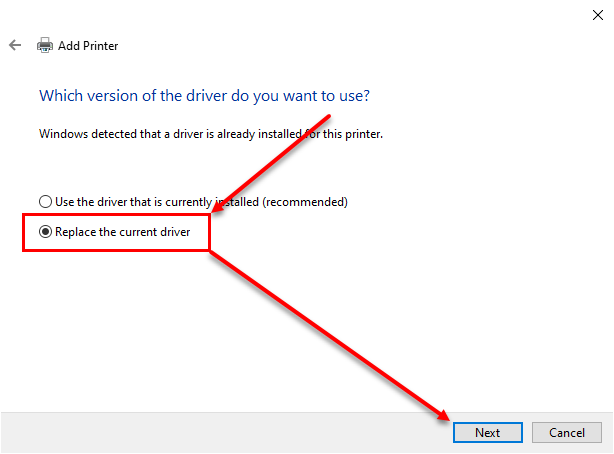
24Type the printer name you wish to use and then click the Next button.
25Select whether or not you wish to share the printer, by default we will select Do not share this printer and then click the Next button.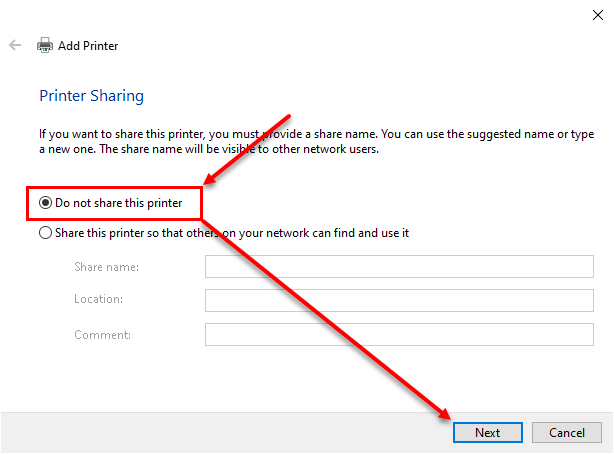
26Make sure Set as the default printer is unchecked. You can print a test page from here if you wish. Click the Finish button.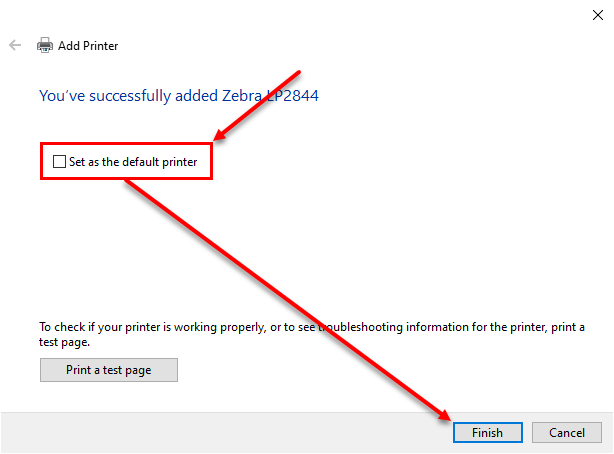
27Right click the Zebra LP2844 printer within Devices and Printers, then select Printing preferences. If you have more than one printer on that port, such as the irremovable ZDesigner driver, make sure to select the appropriate printer instance.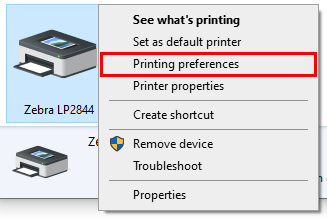
28Click on the Page Setup tab. Under Stock, select User (4.00 in x 4.00). Under Orientation, select Portrait 180.
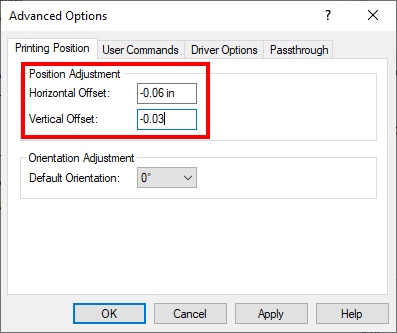
The tag formats have been updated, thus a Horizontal Offset of -0.06 and a Vertical Offset of -0.03 is no longer needed. If you are on an earlier version of Liberty, then these can be adjusted in Advanced Options. Click the Apply button once you are done.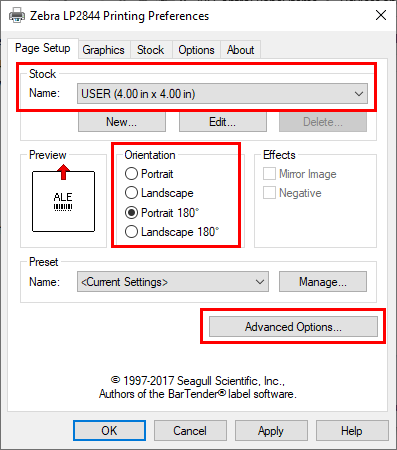
29Open the Liberty 5 Inventory Module and go to Setup > Options.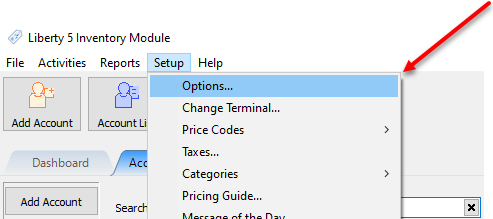
30Click on the Selected Tag Styles menu option.
Select the appropriate tag styles for your tag printer, depending on the type of tags you are printing from.
Click the OK button when finished.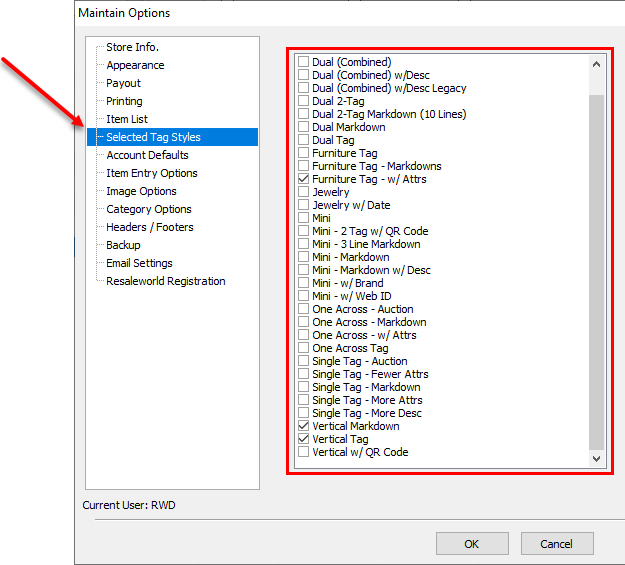
31Drop down the tag printer menu and select the tag printer you just installed. Click OK.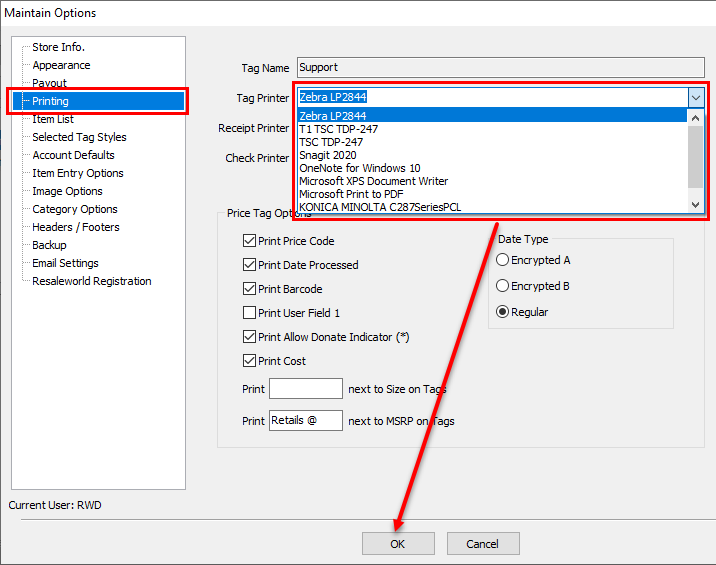
You must now print a tag to confirm everything is working properly.
If the printed tag does not appear correctly, you will need to adjust the offsets under Printing preferences > Advanced options of the printer driver in Control Panel.