Automatic Markdowns by Time Period
Use Markdowns by Time Period when you wish to automatically markdown the price of items based on time frame. To use Markdowns by Time Period the Price Code that this Markdown schedule is assigned to item(s).
Set Up Automatic Markdowns by Time Period
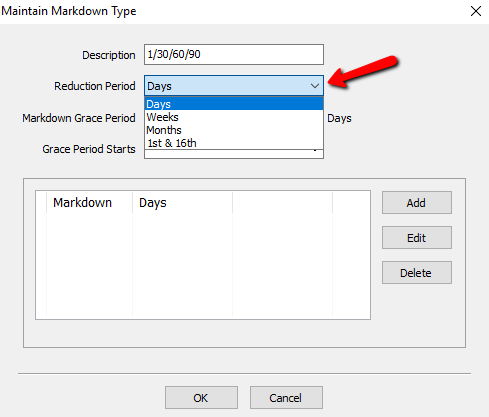
1.In the Liberty Inventory Module select the Setup > Price Codes > Markdowns
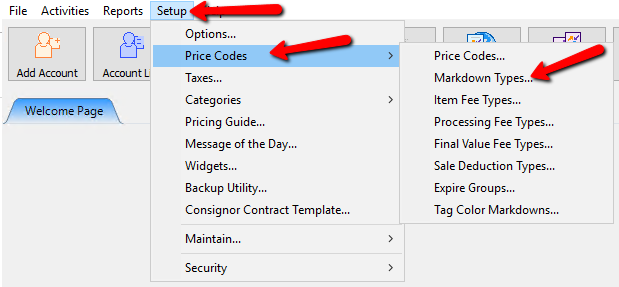
The Markdown types dialog Box will open.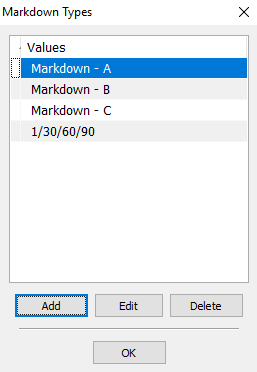
2.Selecting the Add or Edit buttons will open the details of a Markdown.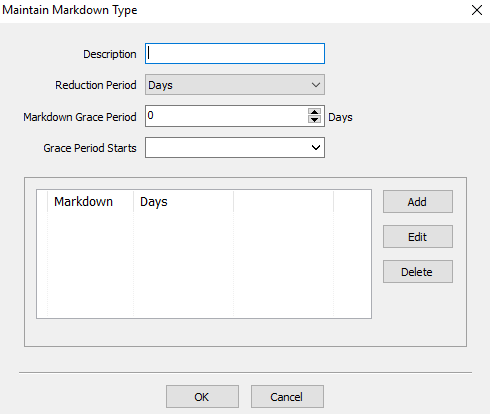
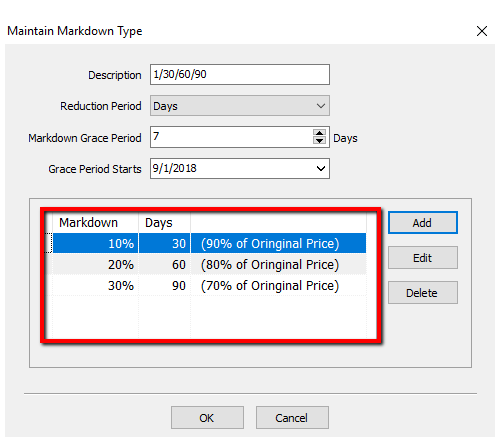
●Description : Enter the description for your Markdown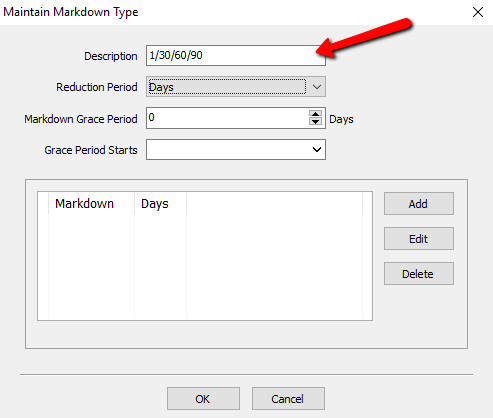
●Reduction Period : There are 4 choices for Reduction period.
○Days : With days, Day 1 is considered the Process Date of the item. When days are specified, remember that some months have more days than others, therefore, 90 days from May 15th is not August 15th.(Days, Weeks, Months 1st & 16th)
○Weeks : A week always begins on Sunday. Items Processed on a Sunday begin their first week that day. Week number one does not start for items Processed Monday thru Saturday until the first Sunday following the date the item is Processed.
○Months : A month always begins on the first day of the month. Items Processed on the first of a month will begin their markdown the next occurring month on the first. Otherwise, if an item was entered at any other day during the month, month number one of the markdown schedule will not start until the next full month has passed, then apply the next month on the first.
Example: The markdown schedule is set to "Months", with the first markdown period set to start the next full month. So, if Item A's Process Date is 2/1/2020, it will markdown on 3/1/2020. If Item B's Process Date is 2/14/2020, it will markdown on 4/1/2020, as the markdown starts the the first after the next full month from the Process Date.
○1st & 16th : With 1st & 16th the first Half Month begins on the next 1st or next 16th, whichever comes first. An item Processed on the 1st starts its first half month that same day. The same applies to an item marked as Processed on the 16th. Otherwise the first Half Month period does not begin until either the next 1st day of the month or the next 16th day of the month, whichever occurs first.
3.Markdown Grace Period : The Grace Period is is for when items on this markdown need more time on the floor either due to planned or unplanned circumstances. Enter in the amount of days your grace period will be in affect.
Example: There are items on the floor that have a 30 days, 60 days, 90 days markdown cycle. By Contract you agree to have those items on the floor for the full time of the contract, with equal exposure time on the floor before they markdown. Let’s assume the store closes for a week at the beginning of September for Summer Cleanup, and the store will be closed for 7 days. You would put 7 days in the Markdown Grace Period. This will stop the markdown on the Grace Period Starts date and freeze it, extending the period for 7 days, and starting back up on the 8th day.
So if there are items on the floor, and their markdown is for 30 days, 60 days, 90 days, and the first markdown would start on August 20th, then under normal circumstances the second markdown would start on September the 19th (31 days in August), and the third would start on October 19th. Since the store was closed for 7 days, then the remainder of the current markdown schedule will need to be extended 7 days.. So the second markdown will now start on the September 25th and the third will be October 25th.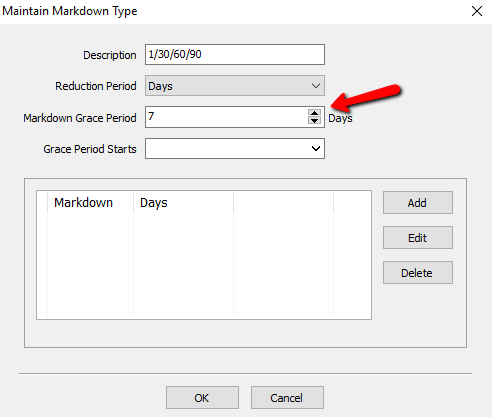
4.Grace Period Starts : This is the day your Grace Period will start. Select a date using the dropdown.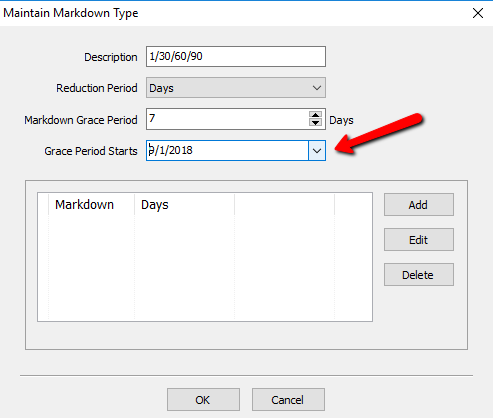
Selecting the Add button or Edit button will pull up the details of the markdown period. The delete button will delete the highlighted markdown details.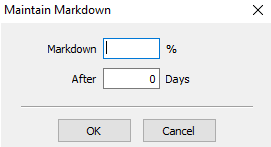
Markdown ___% : This is the amount you will want to take off.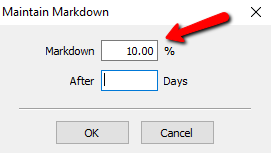
After ____ Days : This is the number of days to wait until the markdown is applied.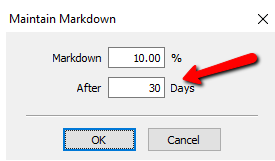
5.Press the OK button when done.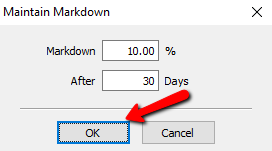
Note: Each consecutive markdown will be based from the original process date. 30 days, 60 days, 90 days. Not 30 days, then 30 days from that day, and 30 more days from the last day.
After selecting OK, you will see the markdown details.
6.Press the OK button when done.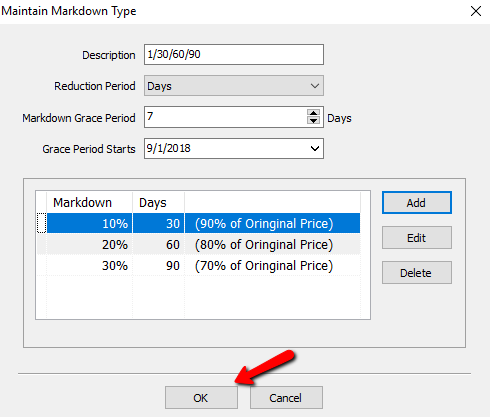
You will see your Markdown Type in the list. Press the OK button when done.
Associating Markdown with Price Code
1.In the Liberty Inventory Module select the Setup > Price Codes > Price Codes.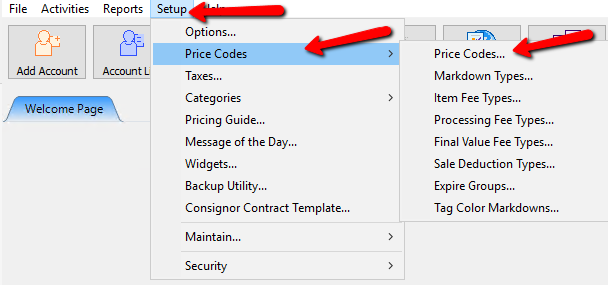
2.Select the price code you want to have the markdown schedule applied to, or click the Add button to create a new one. See Price Codes Overview for more details.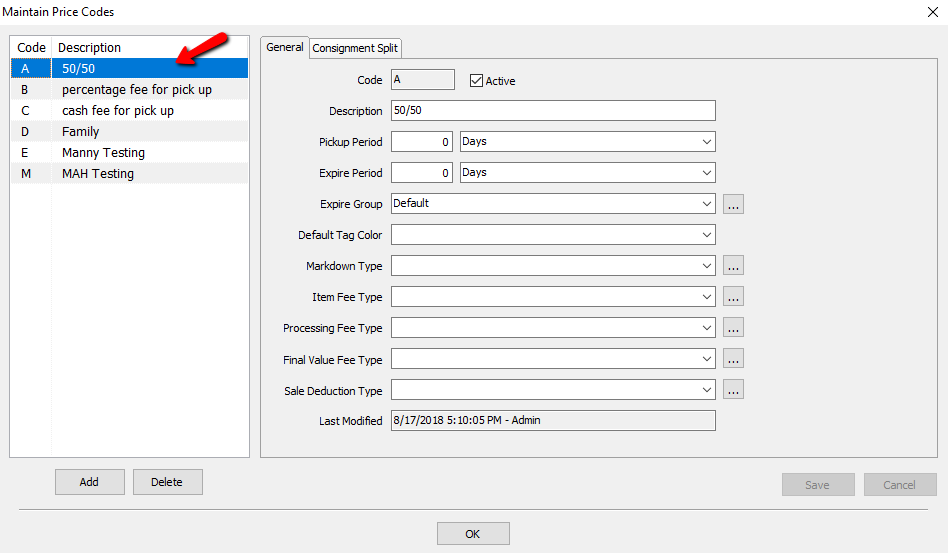
3.Click the down arrow to the right of the Markdown Type field and select the markdown you wish to apply.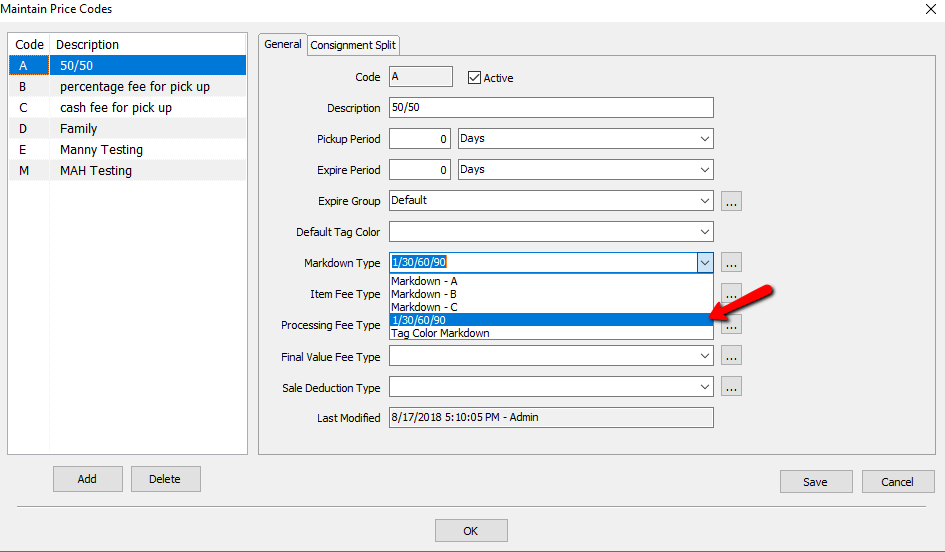
4.Click the OK button when done.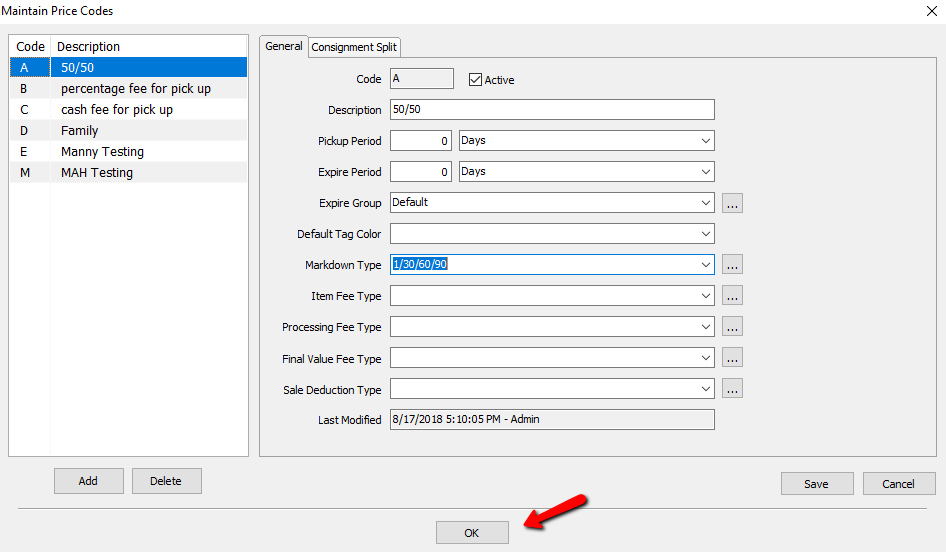
Note: The Price Code needs to be associated with the item for it’s properties to be implemented.
Definitions:
●Markdowns : Automatic price reduction based upon time, tag color, or calendar date.
●Price Code : Set of variables that determine markdowns, store/consignor split, pickup periods, item fees, listing fees, final value fees, sale deductions, and setting the expire period, pickup period, and expire group.
●Markdown Grace Period : Amount of time the markdown will be temporarily suspended.
●Grace Period Start : Calendar date the Markdown Grace Period starts.