Category Tag Types
It is possible to associate Categories with Tag Types. This will allow you to filter items groups of items to print based off of their Category in the Print Tags dialog.
1.First you will need to set up your Category Tag Types. To do this, navigate to Setup > Categories > Category Tag Types.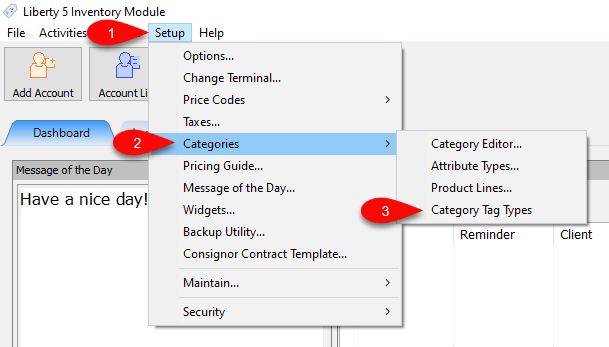
2.From there, the Maintain Tag Types dialog will appear. Here is where you can create and configure your Category Tag Types to be assigned to your Categories. To create a Category Tag Type, click Add.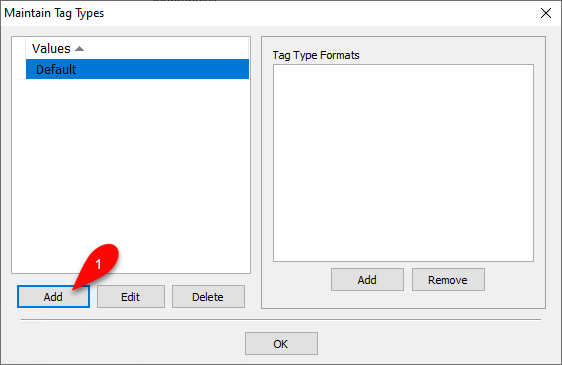
3.Then enter what you want to name the Category Tag Type.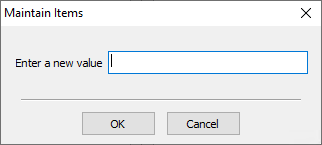
4.From here we need to add Tag Formats to our Category Tag Type. Select the Category Tag Type you created, and then on the right-hand side, click the Add option.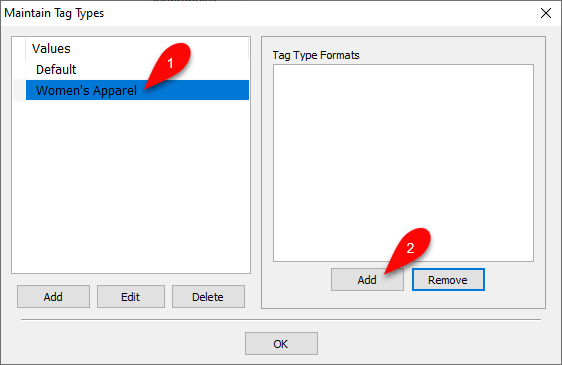
5.In the Select Tag Format dialog, highlight the desired tag types you wish to add to your newly created Category Tag Type by clicking each of them in the list.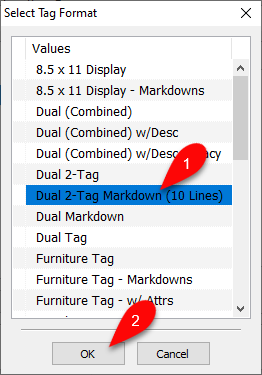
6.Notice it added the selected Tag Formats to the Tag Type Formats section on the right of the Maintain Tag Types dialog. Now click OK.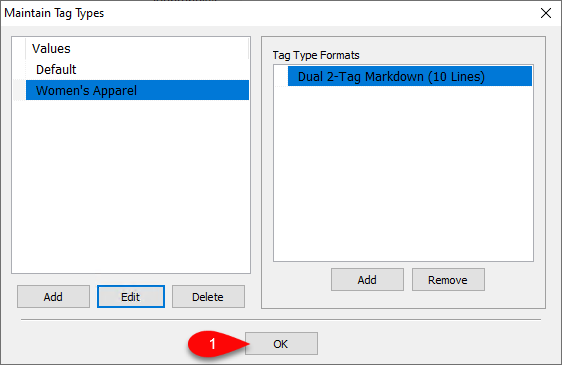
7.Next we need to assign the Category Tag Type to a Category. Navigate to Setup > Categories > Category Editor.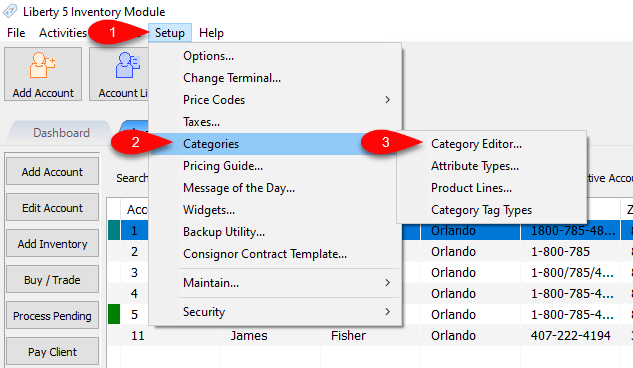
8.In the Category Editor, select the category in the tree you want to add the Category Tag Type to and then click Edit.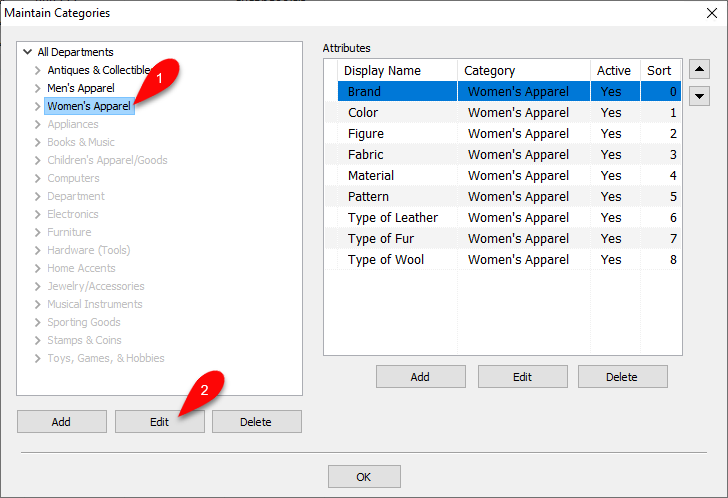
9.Then in the Tag Type drop down, select your newly created Category Tag Type and click OK.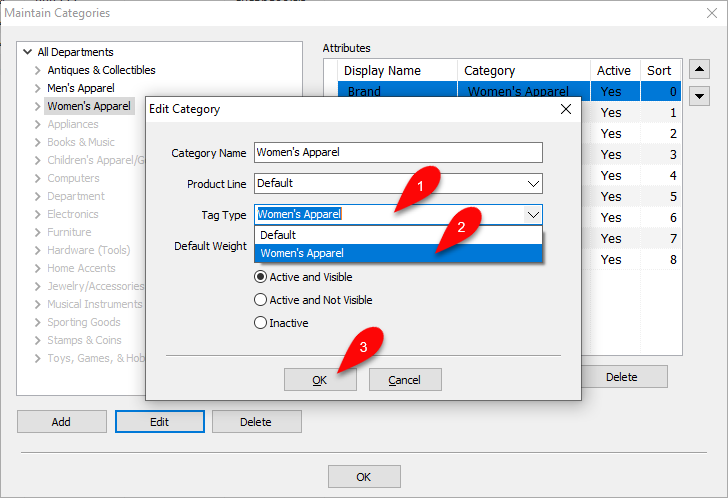
10.To use your newly created Category Tag Type, open the Print Tags dialog for an account you wish to print tags of a certain Category from. Then in the Print Tags dialog: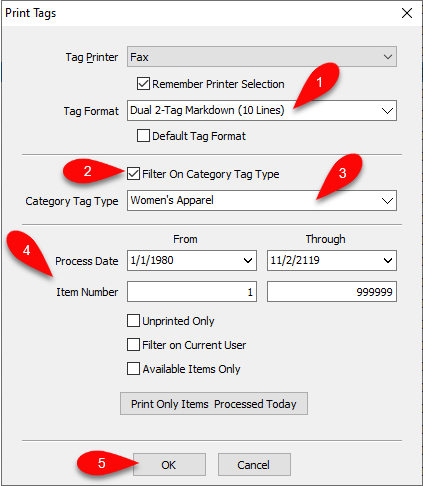
1.Select a Tag Format that is one of the formats you added to you Category Tag Type.
2.Check the Filter On Category Tag Type checkbox.
3.Select the desired Category Tag Type you wish to filter our items for that share a tag format with those designated in the selected Category Tag Type.
4.Specify a range of items, by Process Date and/or Item Number.
5.Then click OK to print tags for all items within the range specified, that are from the Categories that you assigned the selected Category Tag Type.
