Cancel Tag Printing
Sometime we attempt to print specific tags on an account and accidental select to print ALL the tags. Follow these steps to cancel the print job stuck in the print queue. It is assumed at this point you have either turned your printer off, or you have paused the print job by pressing the feed button on the printer.
Note: Once you have gone through the steps below, be sure to turn your printer back on, or to press the feed button if you just paused the print job.
Note: The steps below will clear out the tags in the print queue only. If there are tags queued up to print in the memory of the printer, there is no way to clear those out. You will simply have to let them run their course. This will usually result in about 15-20 tags being used.
Pro Tip: The steps below can be used for any printer. Tag, receipt or documents printers. Simply select the appropriate printer, and cancel the print job using the steps below.
To Cancel Tag Printing In Windows 10 Method 1
1.Click the Start button. (By default located in the lower left corner)
2.Click on the Settings Icon.
The Windows Settings screen will open.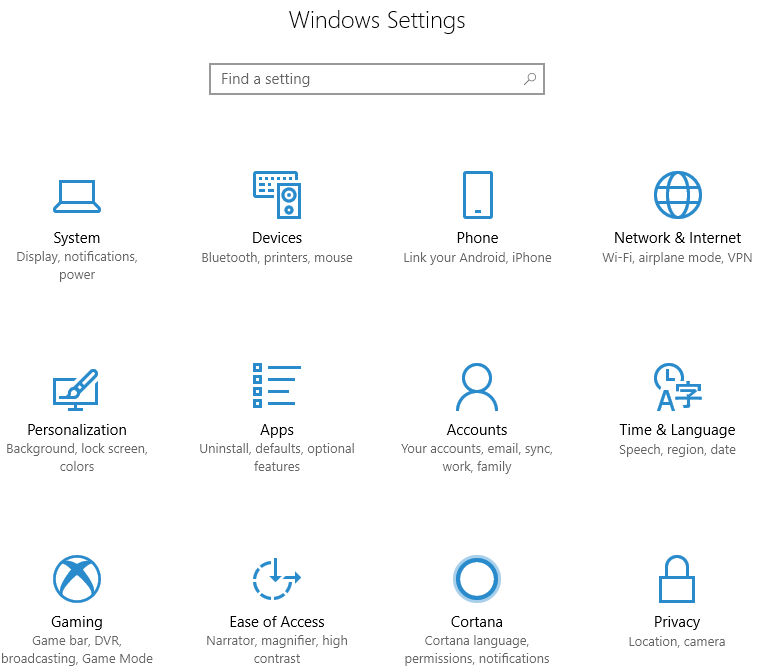
3.Select Devices.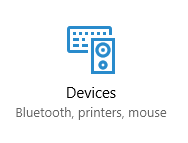
4.Select Printers & Scanners
5.Find the printer that needs to be stopped, and press the Open Queue button.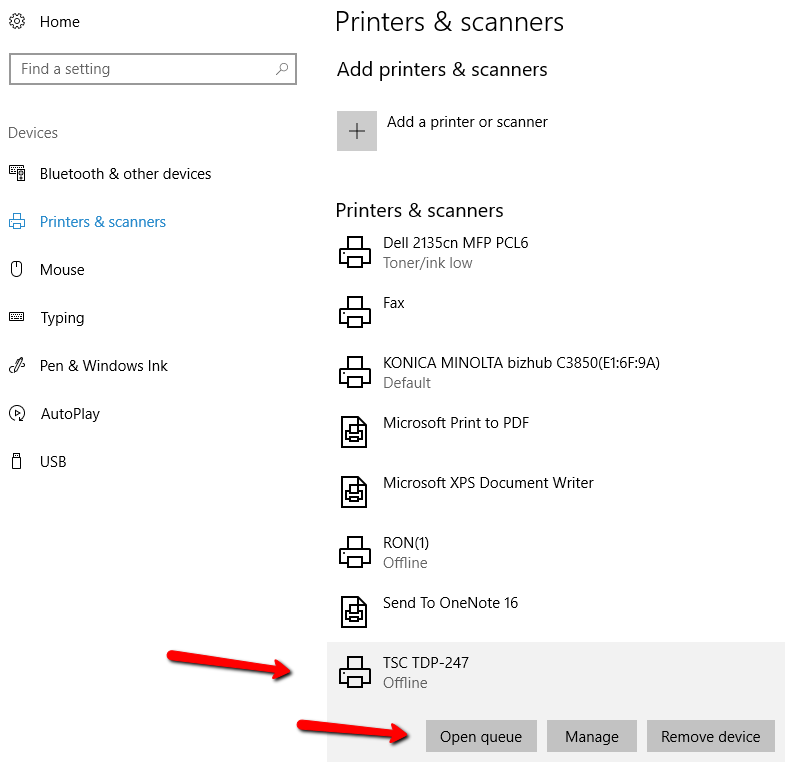
6.When the queue opens, there are 2 ways to cancel the print jobs.
a.Right click the print job you need to stop and select Cancel.
b.Click Printer, then Cancel all documents.
7.You will get a confirmation asking if cancel the documents. Click Yes.
To Cancel Tag Printing In Windows 10 Method 2 (Also works with Windows 8)
1.Click the Start button. (By default located in the lower left corner)
2.When the menu screen opens, just type Control Panel.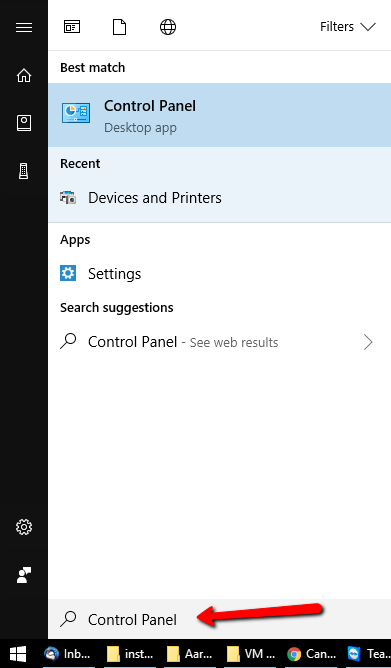
3.Control Panel will display on Best Match.. Click on Control Panel.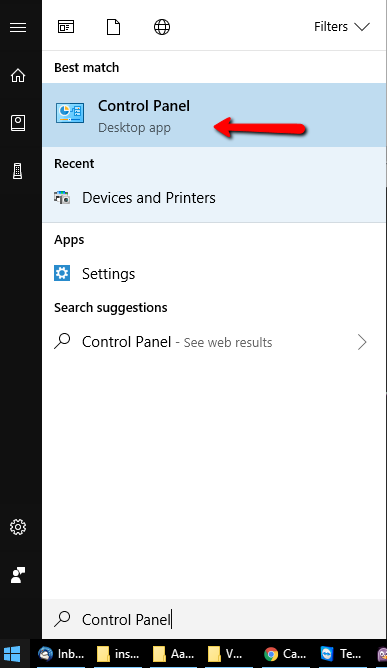
4.When the Control Panel opens, click on View Devices and Printers underneath Hardware and Sound.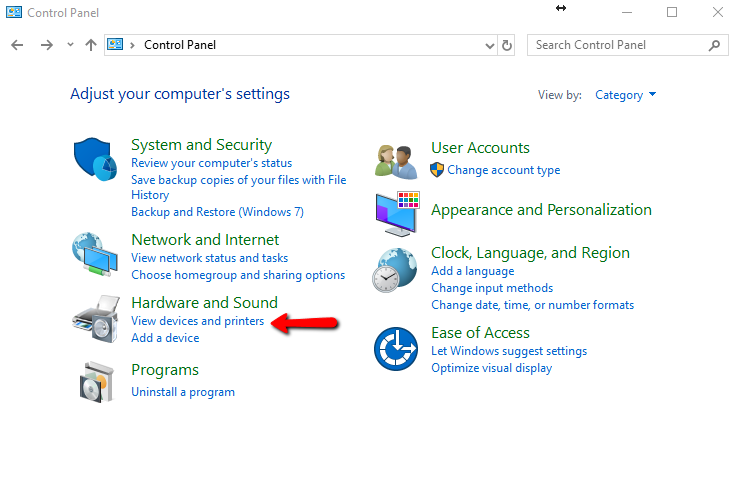
5.Navigate to the printer you need to stop the print job on.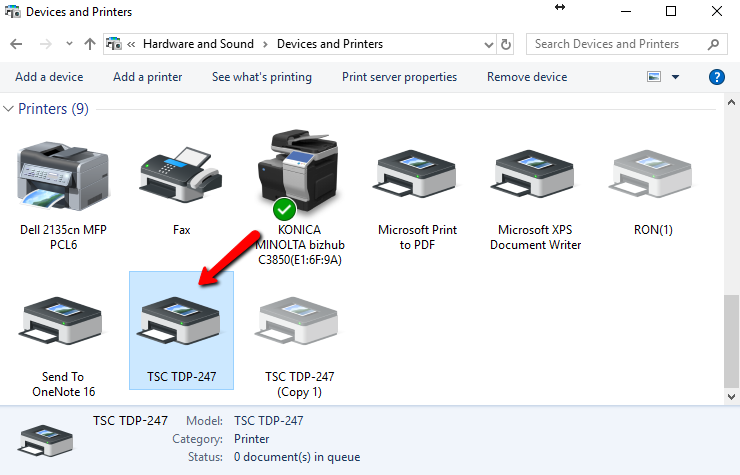
6.Right click the printer and choose See What’s Printing.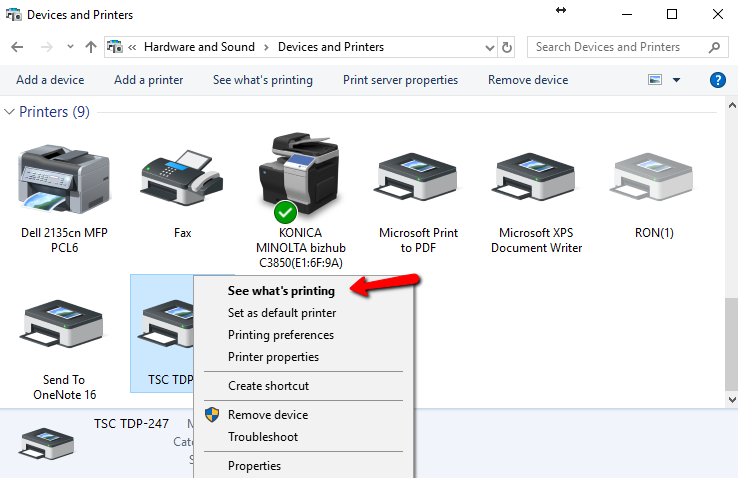
7.When the queue opens, there are 2 ways to cancel the print jobs.
a.Right click the print job you need to stop and select Cancel.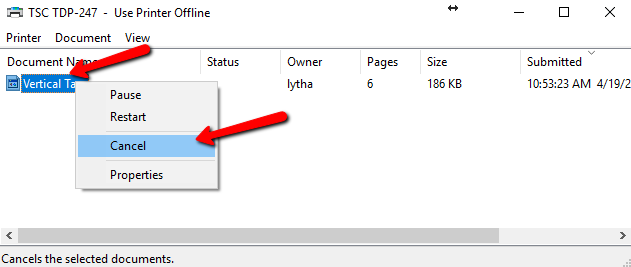
b.Click Printer, then Cancel all documents.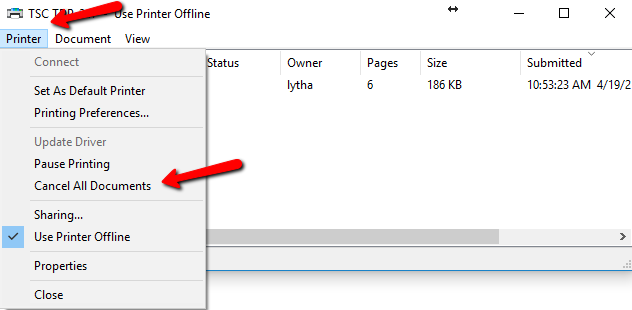
8.You will get a confirmation asking if cancel the documents. Click Yes.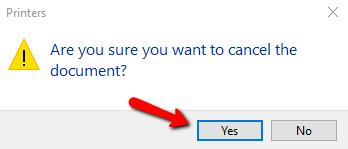
To Cancel Tag Printing In Windows 7
1.Click the Start button. (By default located in the lower left corner)
2.Click on Devices and Printers.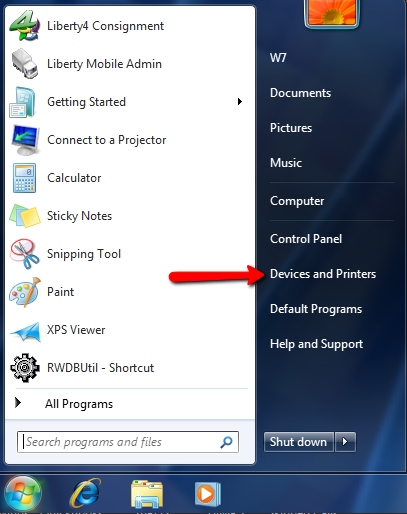
3.Navigate to the printer you need to cancel the print job on.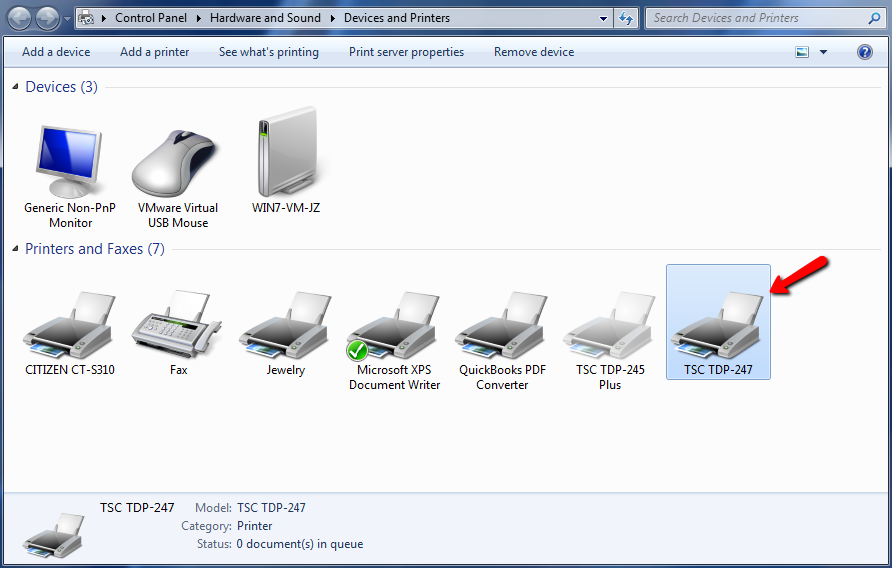
4.Right click the printer and choose See What’s Printing.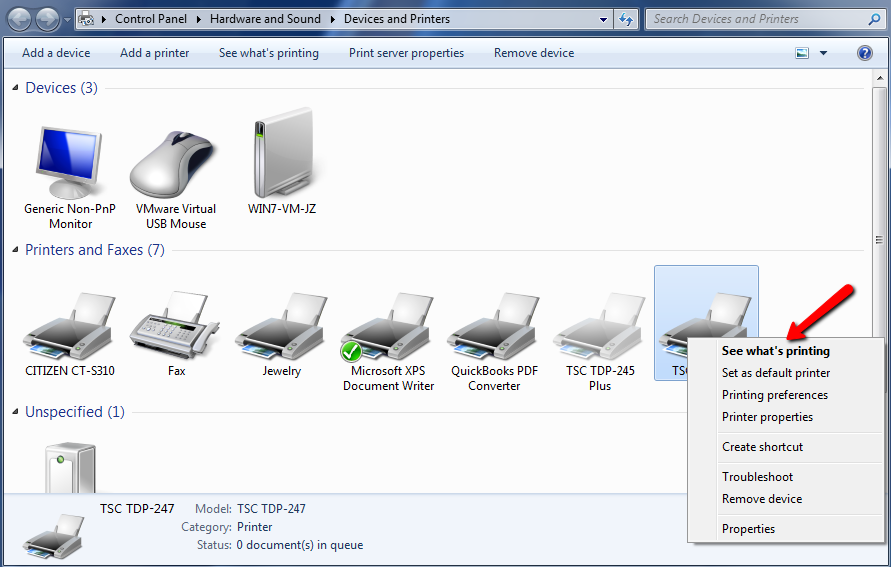
5.When the queue opens, there are 2 ways to cancel the print jobs.
a.Right click the print job you need to stop and select Cancel.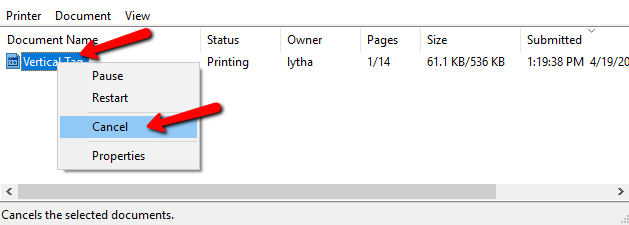
b.Click Printer, then Cancel all documents.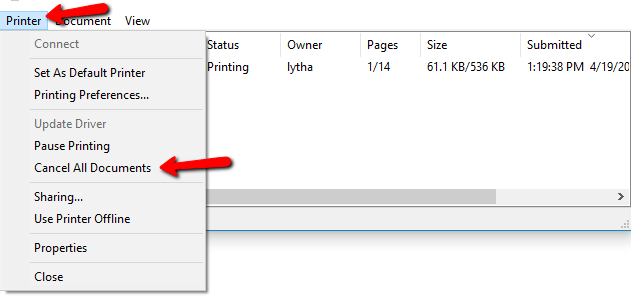
6.You will get a confirmation asking if cancel the documents. Click Yes.
Related Topics
Print Price Tags and Price Labels
Select Printers & Printing Defaults