Bulk Tag Printing
The Bulk Tag Printing routine is used to print a batch of tags for multiple accounts all at once. This allows you, for example, to enter inventory all day long, then print the tags all at once at the end of the day.
The Bulk Tag Printing routine operates in the same manner as reports: it is necessary to select parameters and operators. For more information, see Setting Report Parameters.
Note: Bulk Tag Printing support printing to a Laser Printer.
To Print A Batch Of Price Tags Or Labels
1.Select Activities > Inventory > Bulk tag Printing.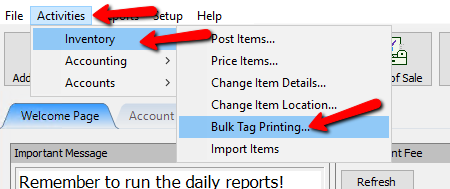
The Bulk Tag Printing dialog will display.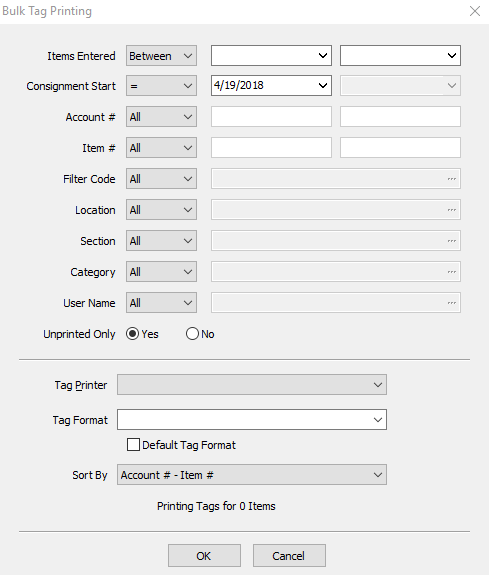
2.Select the parameters you wish to use to print tags. (See below for definition of each field.)
3.When done, press the OK button.
Bulk Tag Printing Field Modifiers
The field modifiers are designed to further help filter out what tags need to be printed.
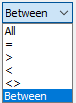
●All : The default setting. When All is selected, that field will not limit the data pertaining to it.
●= (Equals Sign) : When a value is entered for the specified field, you are stating you want to only print tags that Equal to that value.
●> (Greater Than) : When the Greater than symbol is used, the Bulk Printing will print all tags that are Greater than the value entered.
●< (Less Than) : When the Less than symbol is used, the Bulk Printing will print all tags that are Less than the value entered.
●<> (Exclude) : When the Exclude Symbol is used, the Bulk Tag Printing will Exclude the value entered.
●Between : When Between is used, Bulk Tag Printing will print all tags that fall between the two values provided.
Bulk Tag Printing Fields
●Items Entered : Filters the dates for when items were Entered into the system.
●Consignment Start : Filters the dates for when items Started their consignment.
●Account # : Entering a value here will only print tags for the Accounts specified.
●Item # : Entering a value here will only print tags for the Items specified.
●Filter Code : This value will only print tags for accounts that have the specified Filter.
●Location : This value will print the tags for the specified store Location.
●Section : Use Section to print tags for items that were entered into a specific Section of the store.
●Category : Use Section to print tags for items that were entered into a specific Category.
●User Name : User Name will print tags entered by a specific User.
●Unprinted Only (Radio Buttons) : This can be used to filter out items that have never had tags printed for them.
●Tag Printer : If you have multiple Tag Printer, you can change between the printers with this selection.
●Tag Format : Select the Tag Format you wish to print to.
●Default Tag Format (Checkbox) : Once you have selected your tag format, you can set it to be the Default Format for future print jobs.
●Sort By : Has 2 options.
○Account # - Item # :Will print the tags By the Account Number first, and the Item Number second.
○Date Received : Will print the tags based on the Date Received.
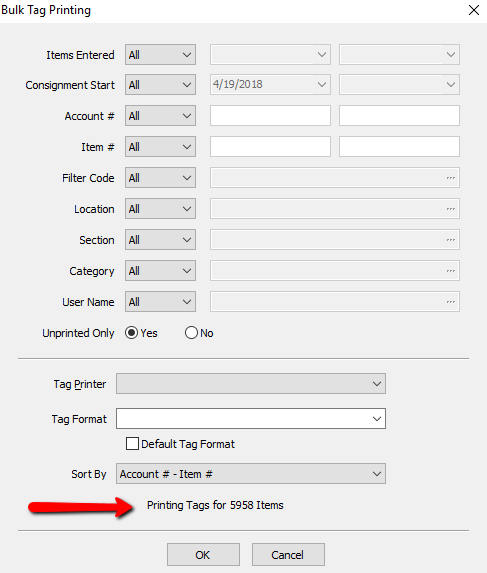
Once you have made your selections, you will be notified as to how many tags are to be printed at the bottom.
Related Topics
Print Price Tags and Price Labels
Select Printers & Printing Defaults
Setting Report Parameters