Creating A Retail Shopify / ShopRW Listing With One Variant Type
Retail items with variants pushed up to Shopify or ShopRW allow your customers to choose an item with different attributes.
This is an article on how to handle listing retail items with 1 variant type, either color or size.
This help article will show you how to setup a retail item with 1 variant type, so a customer could go to either Shopify or ShopRW and view a retail listing with a dropdown for Color or Size.
1.This will require you to have already created a Retail item with variants.
Please view the following articles in another tab if you have not done so already:
Adding Retail Vendor Inventory
Receiving Retail Vendor Inventory
How to Add Retail Variants
Note: Make sure that the Retail Item being added is one that does not have the web item box checked.
Note: With a single variant type, you can add an image to each retail variant (based on Color or Size)
2.Open the Liberty Listing Manager and click the Add Retail Listing button. 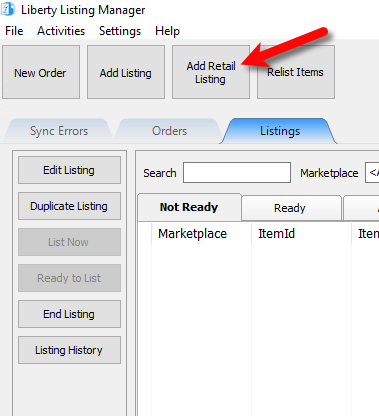
3.Retail Items that are to be pushed up to a web platform must Not have the web item checkmark box checked.
This means you have to search for the parent item that contains all the images for all of the variants. You can do this by typing the account-item number, scanning the barcode for the item or searching for an attribute or part of the description of the item. 
4.For Listing Type you want to select List Multiple Variations.
Select your Marketplace and then you can leave the rest of the fields as they are or edit them.
When you are finished, click the OK button.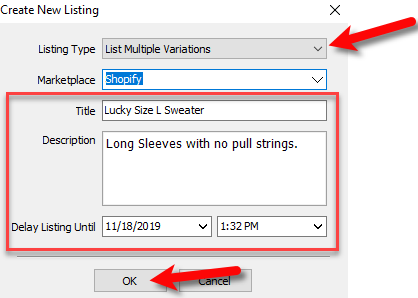
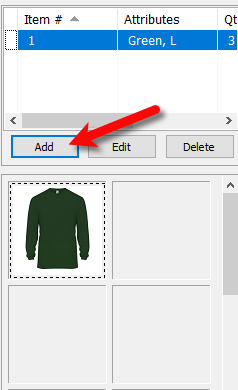
5.Now we must add the variations you wish to make a part of the Retail Listing.
Click the Add button at the top right corner.
Note: It is recommended that each variant have a distinct image when there is only one variant type (Color or Size). In this example, when a customer selects the green colored variant of the sweater, the image will show a green sweater image automatically.
6.Click on the variant item you wish to add and then click the OK button. 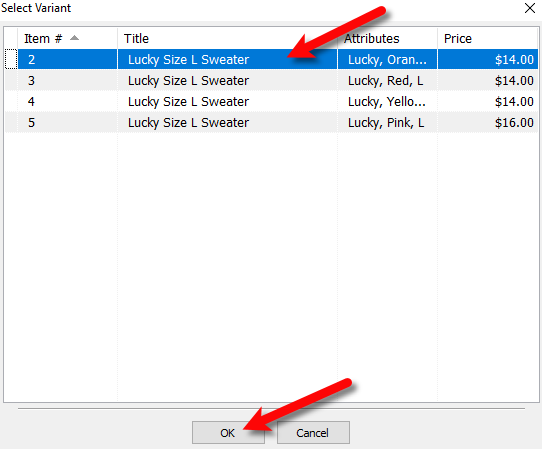
7.Fill out what you would like the variant to be priced at. By default, the original price on the variant is used.
You can also enter the quantity of the variant that is to be listed.
When finished, click the OK button. 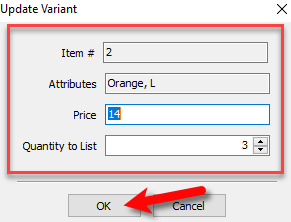
8.Repeat steps Five through Seven until you have added all the variants you would like to use to the retail listing.
9.You may either click List Now, to list the item immediately or you can check the box next to Ready to List!, to have the item list to your selected marketplace automatically within 5 minutes. 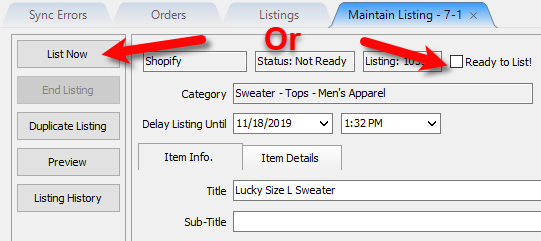
10.Click the Save button. 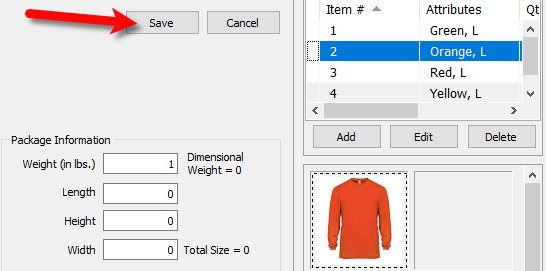
11.Once the item is listed online, you will see that all images can be clicked on. In this example, the images are based on the color of the item.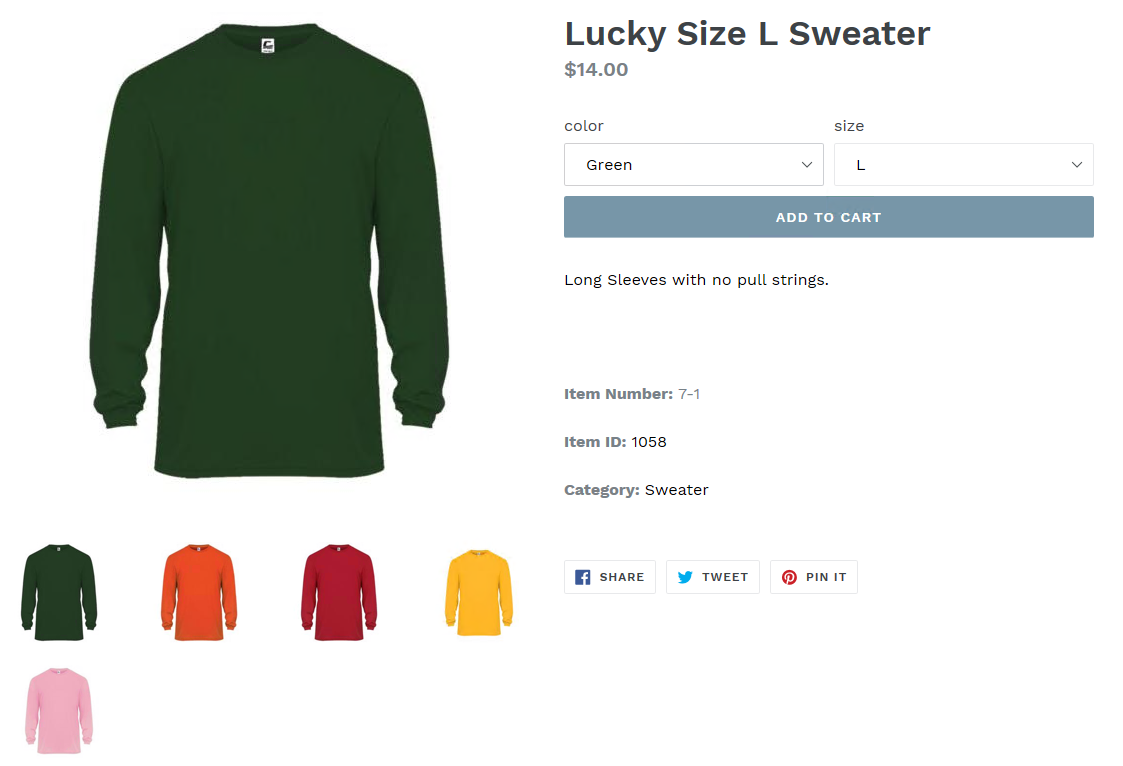
12.Since there is only one variant type, it is possible for the image to change and match whatever is selected in the color dropdown. In this example, we changed from a green sweater, to the orange sweater and the image matched the selection.
When the selection is completed, the customer simply clicks Add To Cart to eventually purchase the item. 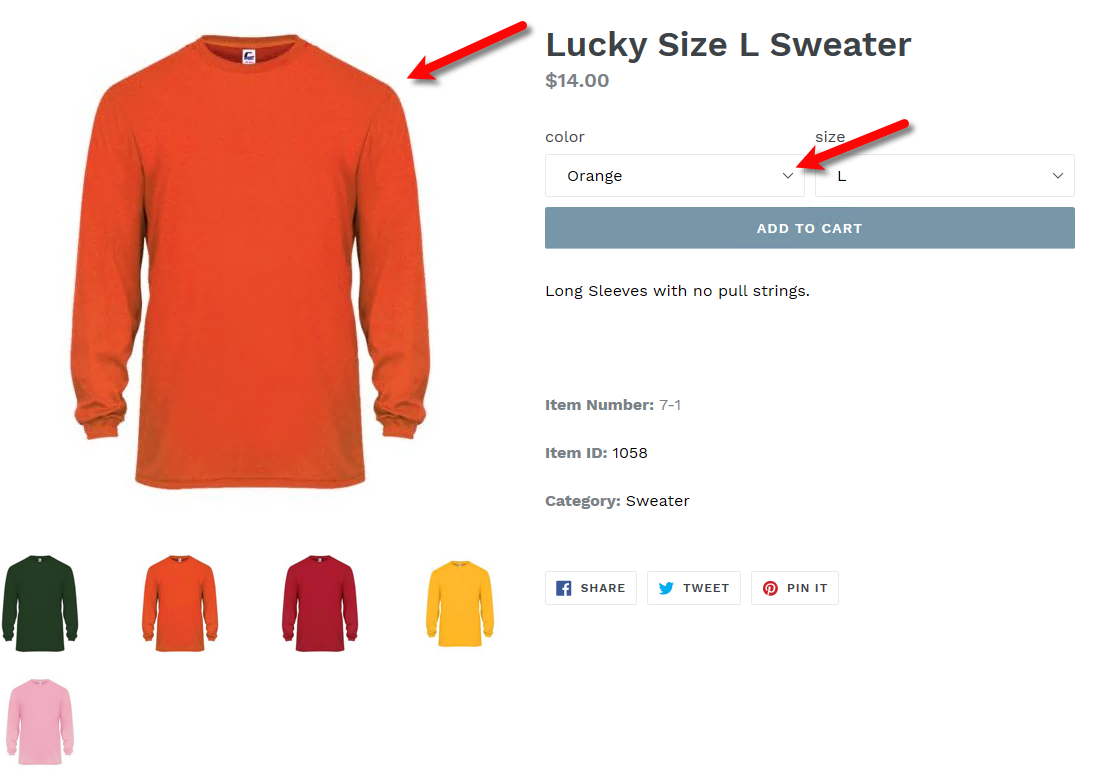
Related Topics
Definition of Consigned, Purchased, Trade, Store Inventory, and Retail Items
How To Use Find Variant To Add Retail Variant Items
Creating a Shopify / ShopRW Listing With Two Variant Types