Liberty Sales App
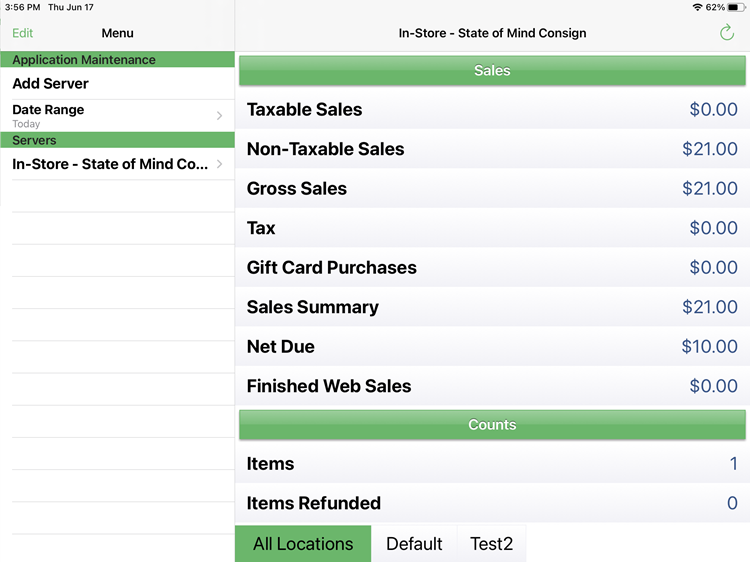
The Liberty Sales App allows you to get a report of the day’s sales conveniently delivered on your iPhone or iPad. The sales data will reflect only the current day, but can be updated at-will for up-to-date sales figures for that day.
Setting up the Liberty Sales App
1.First we will need to allow the app to connect to Liberty from your device. To do this, go to the Start Menu, then start typing “Mobile Admin” until the Liberty Mobile Admin app appears. Then, click the Liberty Mobile Admin app in the search results.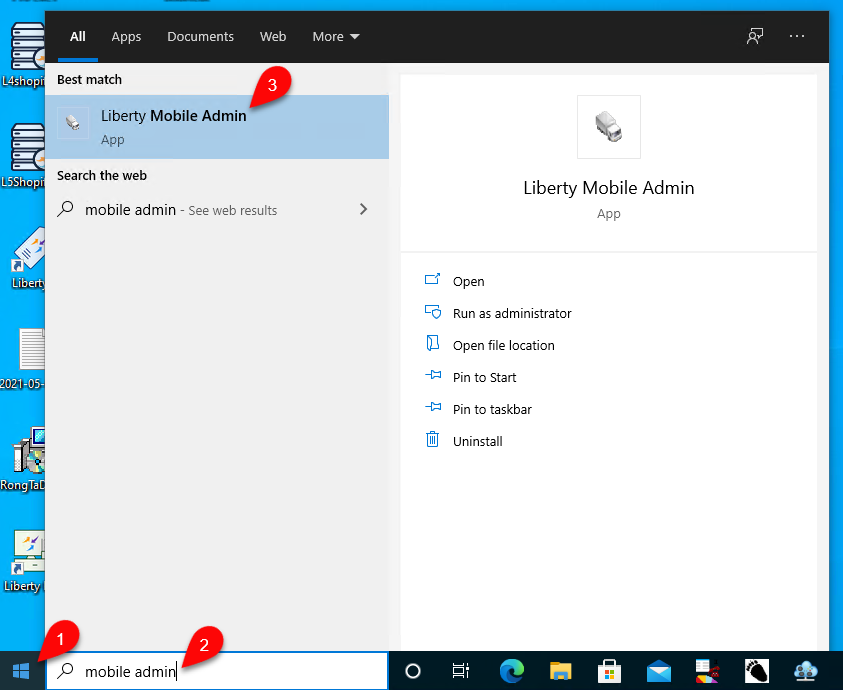
2.Then in the Maintain Devices dialog, click Add Device.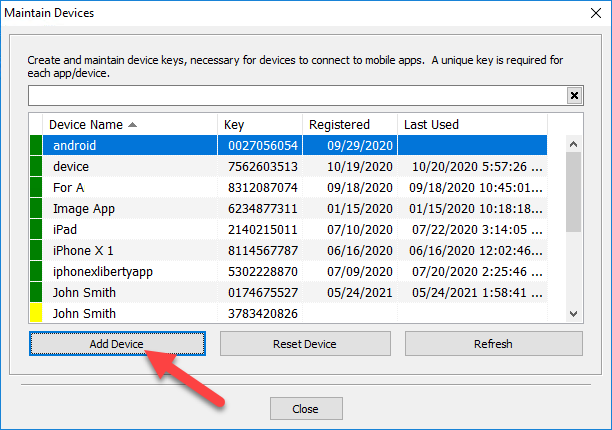
3.Next you will need to enter a descriptive name for your mobile device’s entry. Normally it is recommended to use the name of the app you are setting up access for, followed by the kind of device or person’s name who owns the device.
When done, click OK.
4.The Device Key dialog will appear with the device key, and a quick-setup QR Code. To continue, open the Liberty Sales App on your device.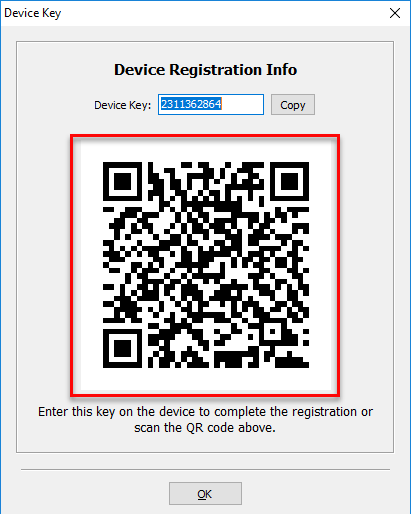
5.On opening the app for the first time, the Add Server window will appear immediately. If it does not, or if you are adding an additional store to the app, tap the Add Server menu option.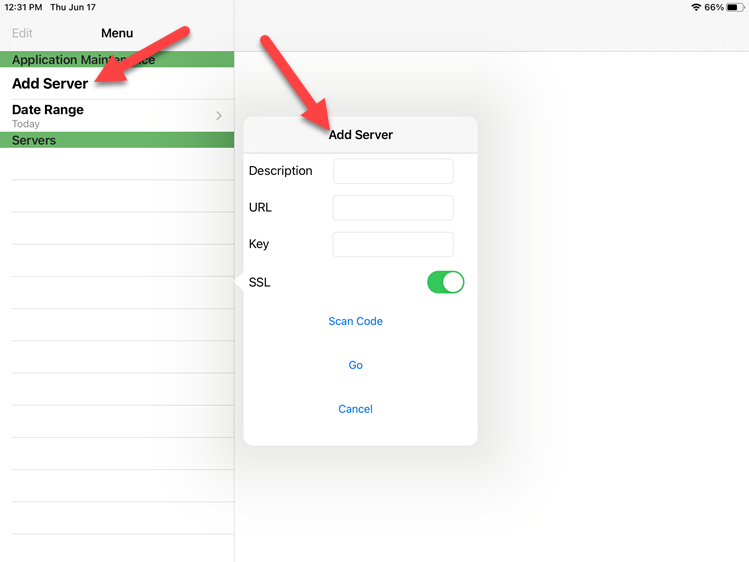
6.Next, tap the Scan Code option in the Add Server window. Then, scan the QR Code that was displayed in the previous steps. 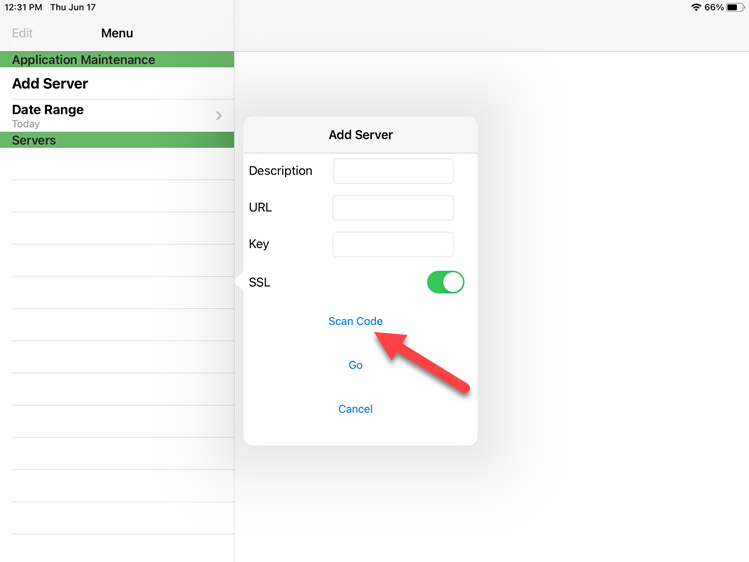
7.This will automatically fill in the required information for setup. To confirm and connect, tap the Go menu option.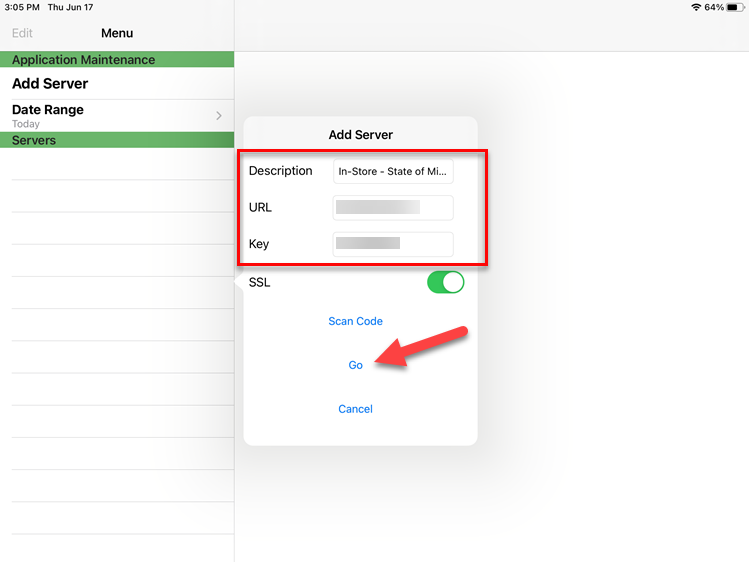
8.After adding the server entry you will be taken back to the main screen of the app. In the server list on the right-hand side of the screen, tap the entry you just created in the list. Notice it will have a warning symbol by it, this is temporary, as now we need to login to confirm the connection information.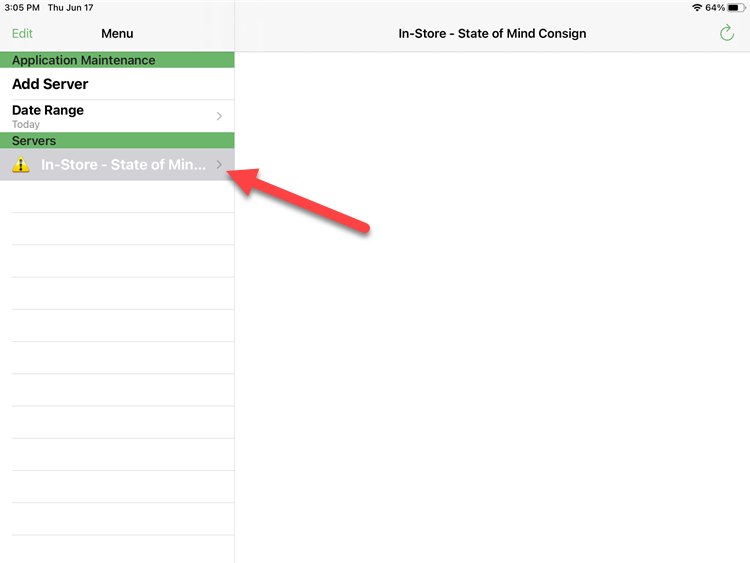
9.On the sign-in screen, enter your Username and Password for an Administrator account in Liberty, change the Remember Credentials checkbox on, then tap Go to connect.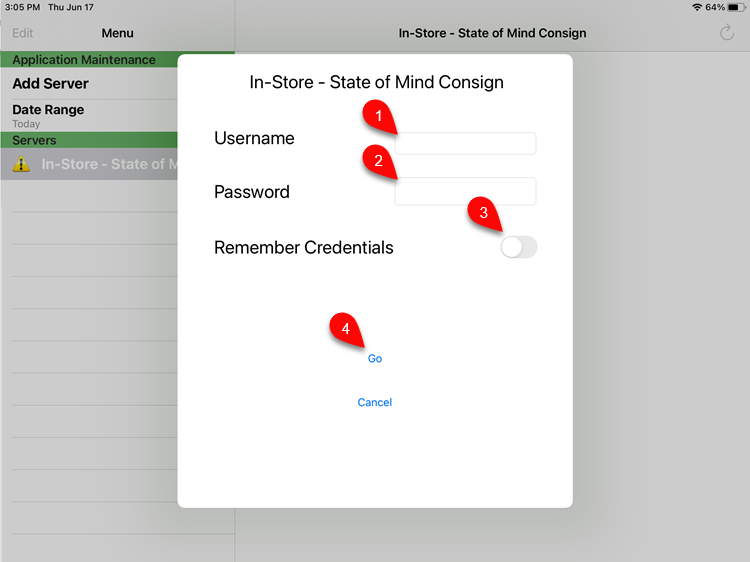
10.If it successfully connects, you will now see the day’s sales data.