Installing the 80 Thermal Printer tag printer on Windows 10
1.There are a few proactive things you can do to ensure a problem free printer installation. These situations can cause inconsistent power issues with any printer which may cause windows to see the printer as being offline.
Avoid USB Hubs. A mouse, keyboard, and scanner all work well on USB hubs but when it comes to printers it’s not a good idea. Keep in mind that the amount of voltage traveling though the USB port is split between all devices plugged into the hub.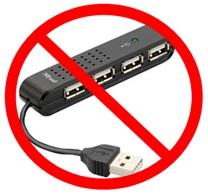
2.Try plugging the printer in the back of the computer instead of the front. In our testing plugging a printer into the back of a computer has fewer issues than the front.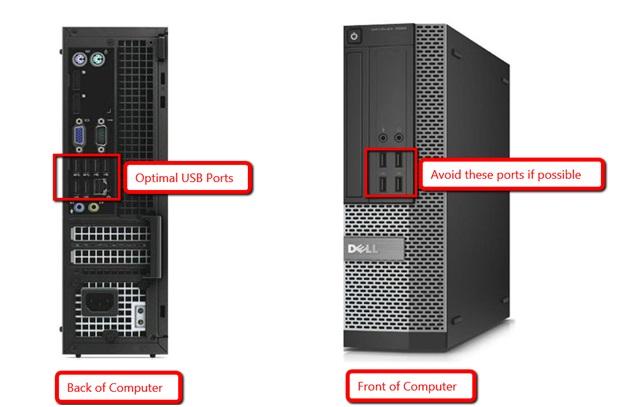
3.Avoid using the battery side of a battery backup for printers; however the surge protection side should be fine.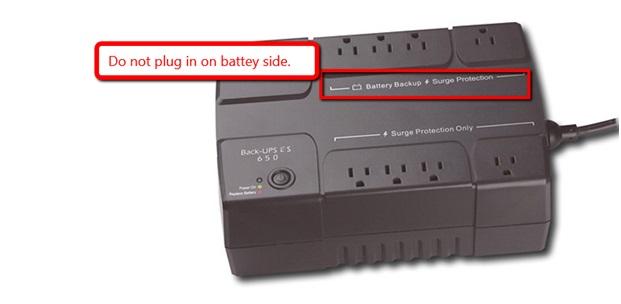
4.You can navigate to http://my.resaleworld.com, sign in and download then install the Printer Driver Utility or you can grab the driver directly from:
https://s3.amazonaws.com/support-resaleworld-com/Fixes/Hardware/Driver/ReceiptPrinters/Rongta%20RP80%20Driver%20for%20PC%20America.zip
5.If you have downloaded the Printer Driver Utility, navigate to "C:\rwd\PrinterDrivers\Drivers\80 Thermal Printer".
To do this click the folder shortcut on the task bar.
6.Now click on Computer or “This PC” and then select “Local Disk C”.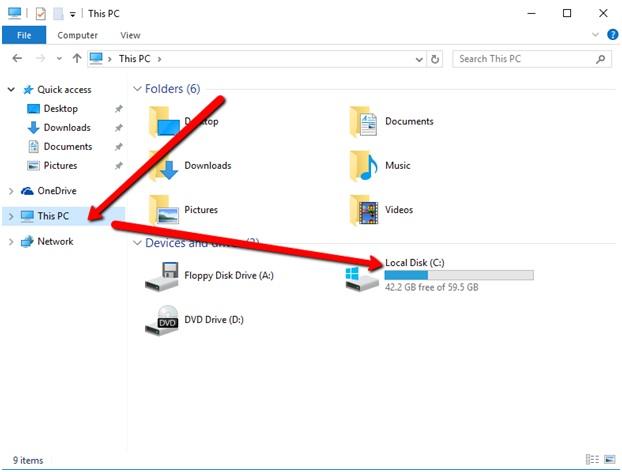
7.Now select the RWD folder. 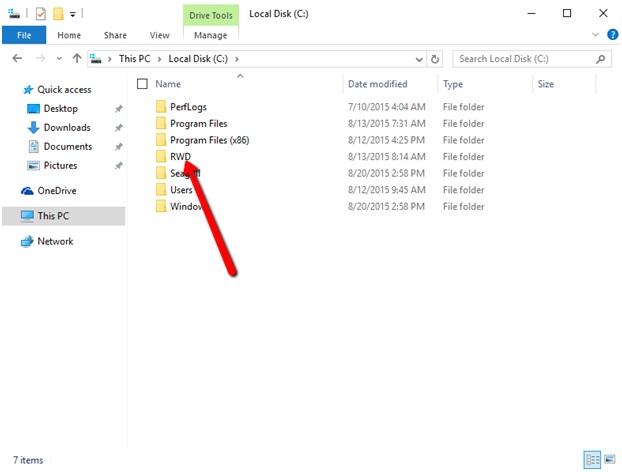
8.Now select PrinterDrivers folder.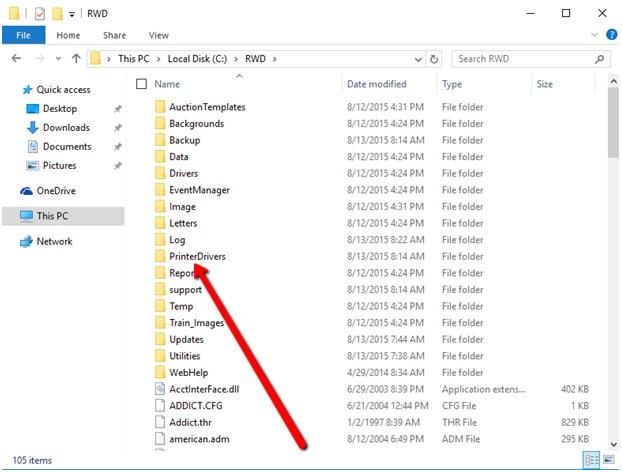
9.Now select the Drivers folder. 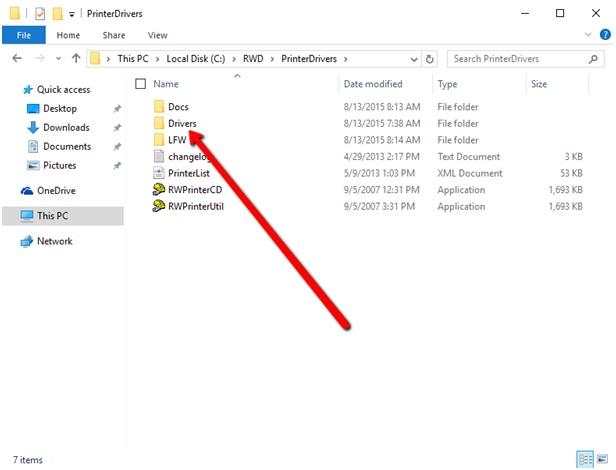
10.Select the “80 Thermal Printer” folder.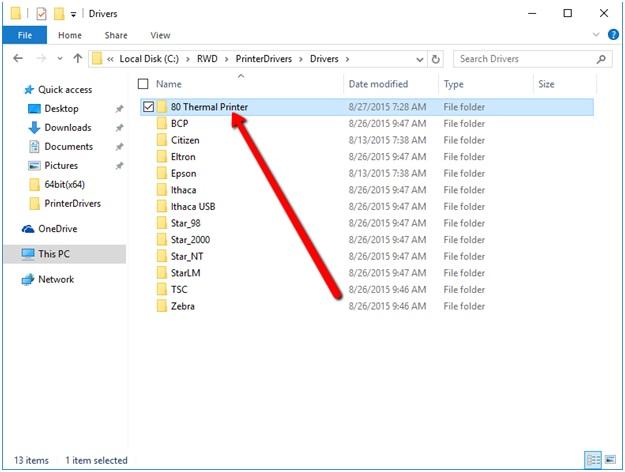
11.Right click on the 80Setup file and choose “Run as administrator”.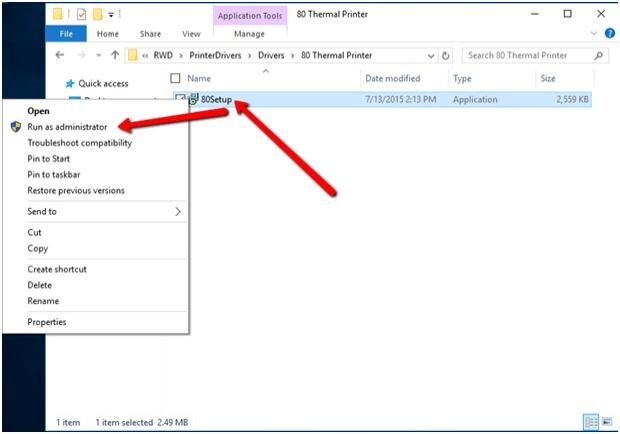
12.Once the Setup Wizard window opens you will want to choose Next.
13.Accept the agreement and then choose Next.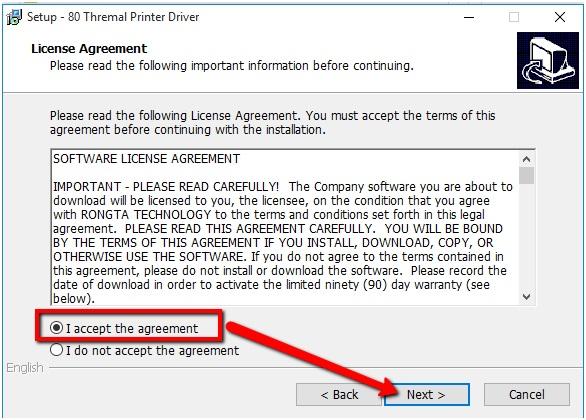
14.Do not change the installation folder and then choose Next.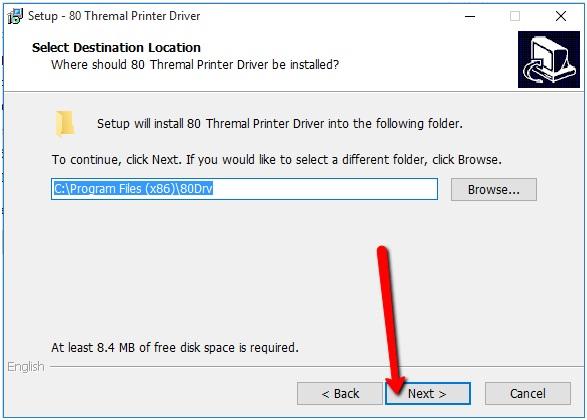
15.Choose Install.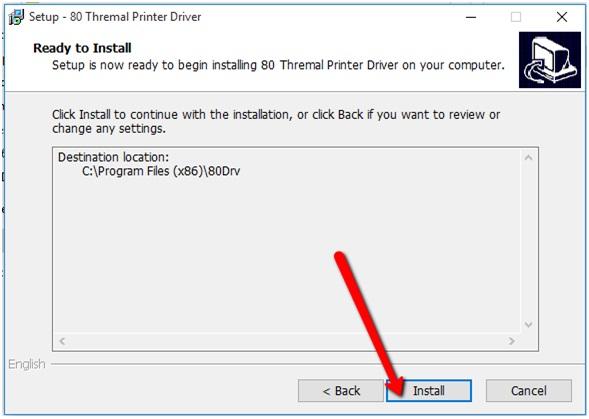
16.Once the install is complete then click OK on the message box.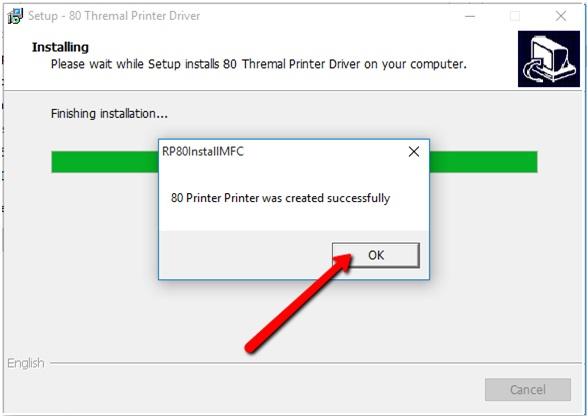
17.Click on Finish.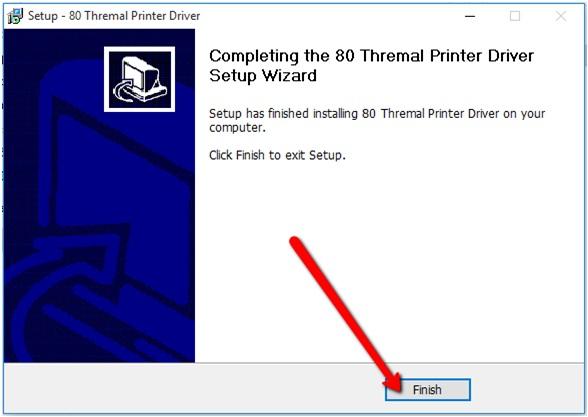
18.Now that your printer is installed we need to set the USB port. To do this type in “Devices and Printer” into the search bar.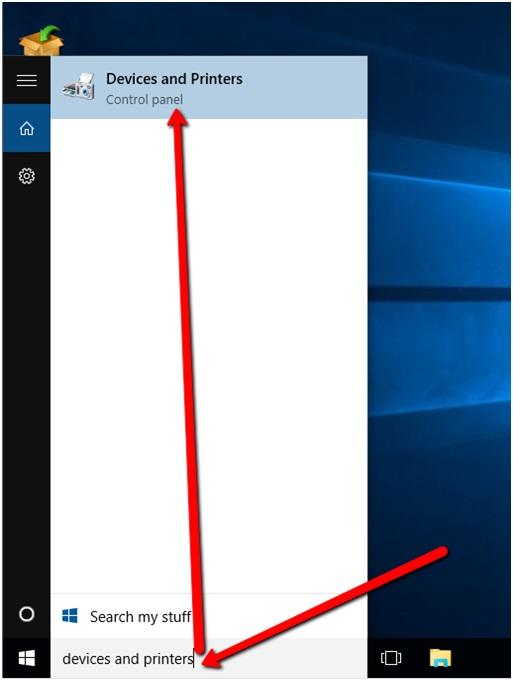
19.Find the 80 Printer that was installed, right click it and choose printer properties. 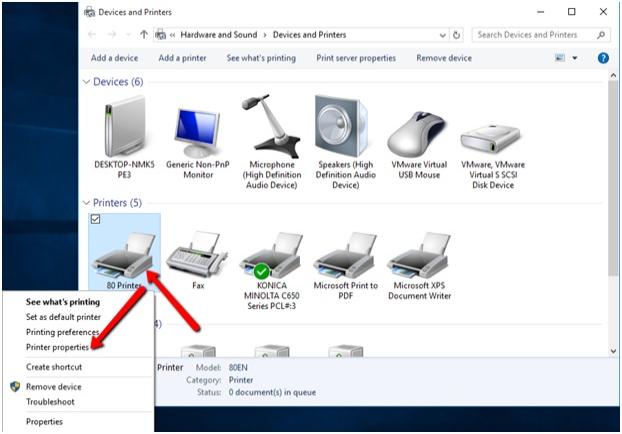
20.Click on the Ports Tab at the top of the new window. Next you will need to specify a USB port. In our testing we have found that the highest USB port (in this case USB001) is normally the correct option.
However, you will be able to change this later if it is not. Click apply to set changes.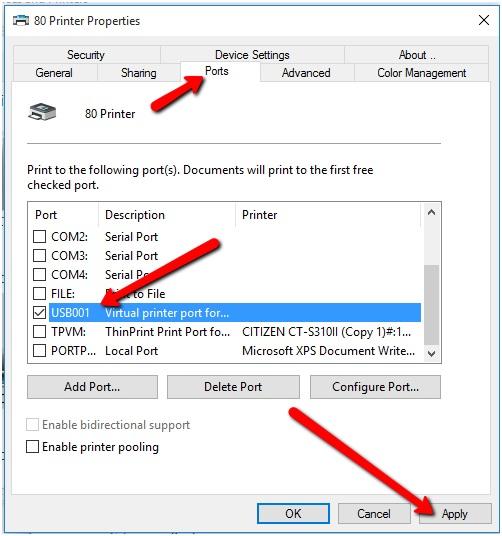
21.Now its time to print a test page to make sure everything works.
Navigate to the General tab, then click on the button near the bottem that says print test page. If you see a test page come out of the printer then you know it works.
If you do not see any motion from the printer it may be on the wrong port and you may want to try going to the ports tab and switching between a few USB ports to see if one will work.
Once you found the correct one Click OK to close the window.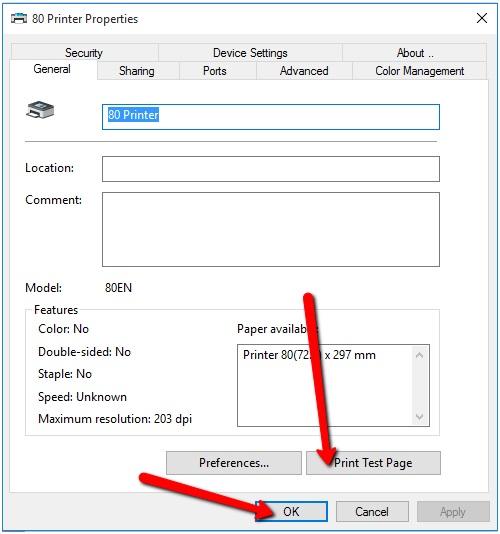
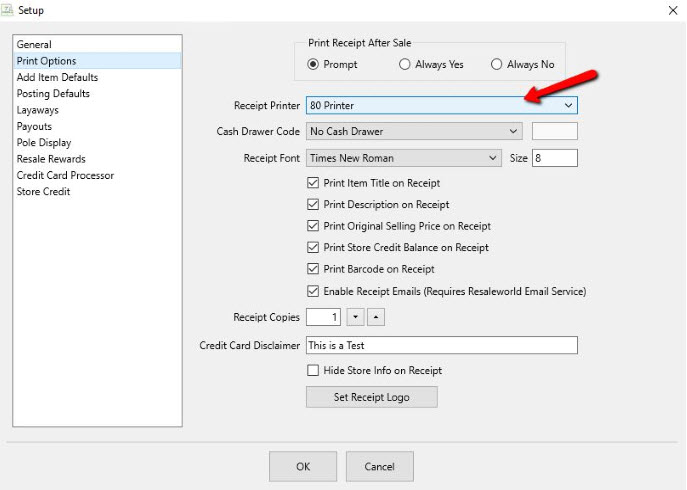
Setup in Liberty
1.Launch the Point of Sale module.
2.Select More…
3.Select Setup.
4.Select Print Options.
5.Select the 80 Printer from the Receipt Printer drop-down menu.