How To Use The Client Merge Utility
Liberty is designed so that every client should have only one account.
Overtime, you can continue to gain duplicate accounts where a client may have more than one account in Liberty.
The Client Merge Utility is designed to merge these additional duplicate accounts into one account.
There are different criteria you can use to merge the accounts.
Sometimes there is more than one account with the same Email, Primary Phone Number, First and Last Name or Secondary Phone and Email.
You can merge duplicate accounts on any of the above.
Warning: Please make sure you make a backup before proceeding
Opening The Client Merge Utility
1.Open the Liberty REACT Inventory Module.
2.Click on Activities > Accounts > Merge Accounts
Merging An Account Using Matches Tab
3.Make sure you are on the Matches tab. 
4.Select which Criteria you would like to use to find duplicate accounts.

a.Primary Email: Searching for duplicate accounts based on if they have more than one account that have the same primary email address.
b.Primary Phone: Searching for duplicate accounts based on if they have more than one account that have the same primary phone number
c.First and Last Name: Searching for duplicate accounts based on if they have more than one account that have the same first and last name.
d.Secondary Phone and Email: Searching for duplicate accounts based on if they have more than one account that have the same secondary phone and email address
Note: You can only merge client accounts into client accounts. You cannot merge store accounts into client accounts or vice versa.
5.In the following example we have selected to match on Primary Email.
Select the account pairing you wish to merge. 
6.The Merge Into area, indicates which account should be the Primary Account that will remain active when the merge is complete. 
7.The Merge From area indicates which account will be merged into the primary account and will be made Inactive when the merge is complete. 
8.You can use the Swap button to swap which account in the pair will be the Merged Into account vs which account will be the Merged From account. 
9.Click the Merge button to begin the client merge procedure.
10.Now we can select our Merge options. 
a.Only Primary Email: Specifies if you would like to only merge the Primary Email vs also merging any Secondary Email Addresses
b.Only Primary Phone: Specifies if you would like to only merge the Primary Phone Numbers vs also merging any Secondary Phone Numbers
c.Only Primary Address: Specifies if you would like to only merge the Primary Address vs also merging any Secondary Addresses
d.Deactivate Account: Specifies whether to deactivate the Merged From account. This is Defaulted to On.
11.Will Merge entries are highlighted green and will be merged into the Primary Account.
Has a Match entries are highlighted purple and indicate that they already exist in both accounts so they do not need to be merged. 
12.Click the Merge button when you are finished.
13.Click the Yes button to Merge the accounts.
All items, transactions, payouts, wishlists and purchases from the “Merge From” account will be moved to the “Merge Into” account. 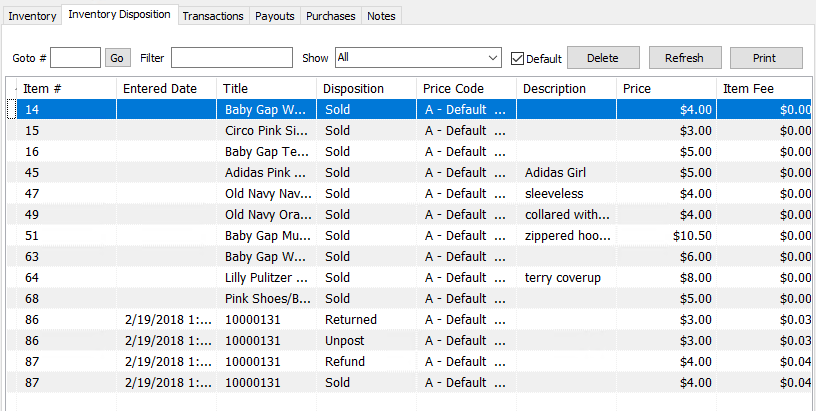
Using The Search Tab To Merge Accounts
1.Make sure you are on the Simple tab. 
2.Select the first account you wish to make the Merge Into account.
The Merge Into area, indicates which account should be the Primary Account that will remain active when the merge is complete. 
3.Select the second account you wish to make the Merge From account.
The Merge From area indicates which account will be merged into the primary account and will be made Inactive when the merge is complete. 
Note: If you made a mistake, you can double-click on another account, this will select another Merge Into account. Double-Clicking a subsequent account will select another Merge From account.
4.You can use the Swap button to swap which account in the pair will be the Merged Into account vs which account will be the Merged From account. 
5.Click the Merge button to begin the client merge procedure.
6.Now we can select our Merge options. 
a.Only Primary Email: Specifies if you would like to only merge the Primary Email vs also merging any Secondary Email Addresses
b.Only Primary Phone: Specifies if you would like to only merge the Primary Phone Numbers vs also merging any Secondary Phone Numbers
c.Only Primary Address: Specifies if you would like to only merge the Primary Address vs also merging any Secondary Addresses
d.Deactivate Account: Specifies whether to deactivate the Merged From account. This is Defaulted to On.
7.Will Merge entries are highlighted green and will be merged into the Primary Account.
Has a Match entries are highlighted purple and indicate that they already exist in both accounts so they do not need to be merged. 
8.Click the Merge button when you are finished.
9.Click the Yes button to Merge the accounts.
All items, transactions, payouts, wishlists and purchases from the “Merge From” account will be moved to the “Merge Into” account.