How To Use Change Item Details
Here is the video that covers this content:
How To Use Change Item Details
1.To get to the Change Item Details dialog, in the Liberty Inventory Module click on Activities > Inventory > Change Item Details….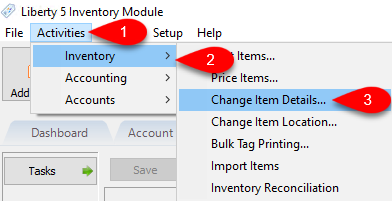
2.In the “For these items” section on the left side of the Change Item Details dialog are the filters used to define which items will have the specified details changed. You can use a combination of any of the various details present to specify the targeted accounts that will have the changes applied.
In this example below, we have edited the Account fields to show we want to target all accounts between 1 and 999999.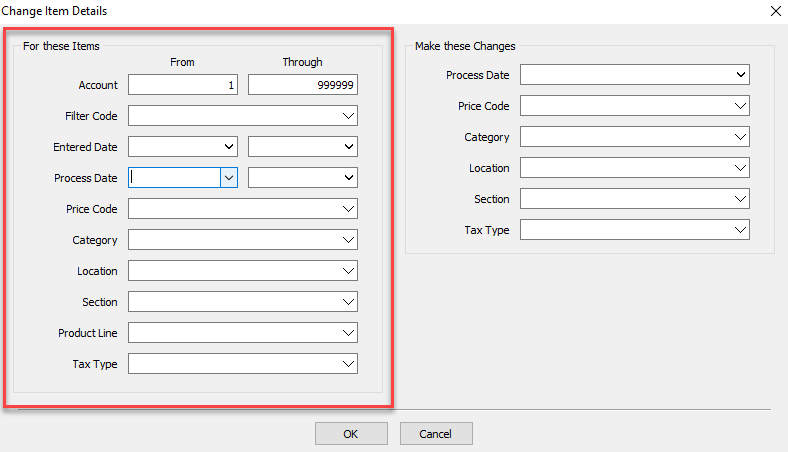
3.In the “Make these changes” section on the right side of the Change Items Details dialog is where we specify what details we are changing, and what we are changing them to.
For example, if we wanted to change the process date of our specified items to June 1st of 2020, we’d edit the Process Date drop down to show 6/1/2020 to reflect that.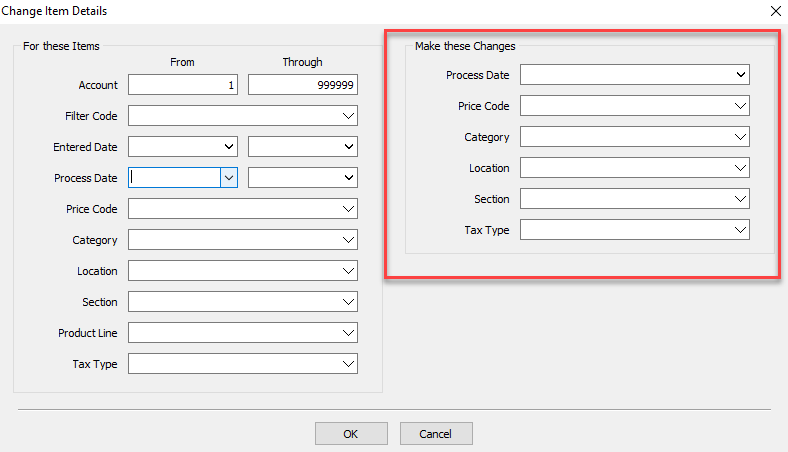
Note: We recommend that you make a backup before any mass changes are made, in the event that you do not like the results. We also recommend that changes be made at the end of a business day so that you do not have to worry about losing anything entered into the software, if you need to restore your backup.
4.Once you have set the filters you want to use to define what accounts are having details changed on the left, and on the right what the details are being changed for those accounts, click OK. This will cause Liberty to search out all the accounts that match the filters you set previously and will change on those items only the details you specified.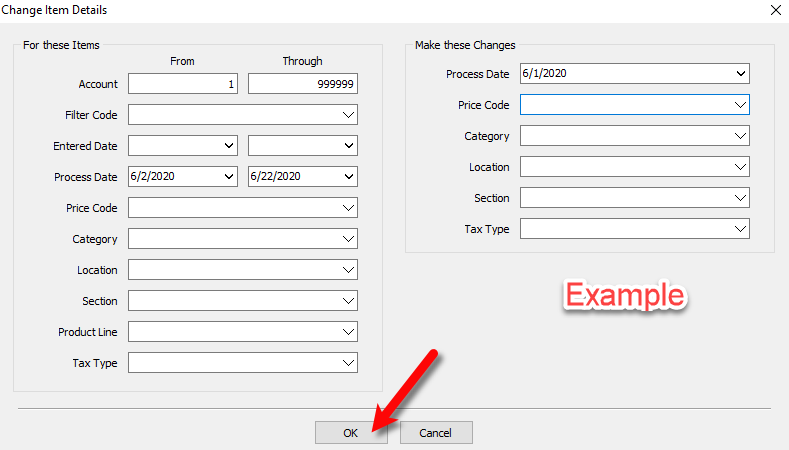
5.Once it completes, it will bring up an Information dialog box informing you of how many items were updated with the changed details. Click OK to confirm and complete the process.