How To USB Share A Printer In Windows
USB sharing of printers is not supported by the Resaleworld Support technicians, as both we and the industry as a whole have seen increasing issues with this feature of Windows, and is often prone to failure, especially when updates to Windows occur.
Resaleworld recommends purchasing network ethernet tag and ethernet network receipt printers if you plan on using them across your network, and offers a variety of affordably priced options for your business.
Examples of hardware we don’t support with USB Network sharing:
●USB TSC Tag printers
●USB Zebra Tag Printers
●USB Citizen Receipt Printers
●USB Document printers like Brother, Canon, HP etc.
How To USB Share A Printer In Windows
Note: We are providing basic instructions on this process so that you may refer back to this page in the event you wish to continue using USB Network Sharing. Please be aware that we will be unable to assist you with this process if you run into an issue, as it is currently unsupported by the Resaleworld Support Department.
First you will need to share the printer out from the computer it’s plugged into over the network to the computers you want to print from.
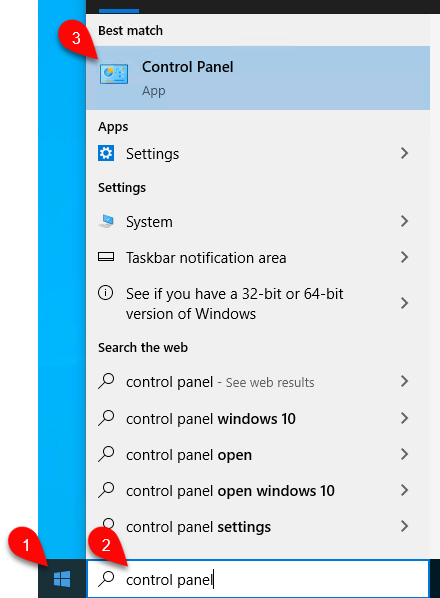
To do this, first click on the Start Menu on your taskbar (usually located in the lower-left hand corner of the screen), then start typing “Control Panel”. As you type, you will eventually see the Control Panel app appear as the best match. When it does, click it to continue.

Then in the Control Panel, click the View By drop down and ensure it is set to Small icons. If this is already set as such, you can skip this.

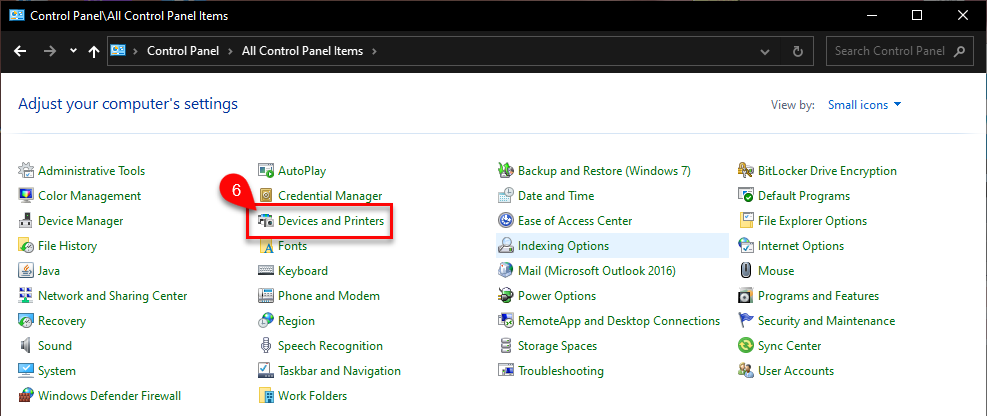
Then, once you have changed the view to Small icons, click the Devices and Printers applet.
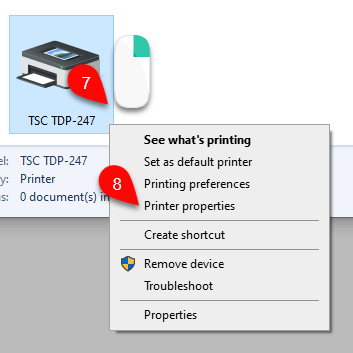
Next, locate the USB-connected printer you are wanting to share out over the network, then Right-Click it. In the context menu, select the Printer properties menu option.
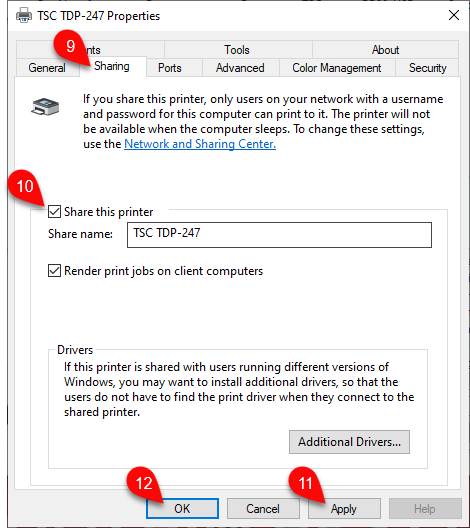
Then, the Printer Properties dialog will appear. Locate and select the Sharing tab, then check the Share this printer checkbox. Lastly, click Apply, then OK to save the changes.
How To Add A USB Shared Printer To Another Computer
Note: We are providing basic instructions on this process so that you may refer back to this page in the event you wish to continue using USB Network Sharing. Please be aware that we will be unable to assist you with this process if you run into an issue, as it is currently unsupported by the Resaleworld Support Department.
After sharing your USB printer out over the network, you will need to add it to each other computer you want to print to it from.
To do this, click on the Start Menu on your taskbar (usually located in the lower-left hand corner of the screen), then start typing “Control Panel”. As you type, you will eventually see the Control Panel app appear as the best match. When it does, click it to continue.
Then in the Control Panel, click the View By drop down and ensure it is set to Small icons. If this is already set as such, you can skip this.
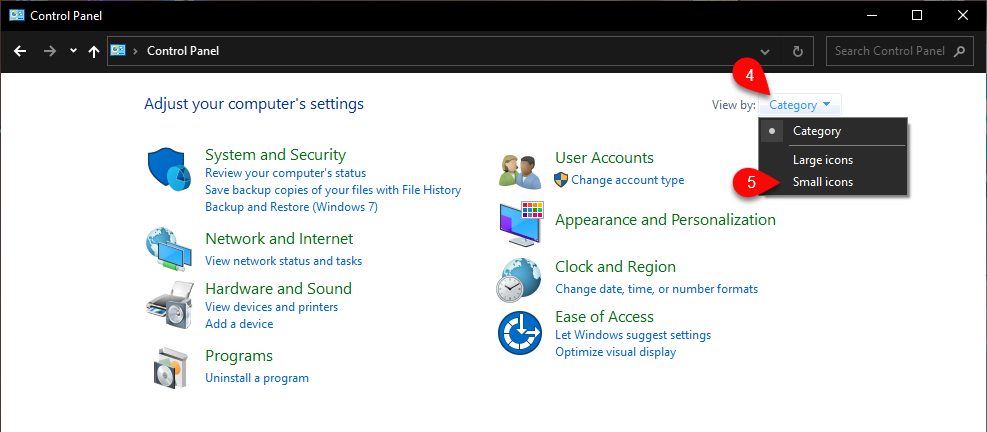
Then, once you have changed the view to Small icons, click the Devices and Printers applet.

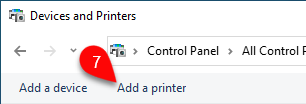
Then, on the menu bar, click Add a printer.
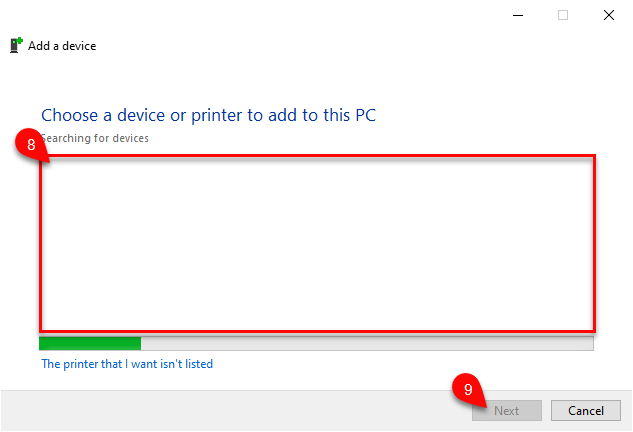
The Add a device dialog will then appear. The Device List will then populate after a few moments with your currently shared printers. Once it does, select it, then click Next.
Click through the prompts afterward until you get confirmation that the printer was added successfully.
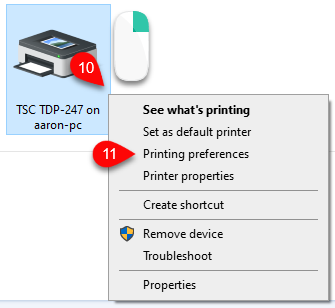
After that, still in the Devices and Printers applet, Right-Click on the newly added printer, and in the context menu, click Printing preferences.
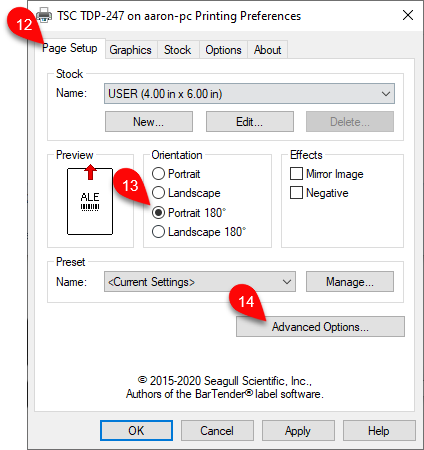
In the dialog that appears, click the Page Setup tab, then set the orientation as Portrait 180. After that, click Advanced Options… to finish the remaining setup.
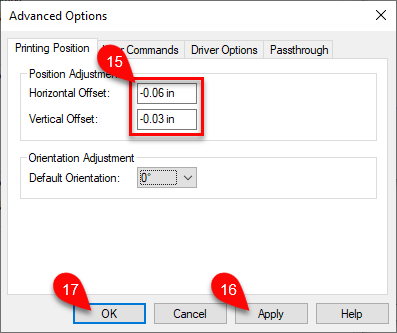
In the Advanced Options dialog, set the horizontal and vertical offsets to -0.06 (horizontal) and -0.03 (vertical), then click Apply, then finally OK.
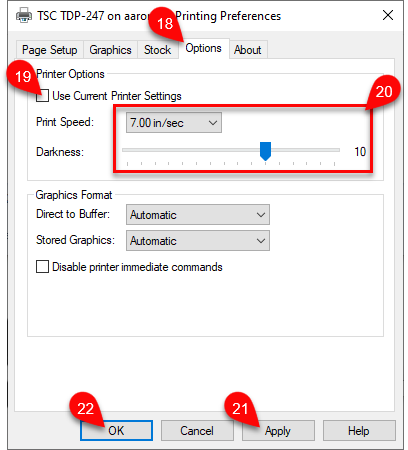
Lastly, click the Options tab, and uncheck the Use Current Printer Settings checkbox. Then, set the Print Speed to 7.00 in/sec and move the slider for the Darkness to 10. Then click Apply, and lastly OK.