Exporting To Constant Contact
Constant Contact is a third party company that can be used as a way to send marketing emails to customers.
For more on Constant Contact, be sure to go to their website. Constantcontact.com.
1.To access the Constant Contact Export utility go to Activities > Accounts > Constant Contact.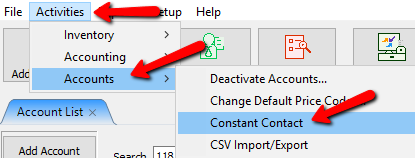
2.If this is the first time exporting to Constant Contact you will need to sign in. If you never created a Constant Contact account, you will need to do that. Select the Continue bButton.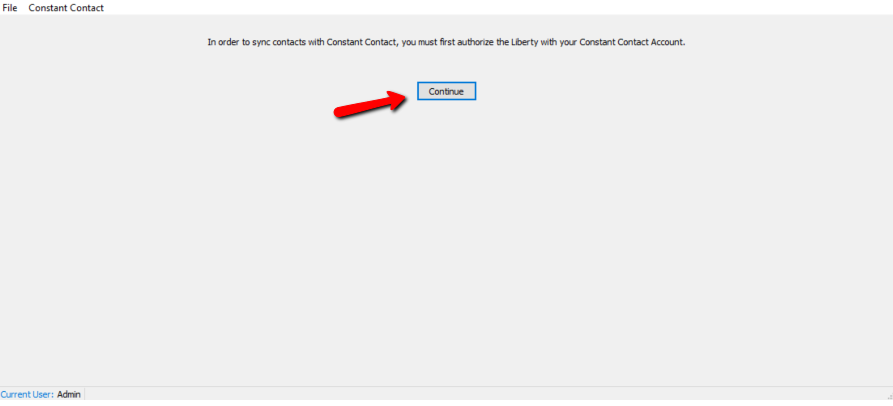
3.Sign in or create a new account.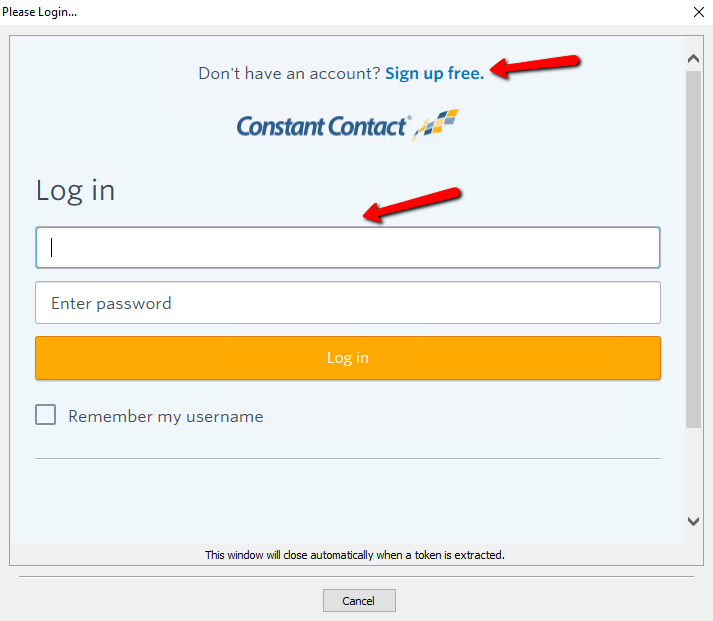
If you signing up for the first time and you see this box, you will need to select the Allow button.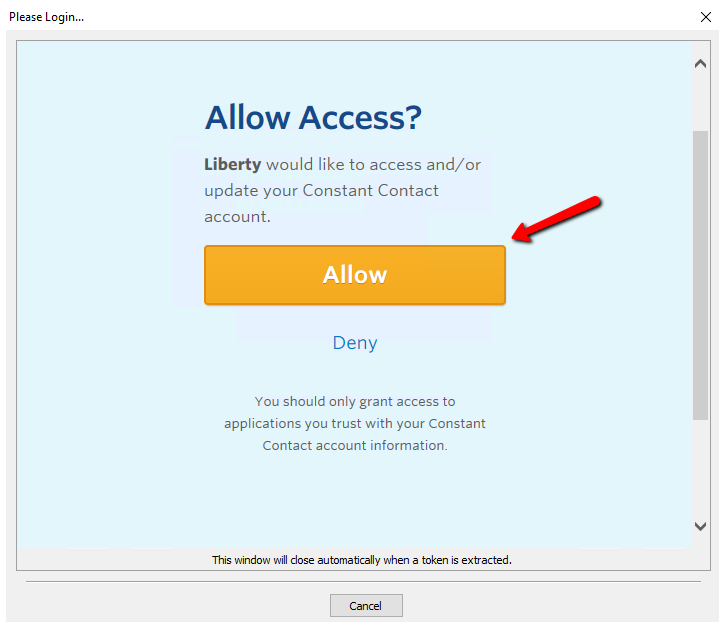
4.Once you are registered and logged in, you will see the Export To Constant Contact dialog box.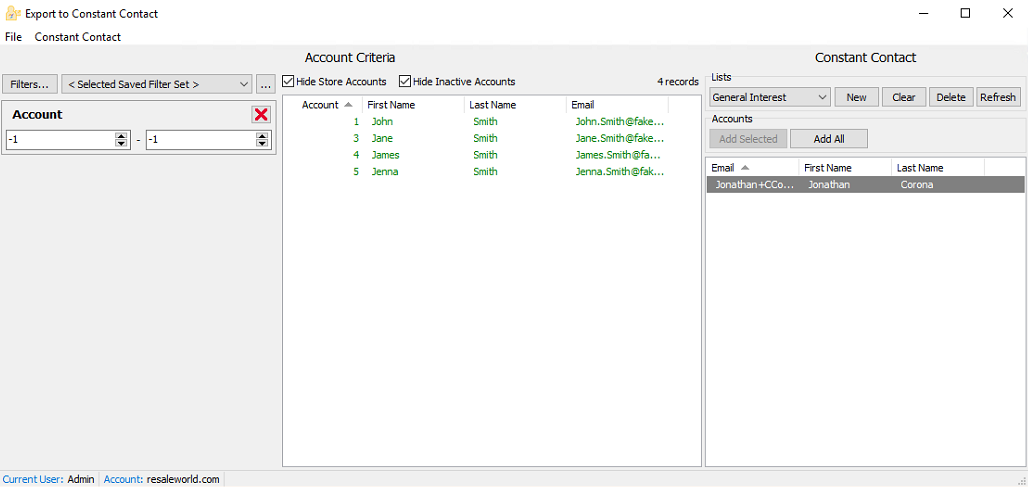
5.Selecting filters will open a list of filters to choose from. Put a checkbox in the filters you wish to use and select the OK button.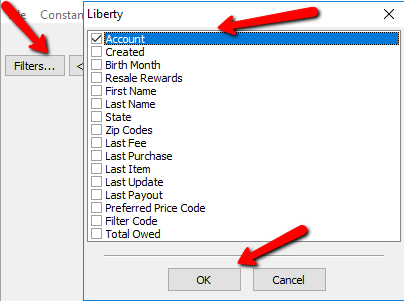
6.This will add the filter. Each filter can be modified to fit the criteria you are looking for. If you wish to delete the filter, click the red X in the upper right corner.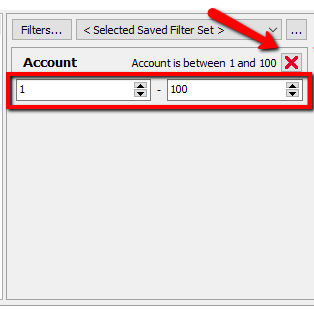
7.If you wish to save this list, you can click on the Browse button.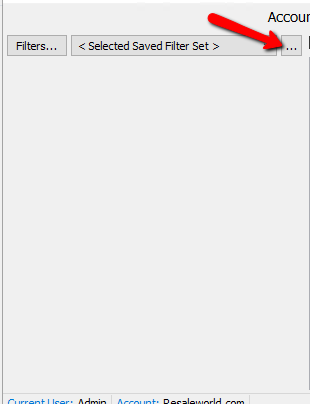
8.This will open the Manage Saved Export Criteria dialog box. 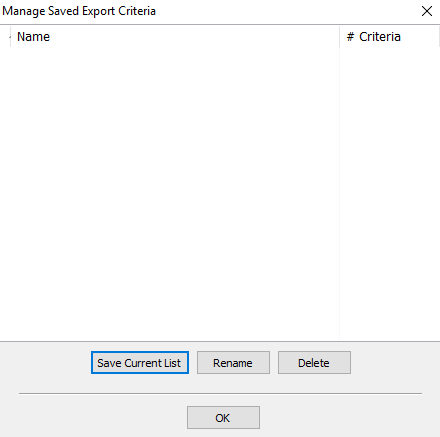
9.Select the Save Current List button to save the list you just created.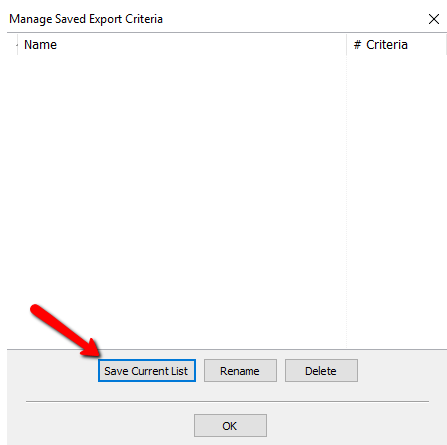
10.You will be prompted to name the current list.Enter a Name and select the OK button.
11.You will see your created list in the Manage Saved Export Criteria dialog box. You can highlight and select the Rename button to change the name of you can highlight a list and select the Delete button to remove it. Select the OK button when done.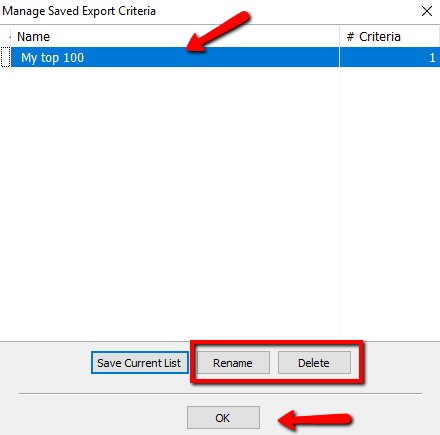
12.Once your list is saved, you can click the Drop Down selection to open that list.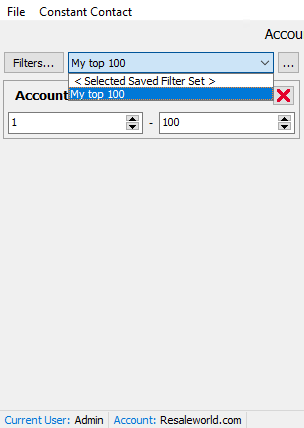
13.Checking off either of these buttons will hide the appropriate accounts.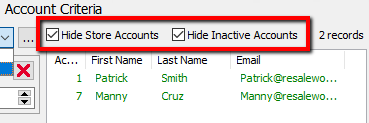
Once you have all your criteria you are ready to make your list.
Note: When you open the Export To Constant Contact tool and make changes to the list, they are automatic and there is no need to “save” anything. All the data is saved live to Constant Contact Automatically.
14.The first time you open the Export To Constant Contact tool, You will have a new list started called General Interest.
If you have other Lists already created, you can click the dropdown and select that list.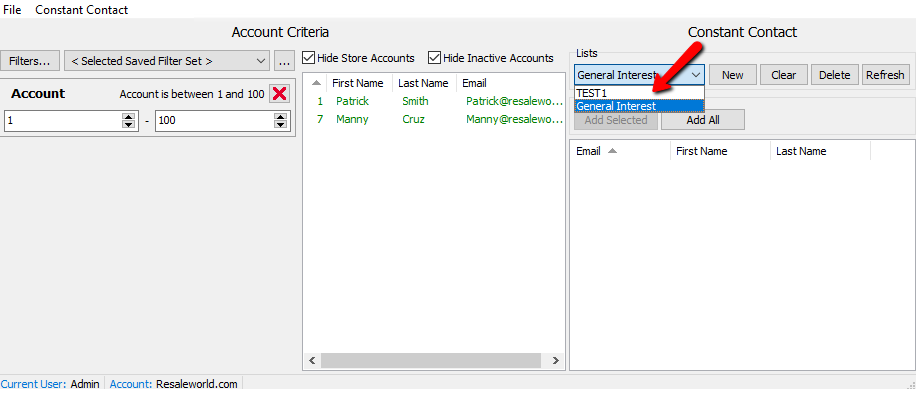
○New : Select the New button to create a new list.
○Clear : Select the Clear button to clear all the names from the list.
○Delete : Select the Delete button to delete the current list.
○Refresh : Select the Refresh button to refresh the current list.
You can highlight an account and use the Add Selected button to move one account or a group of selected accounts at a time.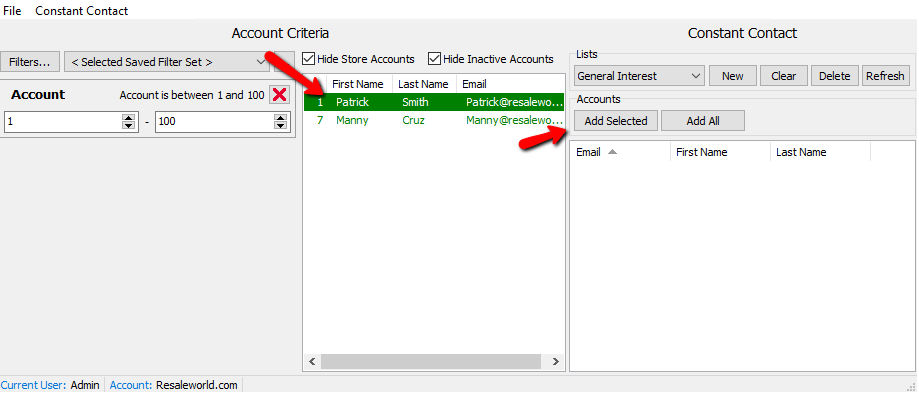
Selecting the Add All button will move all the accounts over to the list.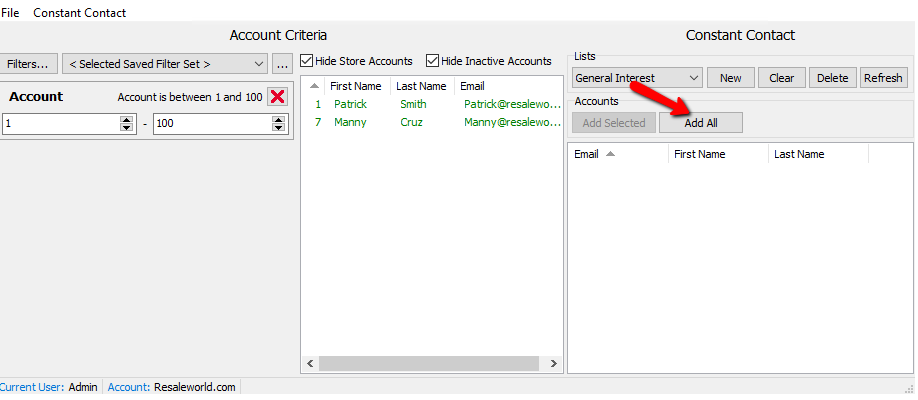
When the accounts are added to the list, the color changes from Green to Blue.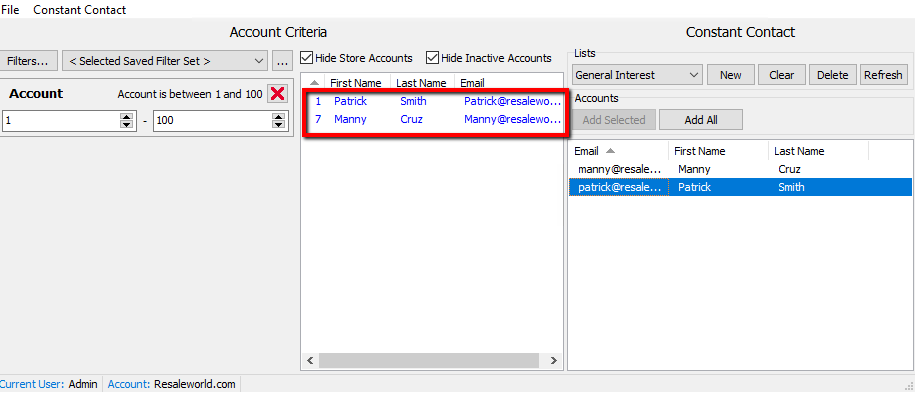
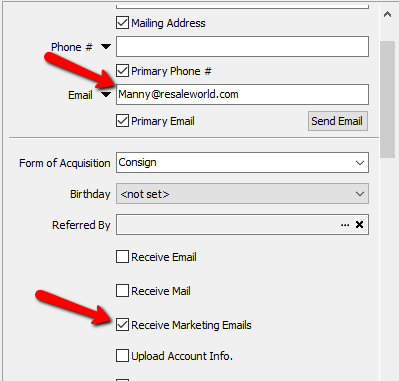
Note: If there is an account missing from the list, it means the account Does Not have an email address AND the check off for “Allow Marketing Emails” is not set on the account.
Once you have added all your contacts to the list, you can close out of the Constant Contact Export, and go directly into Constant Contact to and email your consignors.