Company File Selection and GL Account Settings
Open the Liberty 5 Inventory Module and then click the QB Link icon. 
1.With the Quickbooks Link open, click the File menu at the top left corner and select Settings.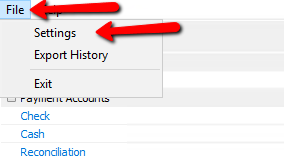
2.Select the General tab on the left, then select the radio button next to either Desktop if it is not already selected.
Next click the Browse Folder button. 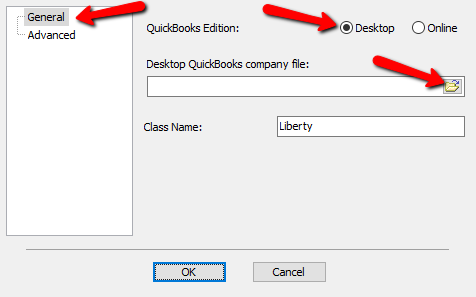
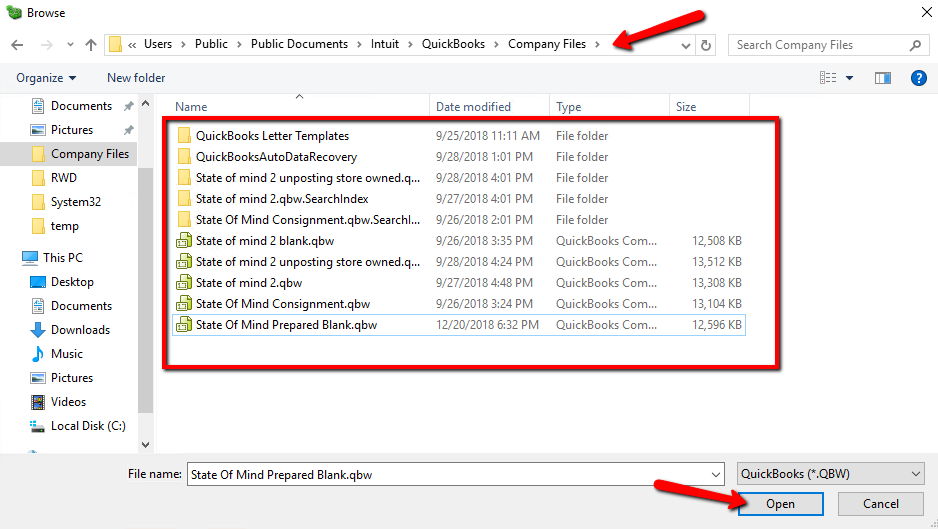
3.Search for the company file you wish to work with and click Open.
Note: In most cases the company file will be located at: C:\Users\Public\Documents\Intuit\QuickBooks\Company Files\
4.If you receive the following message, click the OK button and close your Intuit Quickbooks program, then click Open again. 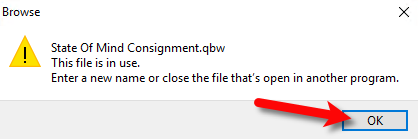
5.Click on the Advanced Tab.
From here you can edit the Liberty specific GL account names that get inputted automatically when Liberty syncs.
You can also select whether you want to separate consignors as vendors in Quickbooks. 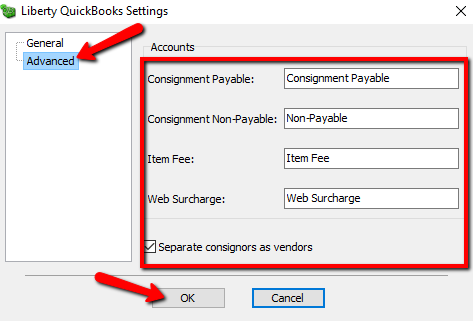
○Consignment Payable:
This is an Accounts Payable General Ledger account that maintains all of the consignor obligation owed to consignors. When a check is written, the total consignor obligation owed will decrease from this account.
○Consignment Non-Payable:
This is a sub-account of the consignment payable general ledger account. This account maintains all of the non-payable obligation owed to all of your consignors. When a consignor’s store credit is used towards a purchase, the value maintained within this sub-account will decrease.
○Item Fee:
This account maintains the total item fee dollar value you have received when items sell with an item fee.
○Web Surcharge:
This account tracks any fees you have collected
Related Topics
Exporting to Quickbooks Desktop Software Using The Quickbooks Link Overview
Setting Up Your Quickbooks Company File
Exporting To Quickbooks Desktop Software For The First Time
How To Initiate Subsequent Syncs To Quickbooks Desktop Software